Mount Rainier National Park in Washington State encompasses 236,381 acres, the centerpiece of which is the volcano Mount Rainier (aka Tahoma, Takhoma, Tacoma, Ta-co-bet, Taqo ma, Tkobed, Taqo bid, Tkomen, Nutselip, and Pshwawanoapami-tahoma, as named by various Northwest Native tribes). That’s quite a bit of acreage, and I have quite a few favorite spots for photography here. As such, I’m breaking down the park into sections. Previously, you read about my favorite spots at Tipsoo Lake and the Sunrise Area. In this column, you will read about my favorite photo sites along Stevens Canyon Road and at the Paradise Area.
Note: These images were captured during various years at different seasons and under different weather conditions.
Stevens Canyon Road

The park’s website doesn’t appear to have a specific map solely for Stevens Canyon, so I’ve taken a portion of the main park map and numbered my favorite spots along the road. These numbers are sequential, rather than preferential for easier following on the map.
Location 1 – Grove of the Patriarchs Trail
This is an extremely popular trail located just a few hundred feet to your right from the Stevens Canyon entrance fee booths. It’s an easy hike to a grove of large old-growth trees. My very favorite spot along this trail is where the suspension bridge crosses over the clear, cold water of the Ohanapecosh River.
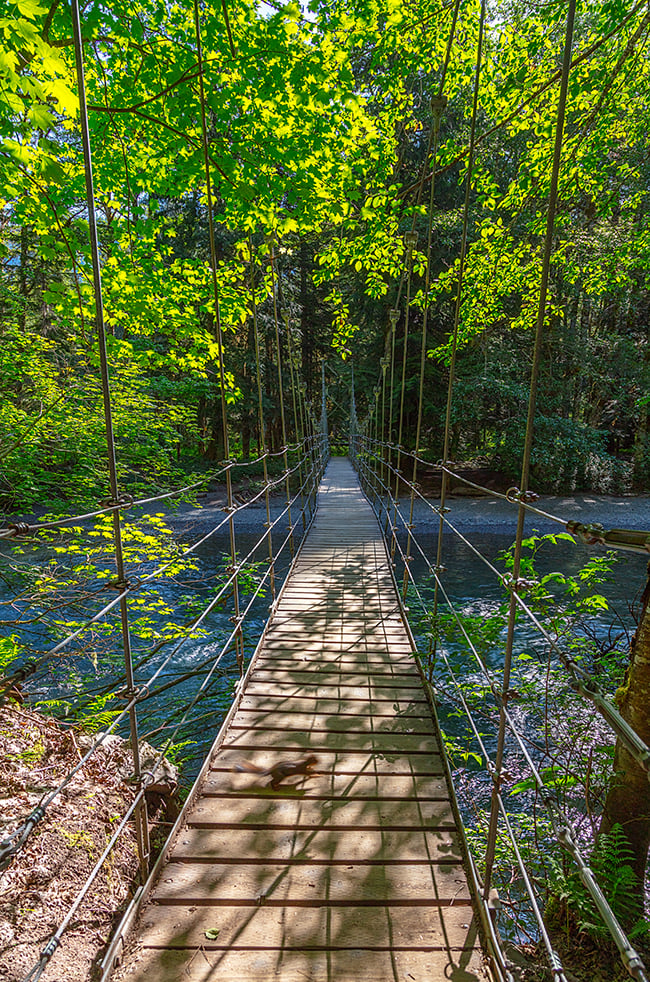
While you can get a cool leading line shot standing at the head of the bridge looking all the way to the end (notice the blur of the squirrel photo bomb near the foreground?), my fave spot is just to the side of the bridge for a “silky water” shot of the teal-blue river that includes the bridge along with the lush green vegetation.

For a shot like this, you need a tripod to prevent camera shake blur while using a slow shutter speed (4/5 of a second in this case). You’ll also want a smaller aperture (maybe f9 or f10) and either a circular polarizing or a neutral density filter to allow for that slower shutter speed without overexposing the composition.
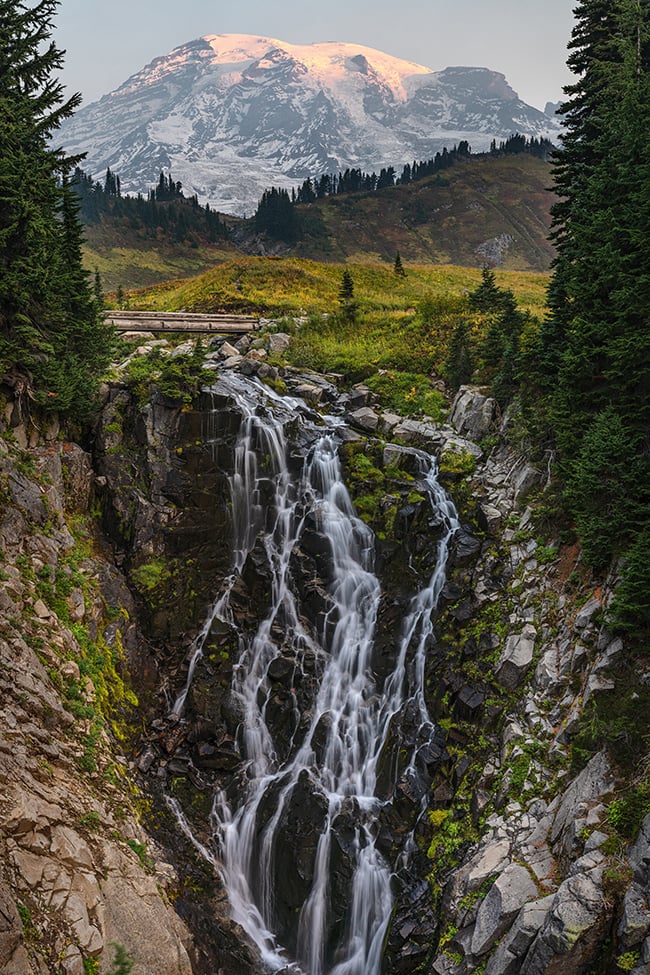
Location 2 – Falls Creek Falls
This, right here, is my absolute favorite waterfall that I’ve yet to see in the park, as well as my favorite spot for a silky water shot, even when there is not much flow of water. The green vegetation framing either side of this waterfall creates a glow to the composition that I don’t find at any other cascade except for one about which I will write in next month’s column.

Depending upon the time of year you visit, this waterfall will either be frothing or trickling. It’s just a few hundred feet up the road from the parking area for Grove of the Patriarchs Trail and is another spot in which you will use a tripod should you choose to capture a silky water shot. If you are not a fan of the silky water look, it’s a great spot for handholding your camera using the “burst method” of pressing down that shutter button for several clicks to get a clear, sharp shot of the water frozen in motion.
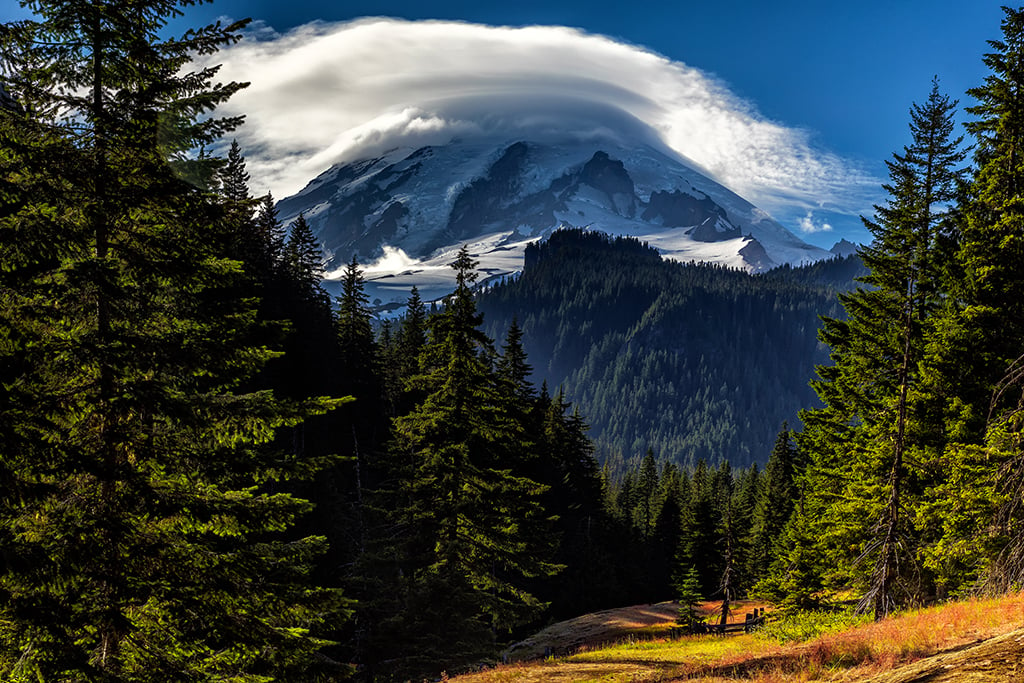
Location 3 – Box Canyon
The parking area here is fairly large but also extremely popular, so it will usually be full except during the very early morning hours. The trail leading to the canyon provides nice views of Mount Rainier as well as glacially-striated (scratched) rock indicating the direction of glacier travel some 10,000 years ago (yes, a glacier reached down that far).
I readily admit it is tricky getting a well-lit composition of the view along this trail because of the variation in light and shadow here. With the exception of the first shot below, the others were captured handheld.
Late afternoon is the best time to capture an image here without totally blowing out the highlights on the glaciers. The very bottom shot was photographed during mid-morning and you can see the glaciers on the mountain are blown out, no matter how much dodging technique I used to remove some of that overexposure during the editing stage. I handheld the camera for that shot and realized later had I used a tripod, I could have captured two of the exact same photos - one exposing for the lighter area and the other exposing for the shadowed portion - then combined them for a less overexposed view of Mount Rainier. Hihdsight is 20-20.
Note: During my most recent September 2025 visit, I discovered to my chagrin that almost every glacially-striated rock near the Box Canyon Trail has been ruined by graffiti. To capture a shot of a portion of the rock without graffiti took careful compositional arrangement on my part.


Stevens Canyon Road
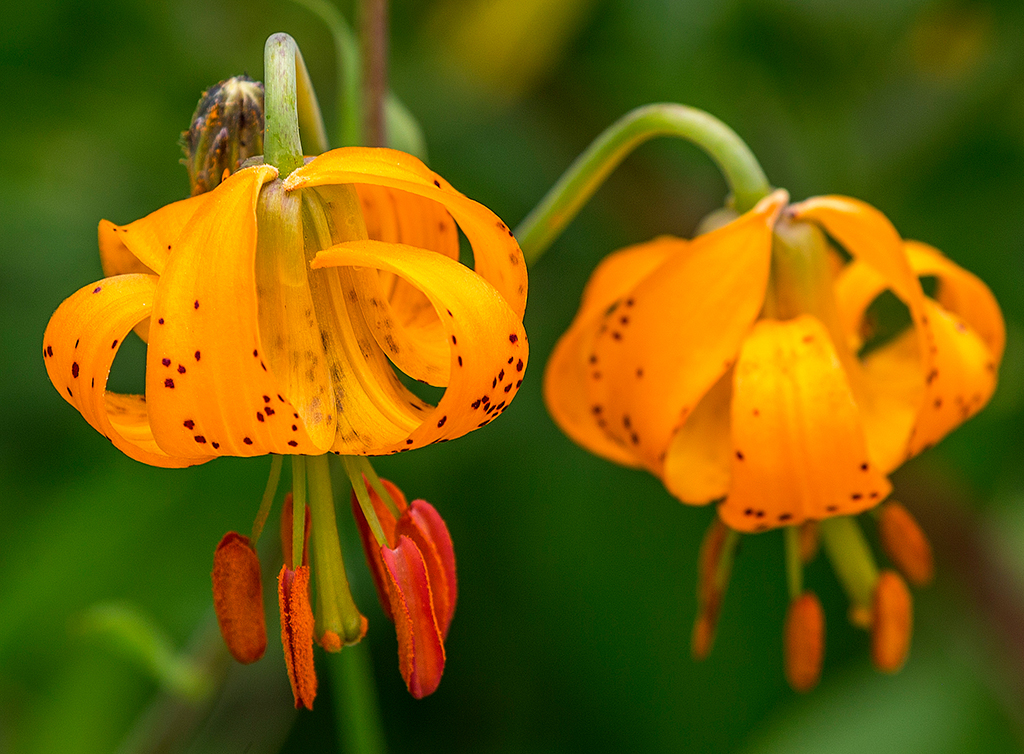
If you enjoy photographing wildflowers, this entire road is a great wildflower corridor during mid-late July. There are small pullouts all along the road affording you the opportunity to photograph the blooms using your camera’s telephoto lens or smartphone’s telephoto setting.
Location 4 – The Bench
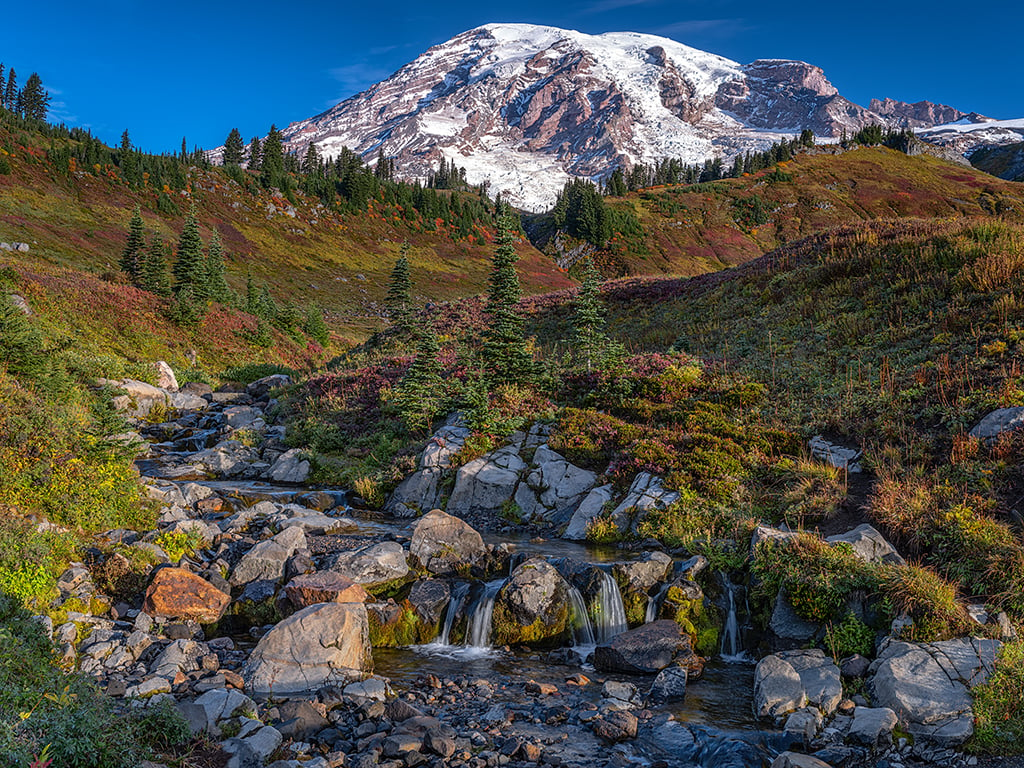
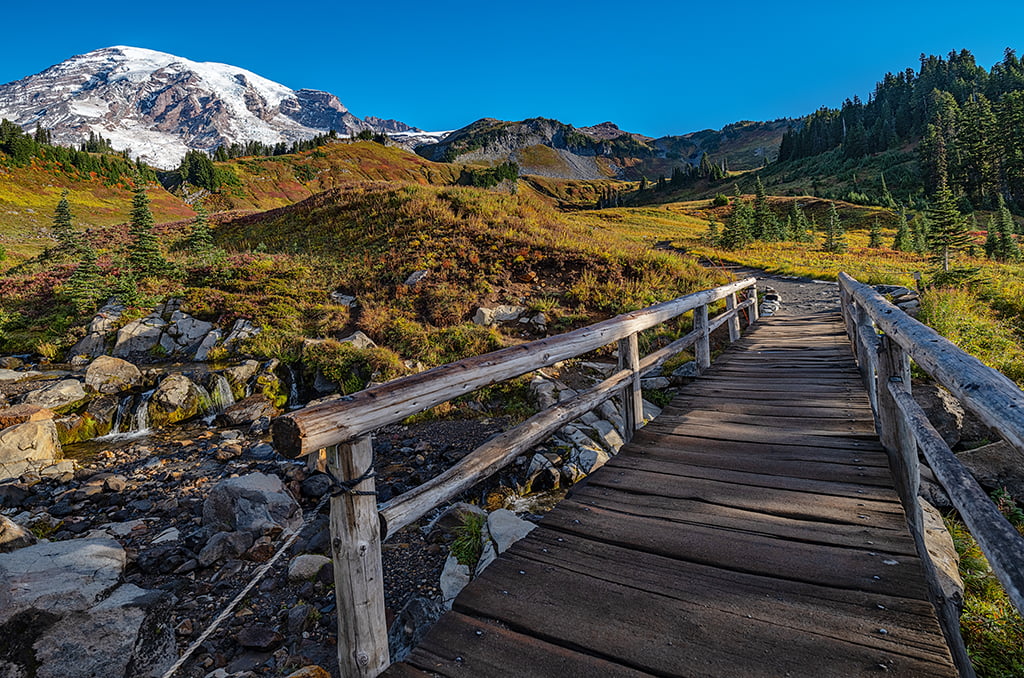
Once you cross the bridge over Stevens Creek, about a mile (1.6 kilometers) further up is a wide pullout to the left prior to the sharp hairpin turn known as "the Bench." This pullout is nice for viewing and photographing sunrise over the mountain. Arrive prior to sunrise and experiment with shutter speeds to create an interesting image of a car’s taillights along the road. It’s also a nice spot for wildflower photos.


Paradise Area
The park does have a map for Paradise Area trails, so I have marked and numbered my favorite spots here – again, in sequential (not preferential) order, continuing from the Stevens Canyon Road numbering.
Location 5 – Sunbeam Falls
Approximately 1/4 mile or less (~0.4 kilometers) up from the parking area for Snow and Bench lakes, there is a small pullout to your right, across the road from a picturesque little waterfall known as Sunbeam Falls. Great for silky water shots, you will see it frothing or trickling, depending upon the time of year.
This is also a nice spot for photographing the charming white avalanche lilies thickly blooming all along the roadside during July, as well as cliff paintbrush and rosy spirea.

Location 6 – Reflection Lakes
The largest of this series of lakes is wonderful for night sky and sunrise shots. There’s a long parking section to your right, next to the lake.

I once stood there during sunrise, next to a small group on a photo tour, and at one point the tour leader exclaimed to one of his attendees “Now, there’s your calendar shot.” He was right.
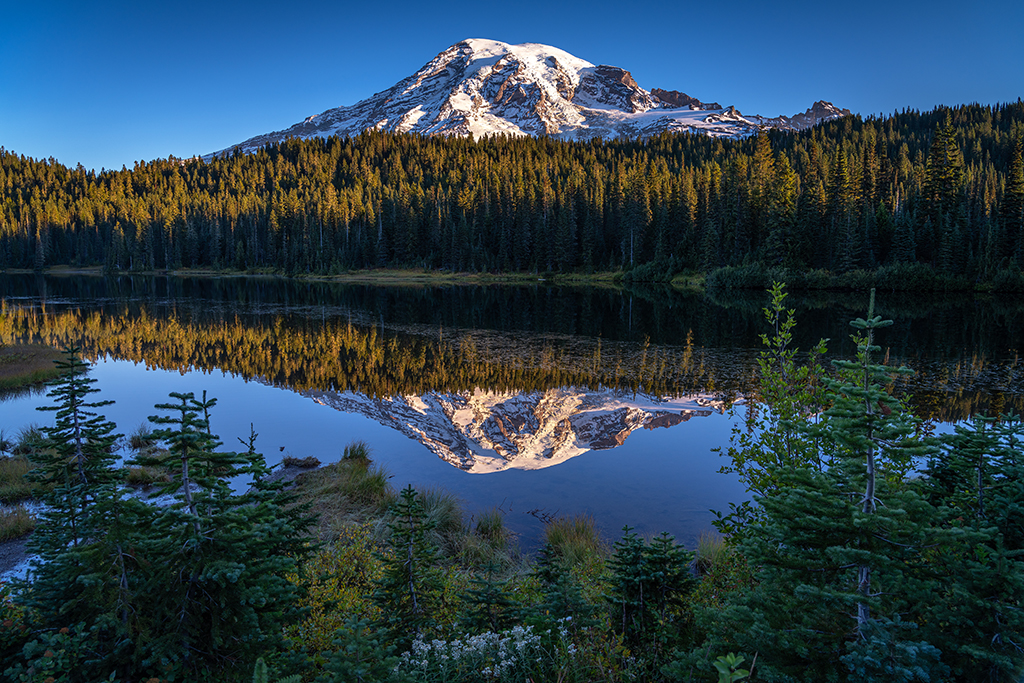
It’s also interesting to visit this spot in early spring (well, early July is considered springtime in the higher elevations there) to capture a reflection of “The Mountain” in the melted portion of the lake surrounded by snow and ice.
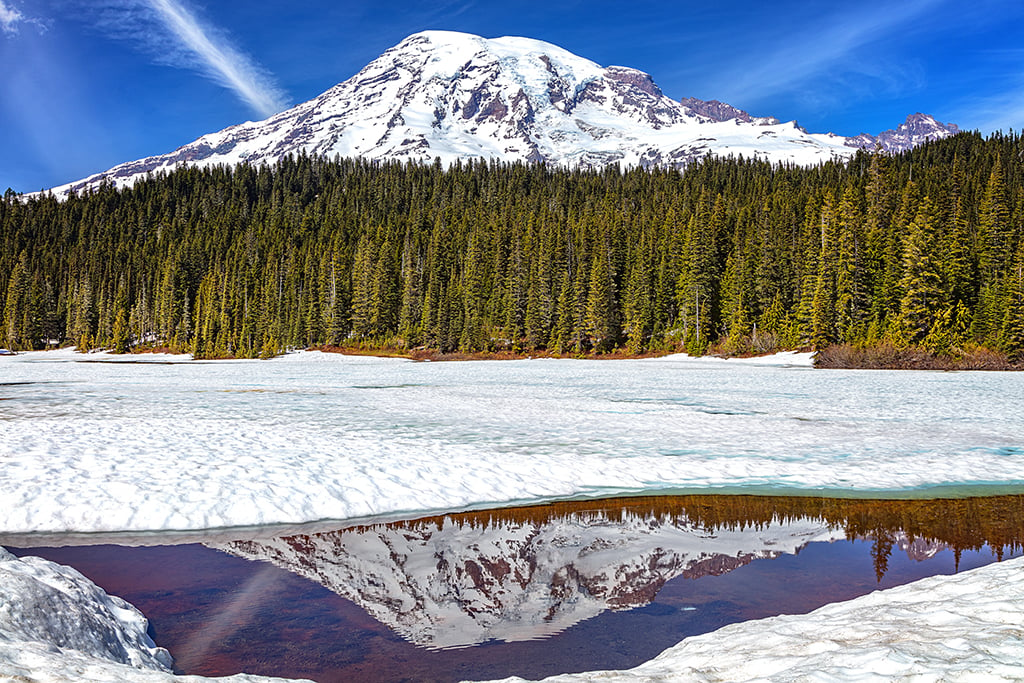
Sometimes, though, the view might be a little fogged in, or the overall atmosphere may be hazy due to wildfire smoke. Don’t let that deter you from achieving an atmospheric composition of the landscape. It's difficult to get a bad photo in this national park, even on a hazy/foggy day.


If Mount Rainier is hidden by the smoke, concentrate on what surrounds you for unique imagery.

Location 7 – Pinnacle Peak Trail
The Pinnacle Peak trailhead is directly across the road from the Reflection Lakes parking area. This is not a long trail (2.5 miles/4 kilometers roundtrip), but it is a steep trail and the melting snows might have created muddy, slick portions where you must watch your footing. As you hike up the trail, beyond the forested area hiding the surrounding landscape, you should turn to look back and capture a photo of Mount Rainier with the tiny speck of buildings (visitor center, Paradise Inn, other infrastructure) marking the Paradise area and providing scale and reference to your shot.


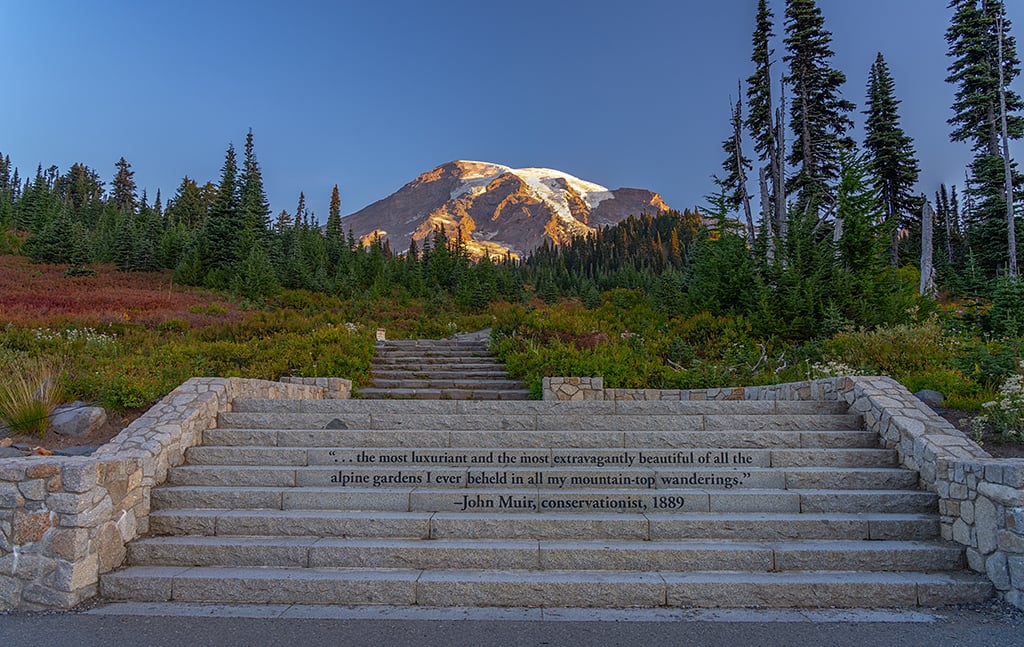
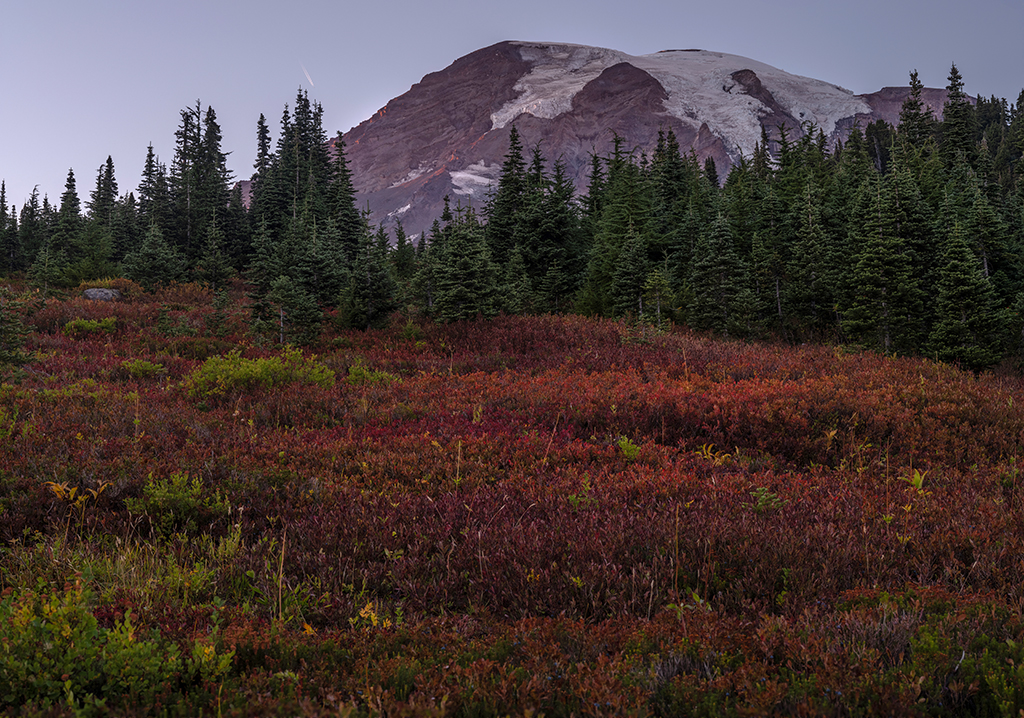
Location 8 – Etched Stone Steps Up From Paradise Parking Lot
Yes, a favorite autumn photo site of mine is located just up the etched steps from the Paradise parking lot. Walk up those steps and set your tripod next to the rope-and-rebar pole "chain" separating paved trail from meadow for photos of Mount Rainier towering over the huckleberry bushes. In mid-late September, those huckleberry bushes have morphed from a bright summer green to gorgeously-saturated fall shades of orange and red. Blue hour, sunrise and early morning imagery are especially stunning. Even early-mid afternoon compositions during this time of year are nice, although you need to watch for blown out highlights on the mountain. Sunset is lovely but the light is far more subtle than at sunrise.
As you look at these images below, note how the colors change with the light. During night and blue hour, the landscape takes on a blue shade. As the sun rises to become more prominent, yellow and red shades take over.
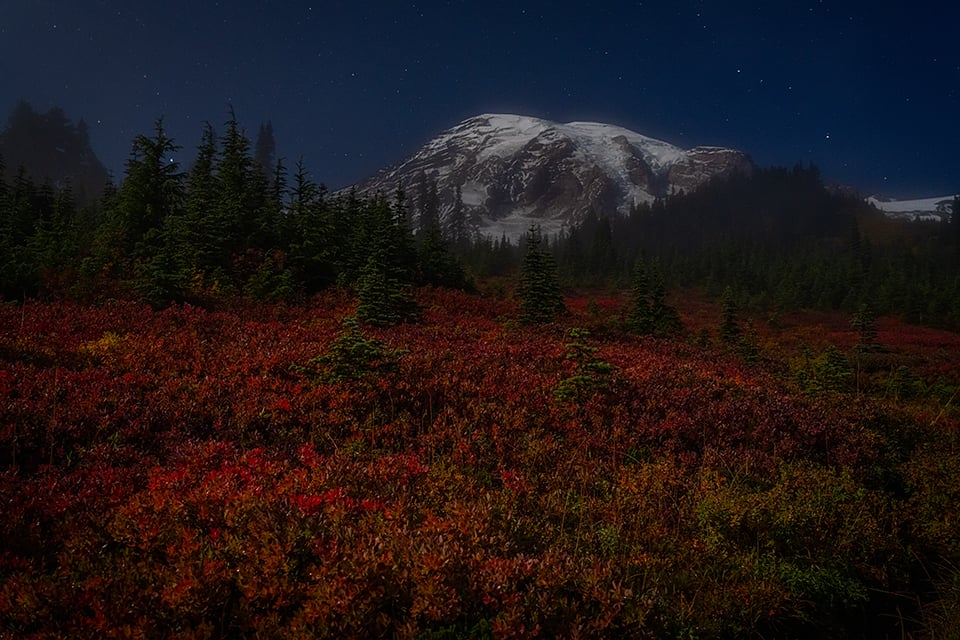
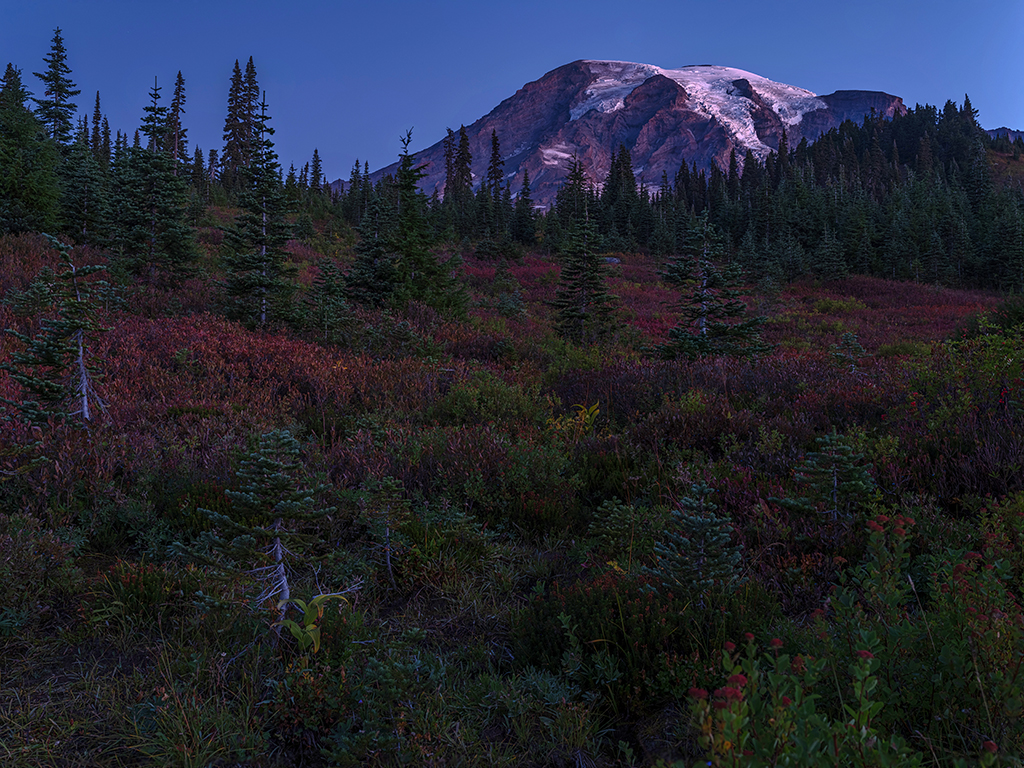
FYI, blue hour - that time just before sunrise or just after sunset, when the composition is filled with brushstrokes of deep blue, purple, mauve, and pink - doesn't really last an hour. It usually lasts maybe 20-30 minutes at most.
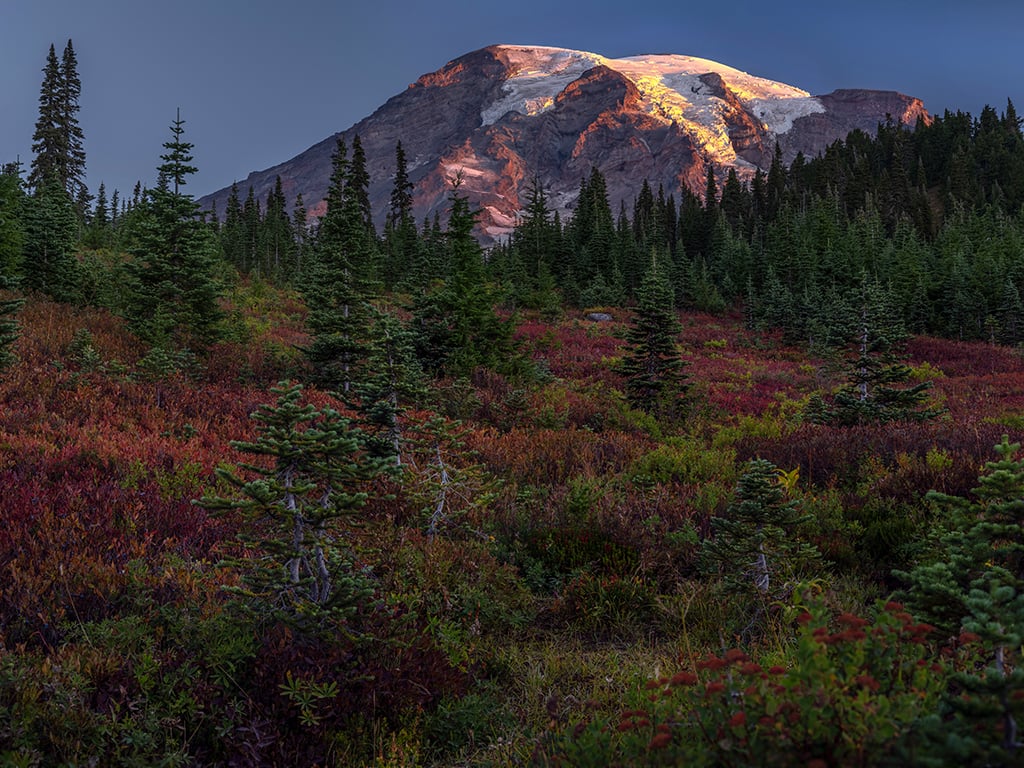

Depending upon what lens or setting you use for your images here, you may note the depth of field is a little shallow (the background is sharp but the foreground is fuzzy). Since I wanted as much of my composition to be in focus as possible, I set my camera on a tripod and captured two images of the same scene - one focused for the background, and one focused for the foreground - then stacked and blended them in my photo editing software. There were still some blurry spots, however, due morning breeze.
Location 9 – Paradise Inn
I love historic lodges and Paradise Inn’s warm, rustic exterior is photo-worthy in and of itself.


I have several favorite photo spots here. One is into the dining room on a brightly-lit morning.

Another spot is the view looking down to the lobby from the mezzanine level, which is an intermediate floor between the first and second floors, with tables and chairs on either side and lights within hand-painted shades hanging from the ceiling.
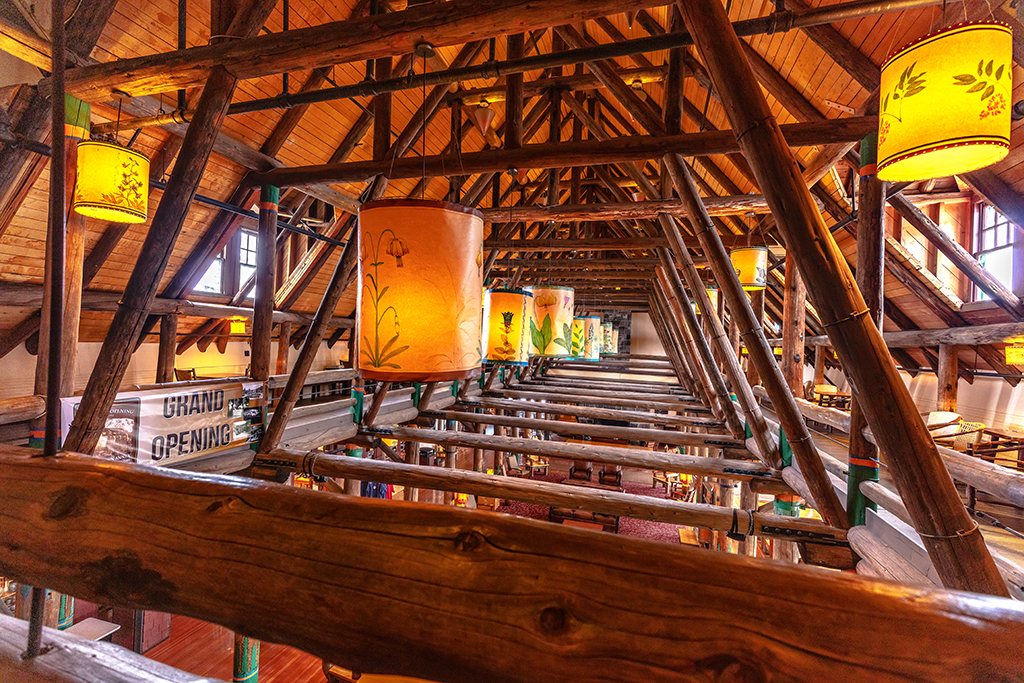

My third favorite spot is, of course, looking across the entire length of the lobby.

Using a wide-angle lens (12mm - 35mm) means you'll get as much of the view as possible. However, a wide-angle lens will often create a slightly different perspective of the composition.
Remember to change your camera's settings when entering the low-light interior of the Inn. If handholding the camera for shots, you should use an ISO of 640 or more, an f-stop between f2.8 - f4.0, and a shutter speed of 1/40 - 1/60. If using a tripod, you can use 160 ISO, f8, and a much slower shutter speed because that tripod prevents camera shake.
To photograph the lobby with as few people as possible, I captured the shot above a little before 6 a.m. prior to heading out for some sunrise photos. Of course, this was also during that period of time when there was no water available up at Paradise - no flush toilets, no hot food, no nothing. This meant the Paradise Inn was pretty vacant. Since this may not be the case for you when you visit, I would suggest photographing the Inn's interior even earlier than 6 a.m. if you want an un-peopled image.
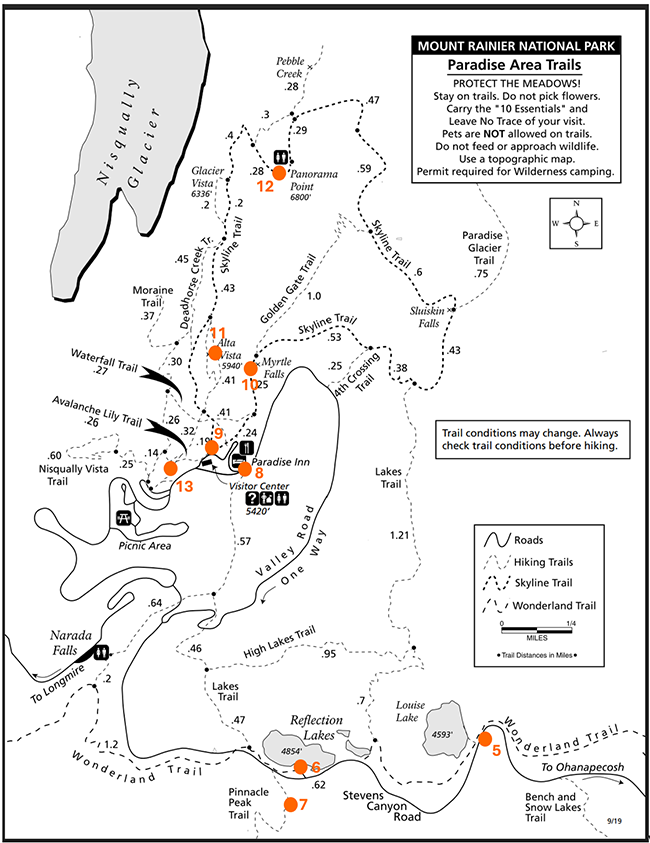
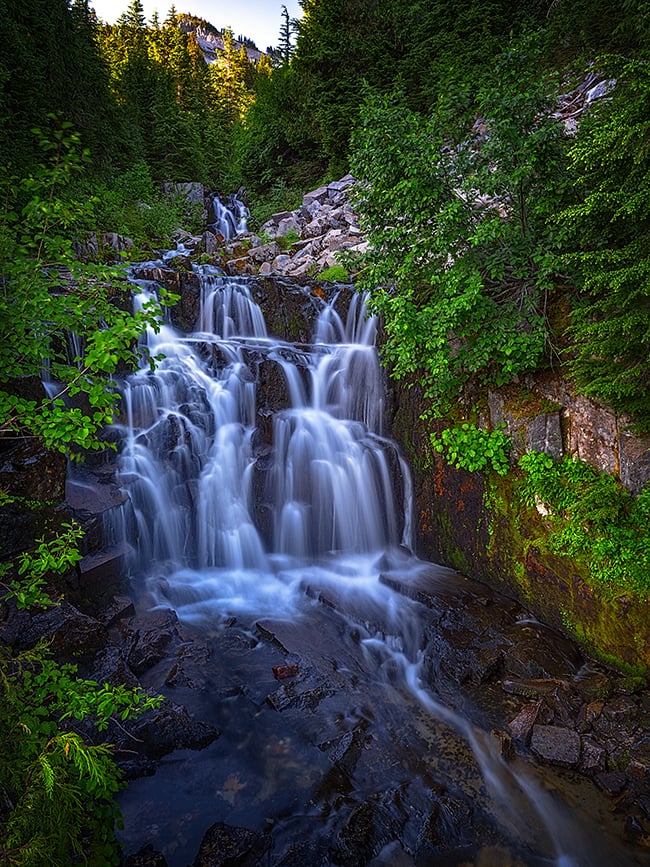
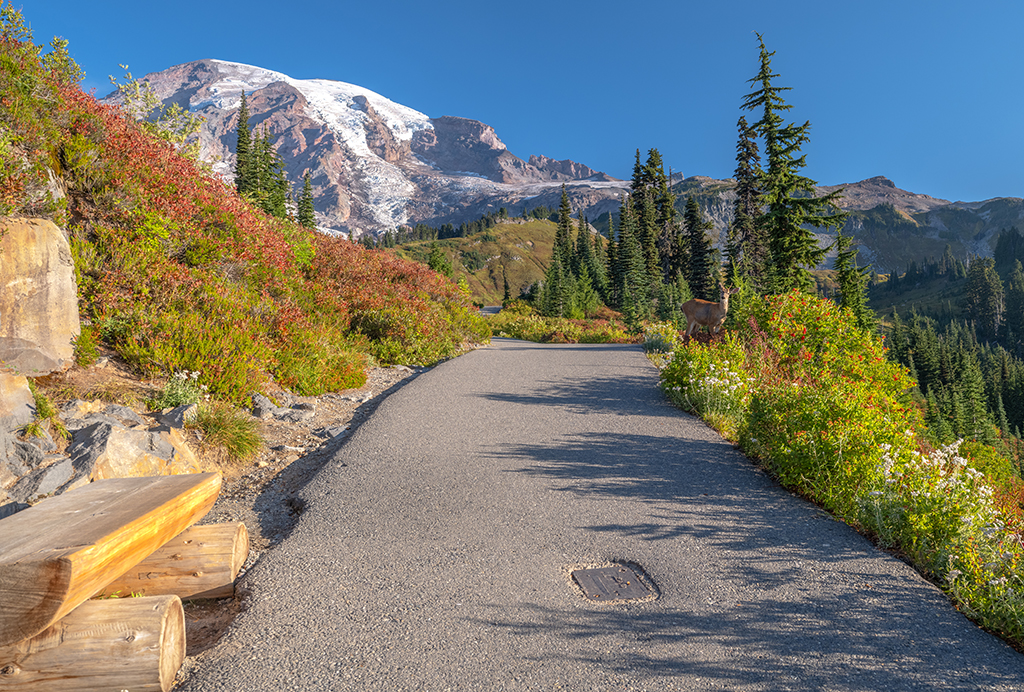
Location 10 – Myrtle Falls and Edith Creek
Hit the paved trail leading up and past the Paradise Inn for a short walk to a view area of a beautiful waterfall with Mount Rainier towering in the background. Tall green trees frame the scene and you can see the sturdy wood bridge crossing Edith Creek, which feeds Myrtle Falls.
Along the way there, you might see deer just off the trail.
The Myrtle Falls view area is tiny and it’s always crowded – except really early in the morning. I’ve found most visitors – at least the ones staying at Paradise Inn – usually don’t get out until after breakfast, so you’ve got a short window of time where there is nobody else at the view area except maybe another photographer.
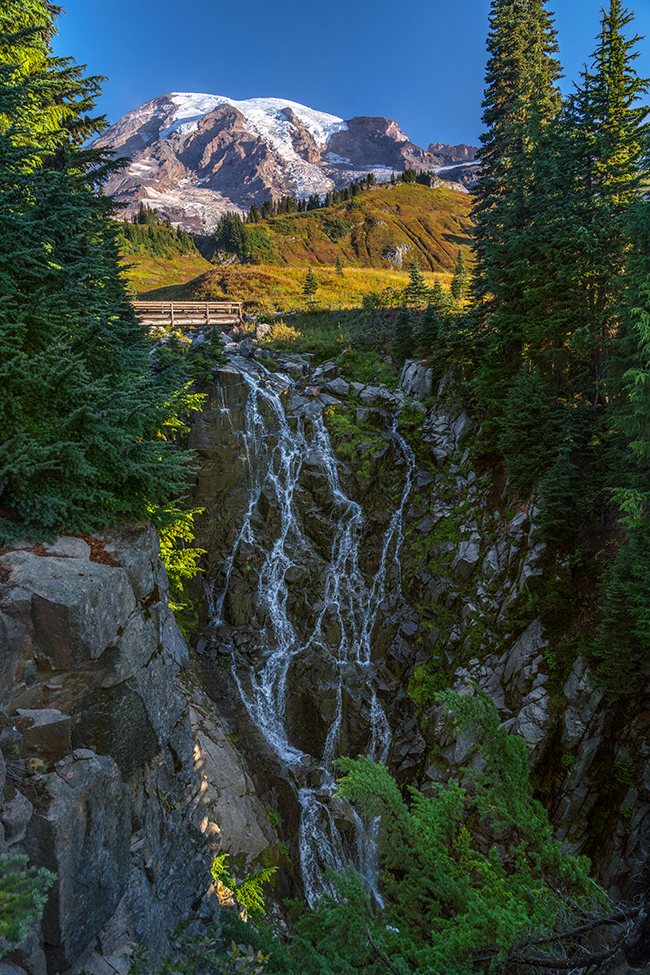
Vertical shots frame the view better than a horizontal shot, I believe. If you are using a wide-angle lens to capture as much of the view as possible, you will either need to crop out the distracting dirt-and-rock foreground, or aim your lens a little above that foreground, which is what I did for the shot above while using a 24mm focal length.
I really wanted to get a silky water shot, but the thick, sturdy log railing there to keep people from going over the edge is almost as tall as I am, so unless you are a very tall person and can raise your tripod above that railing, you will probably need to handhold your camera for a photo, which is what I did
Sunny or overcast, this one spot produces gorgeous photos. Don't ask me how I got this silky water shot, because I honestly don't remember. Apparently I managed to set a tripod for a view high enough above the railing.
Walk back up the steps to the paved trail, turn right, and walk maybe 50 feet (15 meters) further to reach Edith Creek. Not only can you get a great shot of the creek and mountain, but turn your camera toward the bridge over the creek for a nice leading line image, moving your viewer’s eye from the foreground toward the background and adventure beyond.
Location 11 – Alta Vista
The Alta Vista Trail is steep going up and down, but the views are worth it, no matter what the weather conditions. This is a loop trail, so there are two different routes for arriving at the Alta Vista view area. Both are steep but one is very steep. As you hike up the paved trails from the parking lot, stick to your left and take that route to Alta Vista. It’s perhaps not as direct, but your legs will thank you for it.
At Alta Vista, you have an almost 360-degree view of the landscape. So, on overcast days when you can’t even see the mountain, focus instead on the greenery of trees and meadows with colors extra-saturated by the rain.

When the landscape is blanketed with thick snow, adjust your settings to prevent blowing out the highlights (white snow). You might also need to add a little color balance, since your snow may look grayish or too blue.

Observe the steep hillsides here in winter because you might spot a downhill skier.

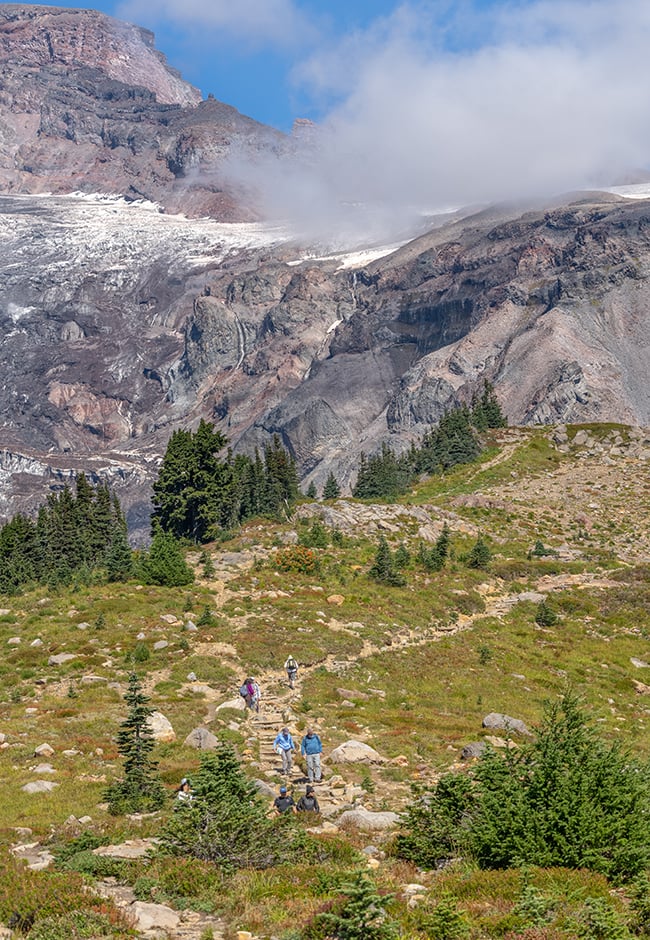
Location 12 – Panorama Point along the Skyline Trail
I hiked the Skyline Trail up to Panorama Point only once, some 15 years ago. I'd sure like to do it again, but I'm afraid I've slowed down during those years, my knees hurt more, and my short legs appear to have grown shorter (kidding, but it feels like it) when navigating the steep rock steps, even with a hiking pole to steady me. I highly encourage you to hike this trail at least once, since Panorama Point along the Skyline Trail offers the most amazing view of the interconnecting network of Paradise trails, Paradise Inn, Tatoosh Mountains, and Mounts Adams and St. Helens beyond.

Even that last bit of trail up to Panorama Point is photogenic.

Don't forget to at least capture one shot of the hikers moving up and down this trail for added scale and reference.
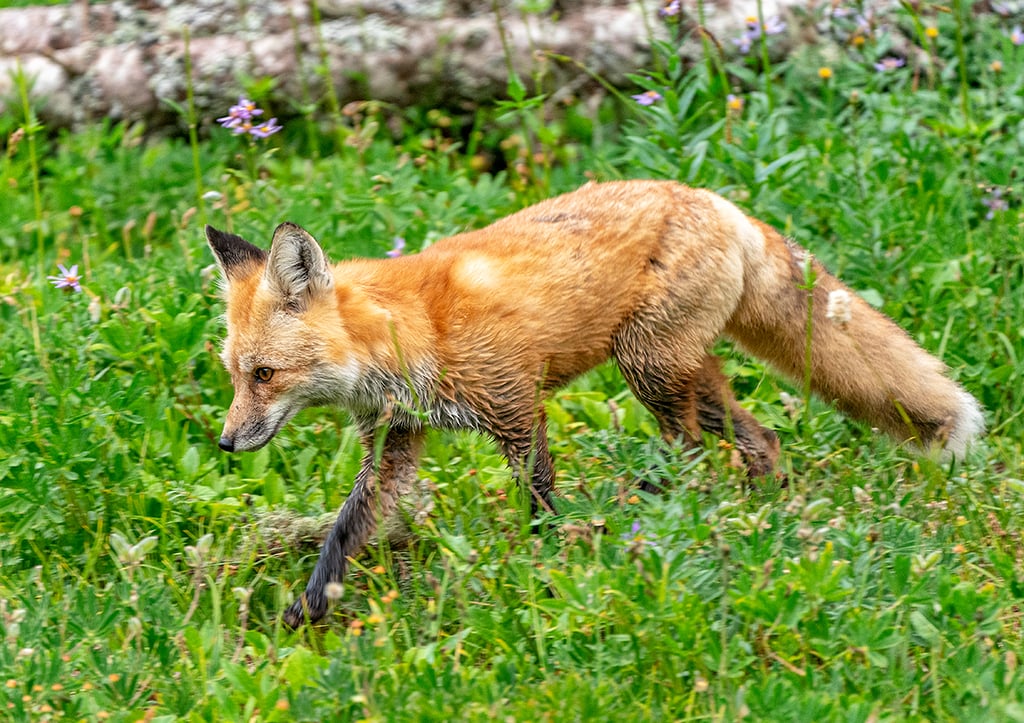
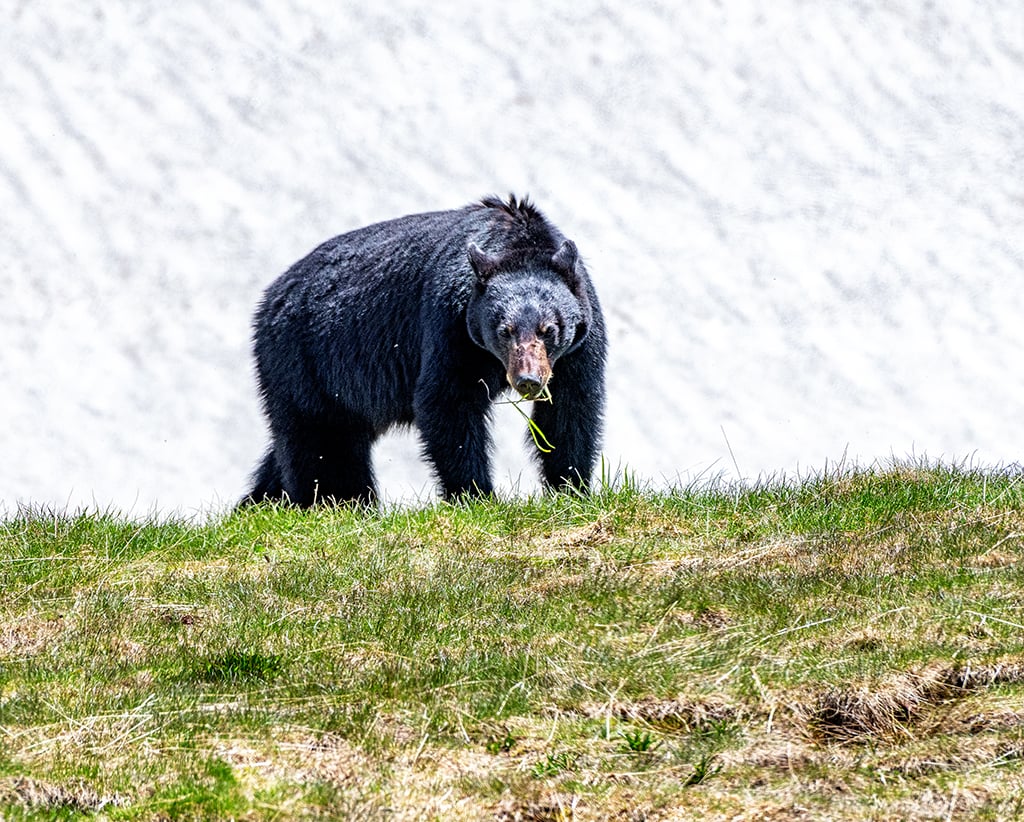
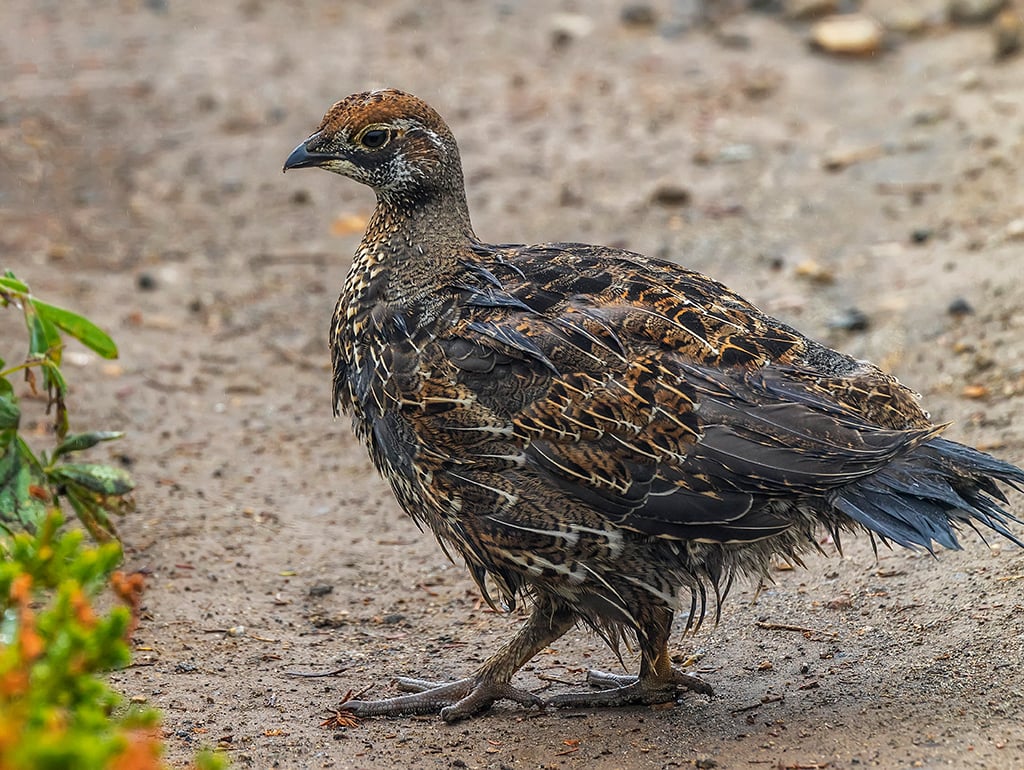
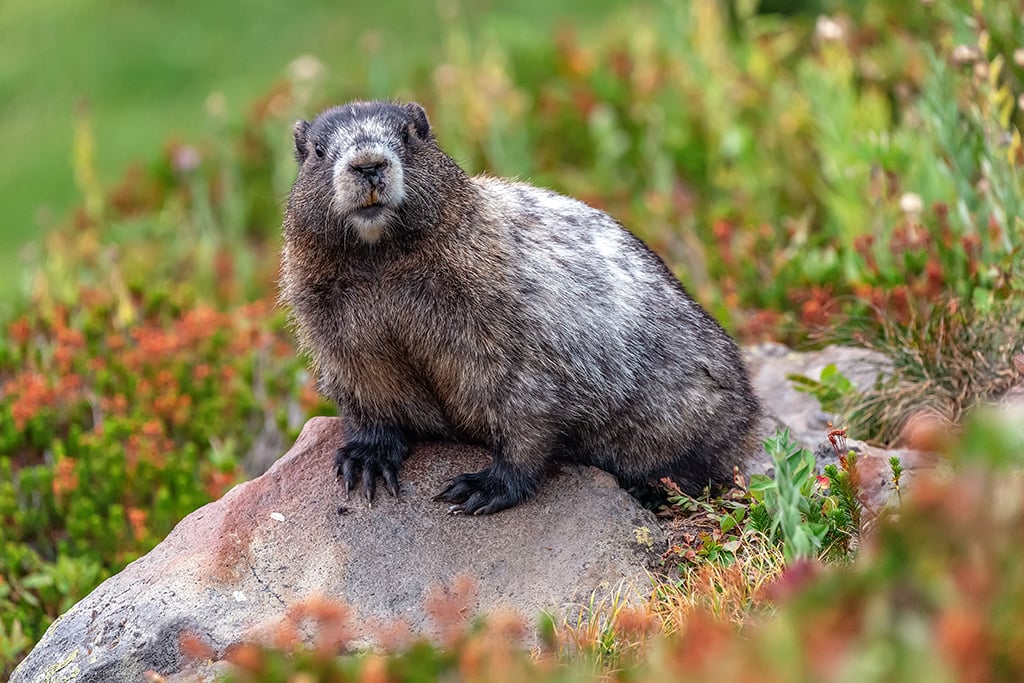
Location 13 – The Trails Around The Lower Parking Lot
While I don’t have a specific spot on this maze of trails near the lower lot at the Paradise Area, I can tell you I have spotted the most wildlife within this area of mixed high meadow and forest along Deadhorse Creek Trail: fox, bear, marmot, squirrel, chipmunk, and grouse.
While Mount Rainier National Park offers many pullouts, view areas, marked parking lots, and trailside spots for stunning photos, what you read about here are my favorite locations for great photos along Stevens Canyon Road and the Paradise Area. They may very well already be your favorite spots too, or they may be additions to other sites you enjoy for photography.
Stories about:
Story Categories:
A copy of National Parks Traveler's financial statements may be obtained by sending a stamped, self-addressed envelope to: National Parks Traveler, P.O. Box 980452, Park City, Utah 84098. National Parks Traveler was formed in the state of Utah for the purpose of informing and educating about national parks and protected areas.
Residents of the following states may obtain a copy of our financial and additional information as stated below:
- Florida: A COPY OF THE OFFICIAL REGISTRATION AND FINANCIAL INFORMATION FOR NATIONAL PARKS TRAVELER, (REGISTRATION NO. CH 51659), MAY BE OBTAINED FROM THE DIVISION OF CONSUMER SERVICES BY CALLING 800-435-7352 OR VISITING THEIR WEBSITE. REGISTRATION DOES NOT IMPLY ENDORSEMENT, APPROVAL, OR RECOMMENDATION BY THE STATE.
- Georgia: A full and fair description of the programs and financial statement summary of National Parks Traveler is available upon request at the office and phone number indicated above.
- Maryland: Documents and information submitted under the Maryland Solicitations Act are also available, for the cost of postage and copies, from the Secretary of State, State House, Annapolis, MD 21401 (410-974-5534).
- North Carolina: Financial information about this organization and a copy of its license are available from the State Solicitation Licensing Branch at 888-830-4989 or 919-807-2214. The license is not an endorsement by the State.
- Pennsylvania: The official registration and financial information of National Parks Traveler may be obtained from the Pennsylvania Department of State by calling 800-732-0999. Registration does not imply endorsement.
- Virginia: Financial statements are available from the Virginia Department of Agriculture and Consumer Services, 102 Governor Street, Richmond, Virginia 23219.
- Washington: National Parks Traveler is registered with Washington State’s Charities Program as required by law and additional information is available by calling 800-332-4483 or visiting www.sos.wa.gov/charities, or on file at Charities Division, Office of the Secretary of State, State of Washington, Olympia, WA 98504.

National parks and their natural resources belong to you. The National Parks Traveler works to ensure you know how these essential places are being cared for.
Sign Up For Our Weekly Newsletter
Unsubscribe at any time.
INN Member

The easiest way to explore RV-friendly National Park campgrounds.

Here’s the definitive guide to National Park System campgrounds where RVers can park their rigs.
Our app is packed with RVing- specific details on more than 250 campgrounds in more than 70 national parks.
You’ll also find stories about RVing in the parks, tips helpful if you’ve just recently become an RVer, and useful planning suggestions.
