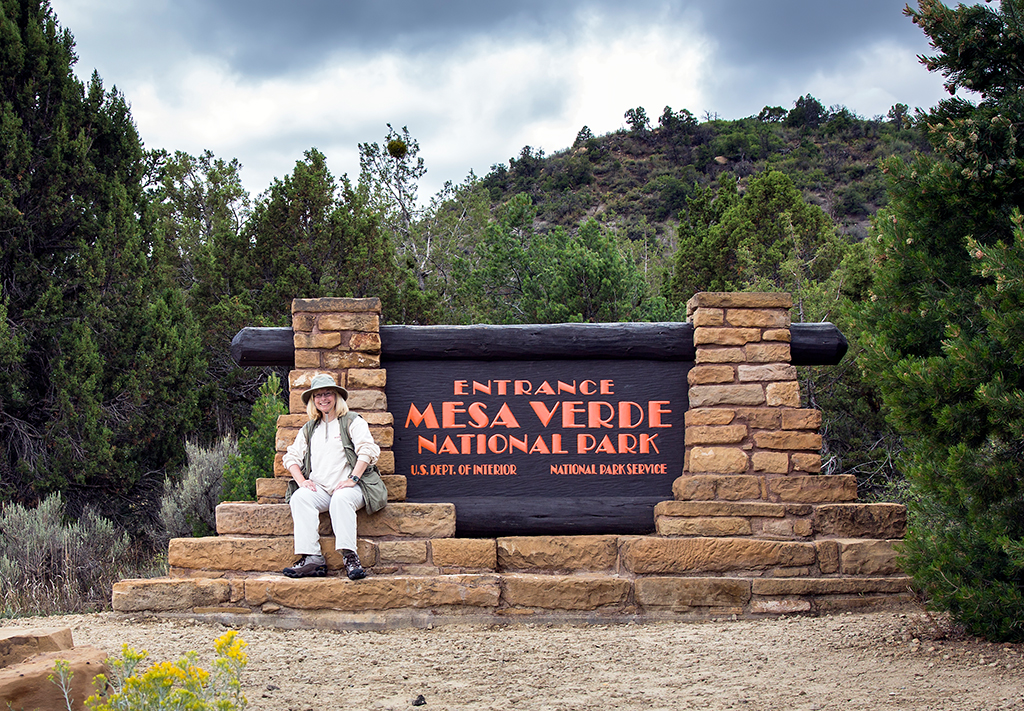
Back in 2012, I visited Mesa Verde National Park in Colorado for the first time and later wrote about that trip for a 2013 Traveler article. Thirteen years later, I stopped off for another visit.
It’s good to revisit a favorite unit of the National Park System. You can capture images of places you’ve seen before of which you want better or different compositions, as well as subjects and landscapes you’ve only just now noticed or maybe wanted to photograph in the past, but didn’t during that first visit.
This particular Mesa Verde stop was a last-minute decision along my route home at the end of a 12-day, 3,771-mile (6,069-kilometer) road trip. Fascinated by this national park, I wanted to stay a couple of nights at the Far View Lodge and photograph/re-photograph cliff dwellings and landscapes with different cameras and lenses. I also wanted to take at least one ranger-guided cliff dwelling tour if I was able.
Bring Your Telephoto Lens Or Use Your Smartphone’s Telephoto Setting
If you plan to travel to and photograph the sights at Mesa Verde, remember to bring your telephoto lens or use your smartphone telephoto setting. In addition to views of the most well-known ruins (Cliff Palace, Balcony House, Spruce Tree House, Long House), there are numerous overlooks along Mesa Top and Cliff Palace loop drives where you can see several cliff dwellings not open to self-touring or offered on a ranger-led hike. To get a detailed photo of these ruins, a telephoto lens – anywhere from 100–400mm – is helpful.
Think About The Time Of Day
Give thought to the time of day you visit any cliff dwelling, because the sun hits these areas at different times of day. Regardless whether you travel the park roads during the morning or afternoon, some of these cliff dwellings will be shadowed within the alcoves. You could expose for the shadows, but depending upon how much of a telephoto setting you are using, if any portion of the sunlit cliff is included in your shot, those areas will probably be blown out (overexposed). If you use a setting more conducive to the sunlit areas, the ruins will be in shadows, but you at least will be able to lighten those darker areas during the photo editing stage without losing detail. Blown out highlights, on the other hand, cannot be retrieved.
Tip: something else that might help prevent much over exposure of lighter areas around the shadowed alcove opening of a cliff dwelling is to apply the vignetting feature your photo editing software may provide. Vignetting is like that old-timey monochrome image of serious-faced cowboys and schoolmarms sitting for their portraits, with a dark oval around the edges of the image.
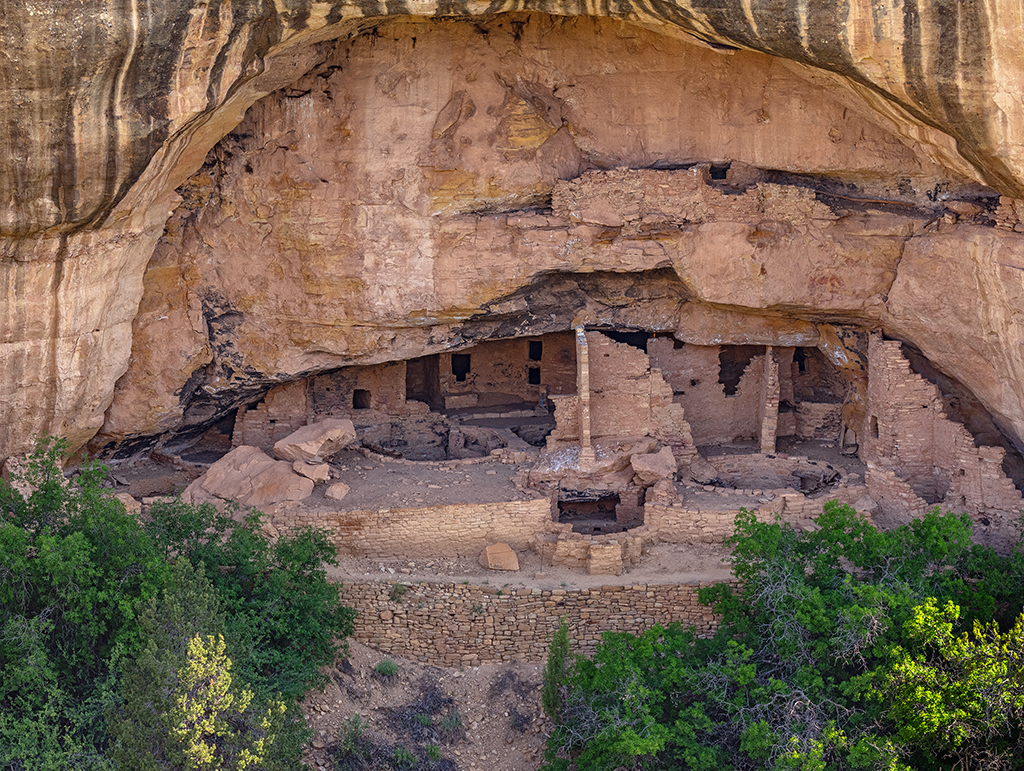
For the view here of Hemenway House, I set my camera to expose for the shaded alcove and still ended up lightening the shadows during the editing process.

On the other hand, House of Many Windows cliff dwelling was nicely lit by the sun on the cliff face.

Get Close-Up And Wide-Angle Shots
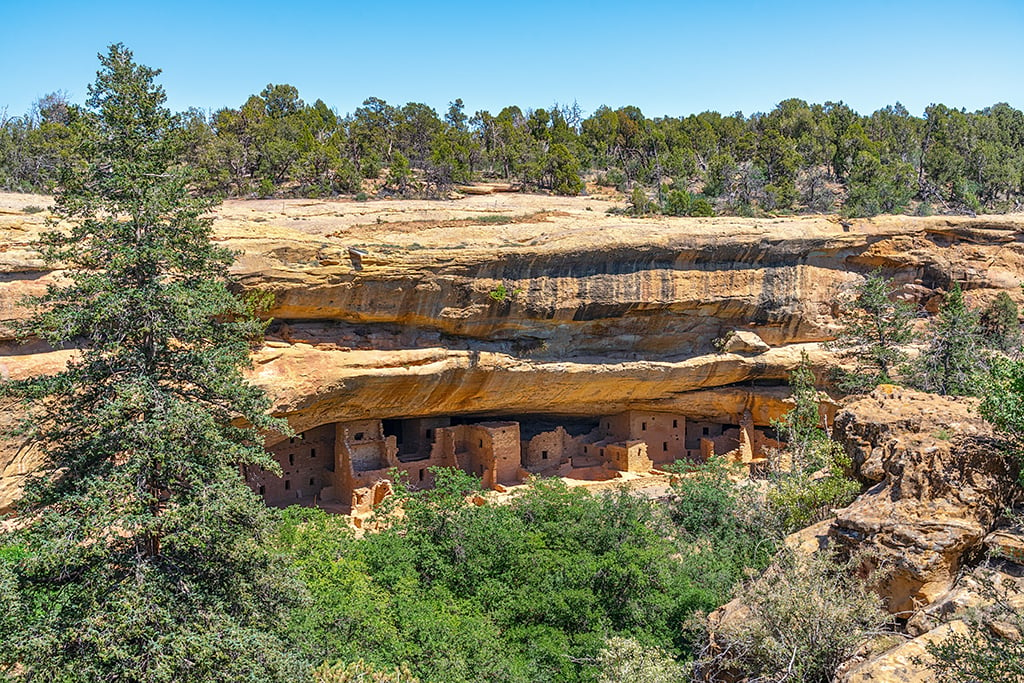
Get both telephoto close-ups and wider-angle compositions to show your viewing audience not only cliff dwelling details but their locations within the alcoves below the cliffs. The Ancestral Puebloans were nimble people to be able to access cliff dwellings from topside using hand-and-foot-holds chiseled into the stone in addition to (what I hope were) very sturdy handmade ladders.
Dehaze That Haze
Depending upon the time of year you visit (I visited just prior to the official start of summer in June), there might or might not be a little haze veiling the ruins. This can be resolved with whatever “dehazer” your photo editing software offers. Just remember to use that dehazer judiciously. Smartphone cameras do a decent job of automatically eliminating some of that haze.
Tripods Versus Handholding
Going on a guided cliff dwelling tour? Leave that tripod behind. The three main tours offered (not to mention the one backcountry tour) all require climbing 15 feet (4.6 meters) or more up sturdy, wood-hewn ladders. If you choose to bring your tripod, you need to secure it in your pack rather than strapping it to the outside, since it’s entirely possible one or more straps might loosen enough for the tripod to fall out and hit someone on the head climbing the ladder below you (same advice for securing your water bottle).
Speaking of tripods, the only time I used one during this trip was for photographing sunrise shots at Park Point, the highest point in the park (8,572 feet/2,612 meters above sea level). All the other shots you see here were handheld using the “burst method” of holding down on the shutter button for several clicks. While most photographers will argue you should always use a tripod, I find the burst method works well when not using a tripod because out of the several shots I captured with this process, at least one image almost always turns out sharp and clear. The only caveat is the amount of memory card space taken up by the burst method (so make sure to take extra cards with you).
Speaking of sunrises, stopping off to photograph sunrise at Park Point is a must-do for photographers. Photograph landscapes looking both to the east as well as the west. Westward, you’ll gaze upon Sleeping Ute Mountain in the distance and the rising sun bathing the mesas.

Sure, you can use the burst method for sunrise imagery here, but your settings will change since you are handholding your camera during a low-light scenario. To prevent motion blur, your ISO will be higher (maybe around 500 – 640) and your shutter speed should be 1/30-1/40. Your lens aperture will need to be wider, too (f4-f5.6). Affixing your camera to a tripod allows for a lower ISO can be 125-160, smaller aperture f8, and a much slower shutter speed allowing more light through the lens and onto the camera sensor. This assures a nice, sharp shot with very little noise (graininess) from using a high ISO. It’s your choice.
Photograph More Than Just Cliff Dwellings
Don’t just focus on the cliff dwellings. You miss so many other aspects of the park if you do that. Even when visiting during the middle part of June, you will still find wildflowers to photograph, and you might even spot a lizard scuttling over a rock at one of the overlooks.


FYI, telephoto lenses are great at capturing nice close-ups of the wildflowers
Capture some people in your shots. Although photographers tend to view that suggestion with disdain, I find including people provides a sense of size and scale. It may also make them realize these quiet, people-less ruins once were sites of much human activity: people at ceremonies, children playing and laughing, and people grinding corn, tending to their turkeys and dogs, or cooking while visiting with each other.

This image above of Cliff Palace was photographed at a view spot right next to the Sun Temple ruins, looking out across the canyon. To the far left, you can see a cluster of people listening to a park ranger just prior to heading down for their tour. Notice the size of the alcove and cliff dwelling versus the size of the people.
Photograph some leading line imagery, including roads and even doorways at such ruins as Sun Temple. Leading lines take the viewer’s eyes from one spot to another to another on the image, allowing them to take in the entire composition.


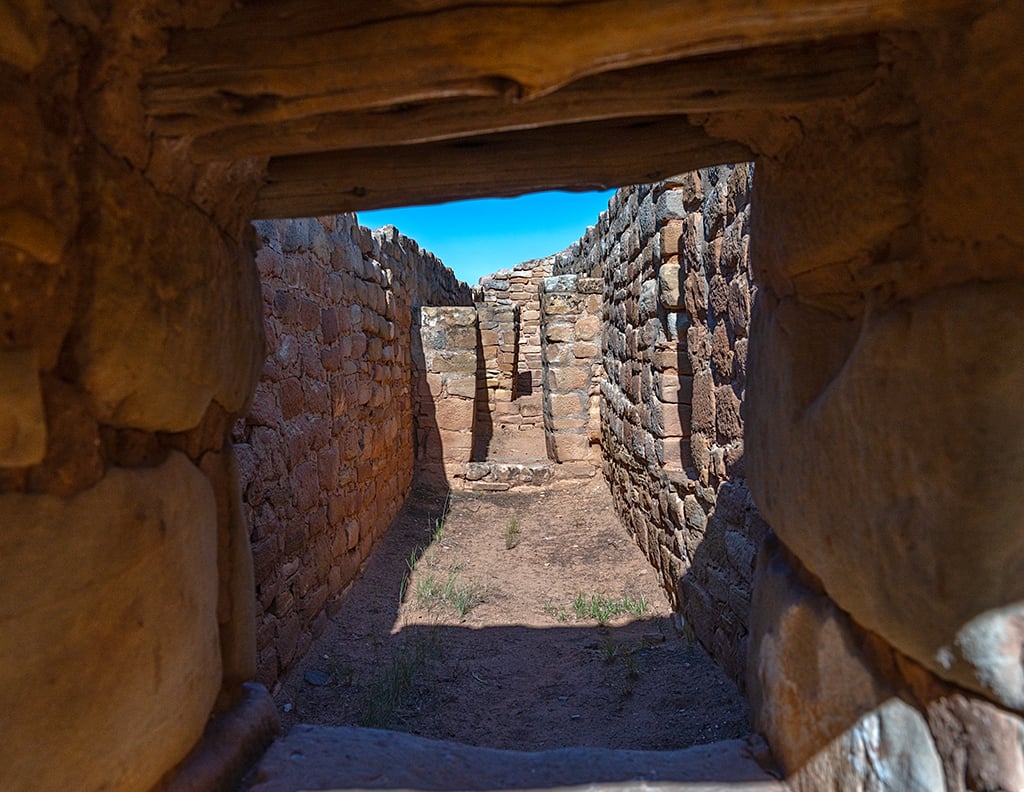
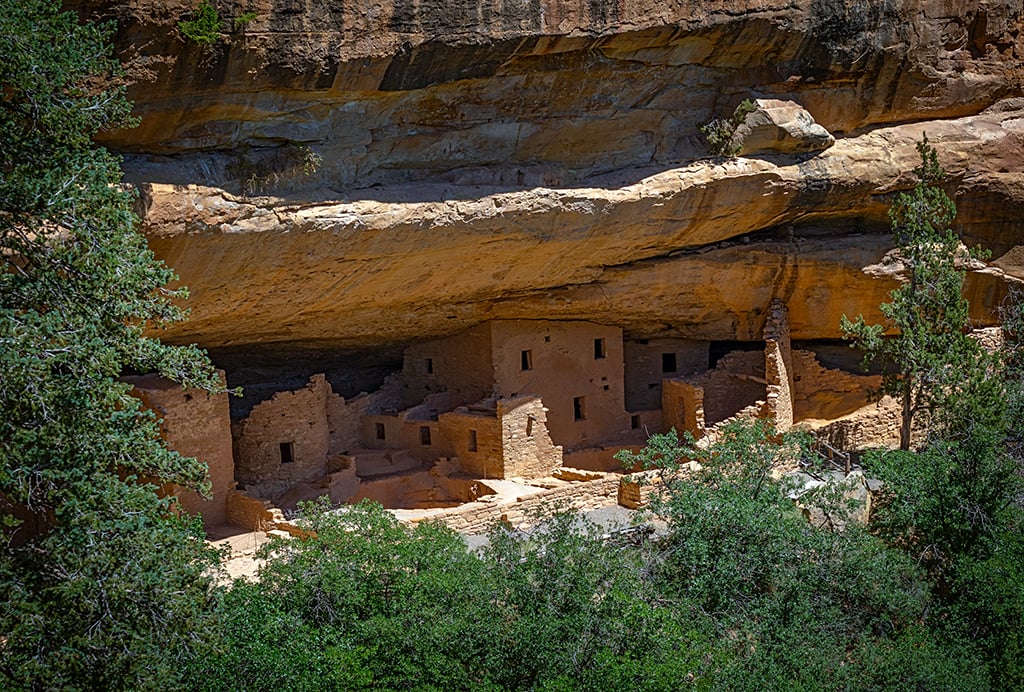
Capturing architectural details of the ruins, too, like plaster, chinking, brickwork, allow your viewer to see how all these building details come together to create living spaces within these ancient dwellings.

You can learn interesting facts from these details. For instance, during my Balcony House tour, the ranger pointed the lines on the alcove ceiling you see in the photo below. These are called “mud lines” and they indicate a former wall built up to the ceiling and later removed. These Ancestral Puebloans remodeled their homes just like we modern home dwellers do.

If you are on a cliff dwelling tour, try to get a shot including both ruins and the surrounding landscape. This will generally be some sort of side shot like the Balcony House photo here. The issue you will have is the same as mentioned several paragraphs earlier: bright areas versus shadowed areas. I adjusted the camera settings for the bright landscape (I could probably have darkened the scene even a little more). I then lightened the shadows during the editing stage.

Those two days were not long enough, yet I returned home with some great photos. No matter how much time you spend in this national park dedicated to the ingenuity, tenacity, creativity, and architecture of the Ancestral Puebloans, you are sure to come away with great photos too, and maybe these tips will help.

Stories about:
Story Categories:
A copy of National Parks Traveler's financial statements may be obtained by sending a stamped, self-addressed envelope to: National Parks Traveler, P.O. Box 980452, Park City, Utah 84098. National Parks Traveler was formed in the state of Utah for the purpose of informing and educating about national parks and protected areas.
Residents of the following states may obtain a copy of our financial and additional information as stated below:
- Florida: A COPY OF THE OFFICIAL REGISTRATION AND FINANCIAL INFORMATION FOR NATIONAL PARKS TRAVELER, (REGISTRATION NO. CH 51659), MAY BE OBTAINED FROM THE DIVISION OF CONSUMER SERVICES BY CALLING 800-435-7352 OR VISITING THEIR WEBSITE. REGISTRATION DOES NOT IMPLY ENDORSEMENT, APPROVAL, OR RECOMMENDATION BY THE STATE.
- Georgia: A full and fair description of the programs and financial statement summary of National Parks Traveler is available upon request at the office and phone number indicated above.
- Maryland: Documents and information submitted under the Maryland Solicitations Act are also available, for the cost of postage and copies, from the Secretary of State, State House, Annapolis, MD 21401 (410-974-5534).
- North Carolina: Financial information about this organization and a copy of its license are available from the State Solicitation Licensing Branch at 888-830-4989 or 919-807-2214. The license is not an endorsement by the State.
- Pennsylvania: The official registration and financial information of National Parks Traveler may be obtained from the Pennsylvania Department of State by calling 800-732-0999. Registration does not imply endorsement.
- Virginia: Financial statements are available from the Virginia Department of Agriculture and Consumer Services, 102 Governor Street, Richmond, Virginia 23219.
- Washington: National Parks Traveler is registered with Washington State’s Charities Program as required by law and additional information is available by calling 800-332-4483 or visiting www.sos.wa.gov/charities, or on file at Charities Division, Office of the Secretary of State, State of Washington, Olympia, WA 98504.
INN Member

The easiest way to explore RV-friendly National Park campgrounds.

Here’s the definitive guide to National Park System campgrounds where RVers can park their rigs.
Our app is packed with RVing- specific details on more than 250 campgrounds in more than 70 national parks.
You’ll also find stories about RVing in the parks, tips helpful if you’ve just recently become an RVer, and useful planning suggestions.
