
An abstract of trees, Yellowstone National Park / Rebecca Latson
I once dated a man who told me “all mountains are the same.” I definitely did not believe that, yet I still believed all forests were the same (go figure). So, the very first time I even thought about framing a forest shot was in 2008, when I took a road trip into Glacier National Park. I’d stopped at a wide spot along Going-to-the-Sun Road to photograph a mountain scene. Looking away from my tripod setup, I peered into the many-shaded and shadowed greens of the forest alongside the road, to behold what I think might have been a bunchberry plant, with its strikingly brilliant emerald-green striated leaves and little yellow-white flowers, all framed by darker green grass and vignetted by the even darker, shadowy forest of toothpick-straight conifers. I just had to capture that scene.
Having always been an “auto mode” gal with my film cameras, I was new to digital photography and manual settings. As a result, I made a number of mistakes, the biggest of which was removal of the camera from the tripod to handhold it while photographing that forest scene. The end shots were fuzzy, dark and ultimately deposited into my computer’s virtual trash bin.
Those first ruinous forest interior shots did not dim my newfound appreciation for the beauty of national park forests. I just needed to learn a little more about capturing a good shot.
All Forests Are Not Alike
As you visit different park units, you’ll observe distinctions between forests and their trees. Some forests, like those you see around Glacier’s Apgar Visitor Center are dry, spacious affairs with widely-spaced, very tall, skinny pines and plenty of sunlight shining onto the forest floor.

Standing out in the crowd, Glacier National Park / Rebecca Latson
Other forests, like the lowland forests of Mount Rainier National Park and the temperate inland Hoh and Quinault rain forests of Olympic National Park, are damp, shadowy affairs carpeted with feathery fern fronds, mossy nurse logs, and a spider’s webbing of tree roots stretching beyond the confines of their trunks.

The saturated color of the forest interior, Mount Rainier National Park / Rebecca Latson

Shapes and colors in the Hoh Rain Forest, Olympic National Park / Rebecca Latson
Some forests provide a misty environment suitable for cultivating sky-scraping trees such as sequoias and coastal redwoods.
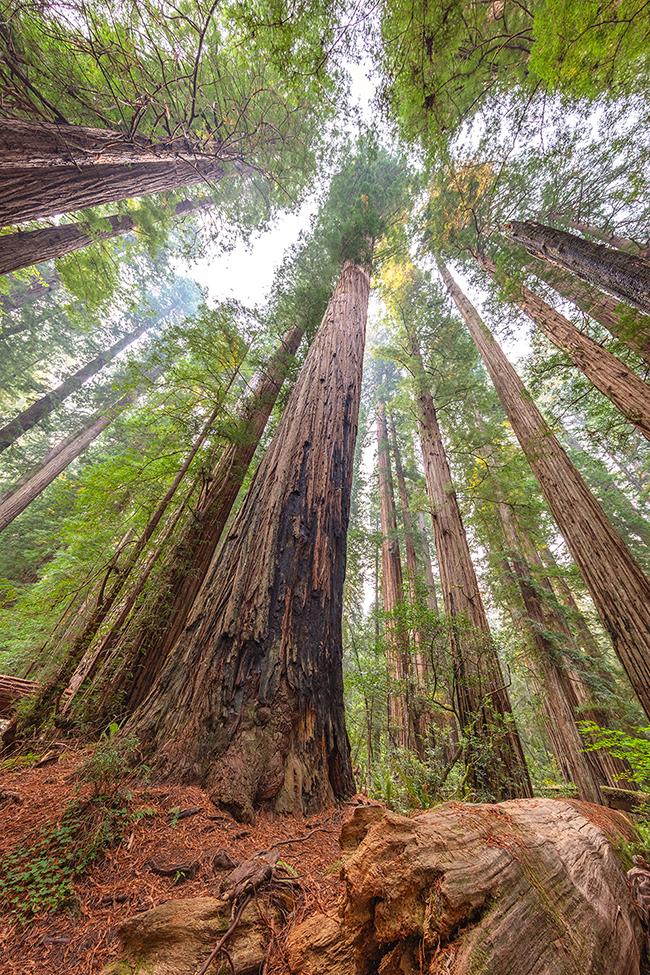
Looking up at some very tall trees, Redwood National and State Parks / Rebecca Latson
Other forests are filled with deciduous trees whose leaves morph from green to brilliant oranges, yellows, golds, and reds in the autumn, before falling to the ground and revealing skeletal, grasping branches.
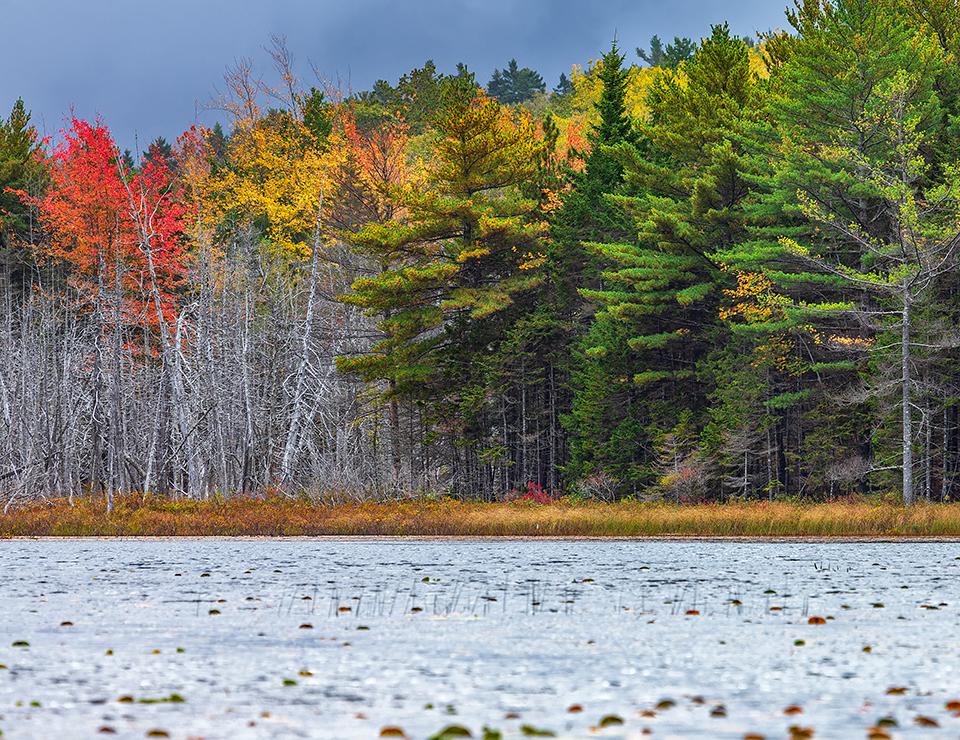
Stormy autumn scenery, Acadia National Park / Rebecca Latson
Some forests have experienced wildfires that burned away their original character to reveal a much different face.
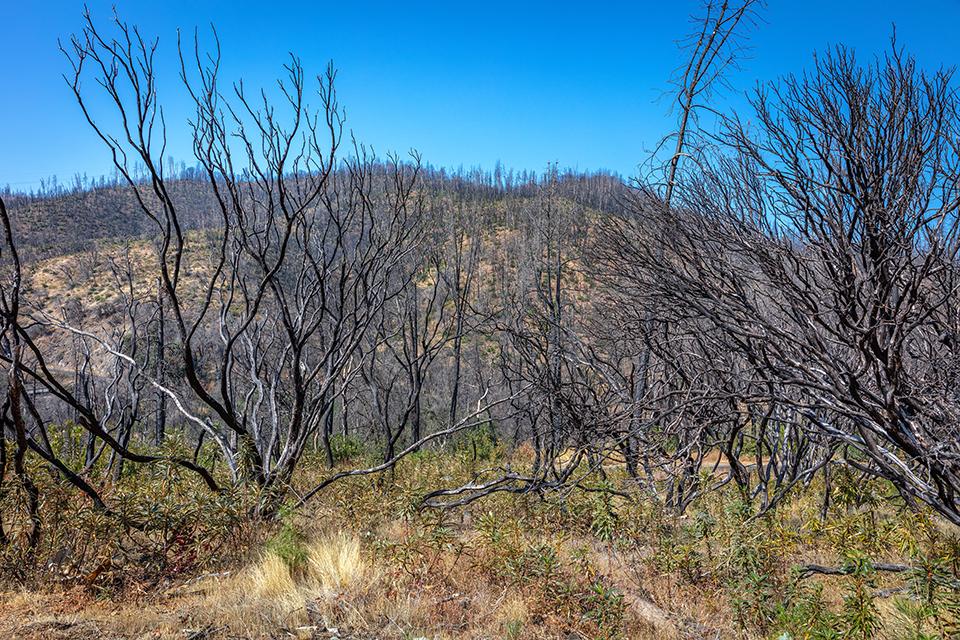
The aftermath of a fire, Whiskeytown National Recreation Area / Rebecca Latson
Each forest possesses its own personality worth a little bit of room on your camera’s memory card. Capturing those woodland personalities requires not only different camera settings, but also a little thought as to how to frame that composition.
Forest Interiors
Most forest interior scenes will be shaded to some extent. Dense tree canopy can block large areas from direct sunlight, creating shadowy, moody, low-light scenarios. A clear image of the forest interior requires a tripod, a higher ISO and/or a slower shutter speed. A wireless remote, corded shutter release remote, or your camera’s 2-second timer prevents vibration blur that would otherwise occur as your finger presses down on the shutter button.
If the sun is peeking between the trees and providing a single-point light source, you might think about capturing a sunstar.
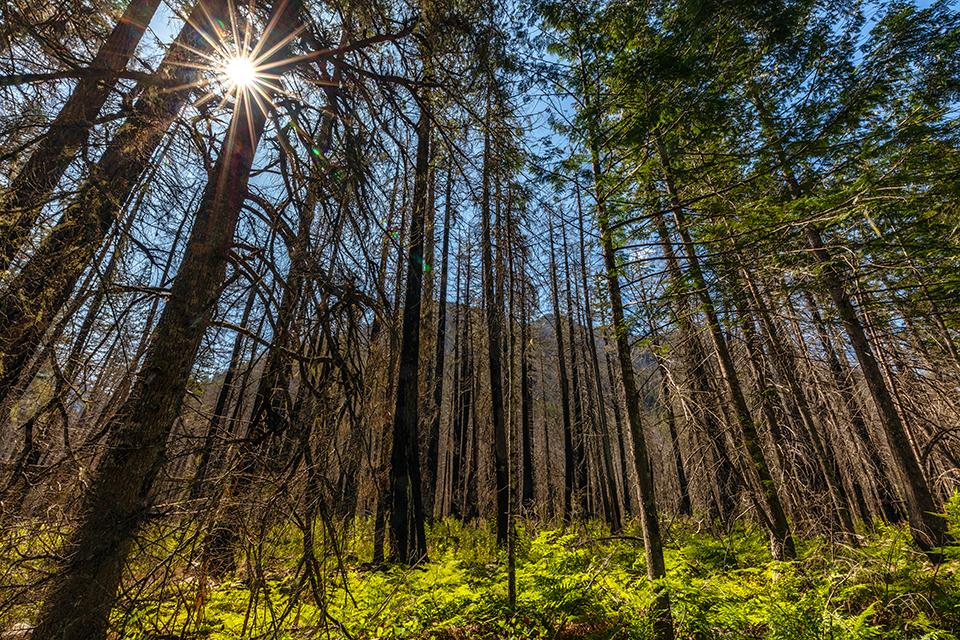
A sunstar through the trees, North Cascades National Park / Rebecca Latson

Ferns, forest, and a sunstar, Jedediah Smith Redwoods State Park, Redwood National and State Parks / Rebecca Latson
To get a distinctive sunstar, you should make your aperture small, ranging from f11 to f22 and adjust the other settings so your image won’t be too dark. The number of “rays” on your sunstar will depend upon the number of aperture blades in your lens.
If there's a path through the forest, then photograph that leading line of trail for your viewers’ eyes to follow.

The narrow path through the forest interior, Mount Rainier National Park / Rebecca Latson
If there’s a stream or creek running through your forest scene, not only do you have the opportunity for another leading line composition, but you can practice your “silky water” technique to give the water a satiny-smooth look. The silky water presents an interesting contrast to the sharp stillness of the vegetation and trees around the water flow.

Silky water through a snowy forest, Mount Rainier National Park / Rebecca Latson
There is a caveat to shooting in low light, though: your resulting images may display “sand grains” in the form of tiny pink, purple, and green pixels. That grain is called “noise.” Some cameras have menu settings for noise reduction. I, personally, don’t use those in-camera settings because I don’t feel like I have quite as much control over the amount of noise reduction I can apply and where I can apply it. Instead, I utilize noise-reduction software. There are quite a few brands out on the market such as Imagenomic’s Noiseware, Topaz DeNoise AI, Adobe Lightroom, and Luminar. It takes a judicious touch, though, when employing noise-reduction to the image – too much takes away most or all of the little details, resulting in a “plastic” look.
Damp Forest Environments
From tree top to forest floor, woodlands in moist environments are carpeted with mosses, ferns, and fungi. Fallen logs become “nurse” logs that provide habitat and nourishment to tree seedlings in addition to mosses, ferns, fungi. Hemlocks, cedars, Sitka spruce, firs, maples, and alders dominate the scene. Epiphytes (plants growing on other plants) such as mosses, ferns, and lichens blanket the tree limbs.

Epiphytes on a big leaf maple, Hoh Rain Forest, Olympic National Park / Rebecca Latson
Use your telephoto lens to zoom in on a particular tree festooned with epiphytes.

A close-up of some licorice ferns on a big leaf maple tree, Hoh Rain Forest, Olympic National Park / Rebecca Latson
Use a wide-angle lens to capture the height of a single, mossy tree, a tree growing from the remains of a nurse log, or a broader view of the tangled, wet, green and brown chaos.

A tall, mossy tree in the Hoh Rain Forest, Olympic National Park / Rebecca Latson
If there’s sunlight peeking through the trees, then photograph your subject(s) backlit by the sun. A backlit image really highlights and delineates tree branch shapes and drapey moss.

Ghostly green arms stretching out in the sun, Mount Rainier National Park / Rebecca Latson
Evergreens, Deciduous Trees and Photographing Fall Colors
While wandering through forests of mixed evergreens and deciduous trees, take a moment to really notice their differences and observe their patterns, colors, and textures.

The forest by the river, Mount Rainier National Park / Rebecca Latson
If you’ve ever visited Acadia National Park or another park in the eastern part of the nation (like Shenandoah and Great Smoky Mountains national parks or the forests along the Blue Ridge Parkway), you’ll see plenty of deciduous trees. In the fall, those trees explode with leaf color. You can concentrate on the overall effect of that fall color, single out a brilliant-leaved tree surrounded by green, or even focus on individual leaves. Hint: you can highlight the bright color of an autumn-hued tree even more by adding a little vignette to your image. If you’ve ever looked at Old West-type sepia photos, you might notice the edges have been darkened. That’s vignetting. Photographers make great use of that technique, and many photo software packages have a preset or slider to add vignetting to your image.

Autumn symbols, Acadia National Park / Rebecca Latson

A vignetted splash of color, Acadia National Park / Rebecca Latson
Tall Trees
A trip to Redwood National and State Parks, or Sequoia and Kings Canyon National Parks, offers opportunities for your camera to capture trees with incredible height and width.

A forest full of redwoods along Stout Grove Trail, Jedediah Smith Redwoods State Park, Redwood National and State Parks / Rebecca Latson
Wide-angle lenses (11mm to 24mm) are great tools for encompassing those extreme measurements, and vertical, rather than horizontal shots, allow you to photograph that height at closer range. Bear in mind, with wide-angle lenses, especially those from 11mm to 14mm, you’ll see more “distortion” in your composition. Look through your camera while moving your wide-angle lens up and down and you’ll see what I mean. I don’t mind that distortion as it adds an interesting perspective to the composition.
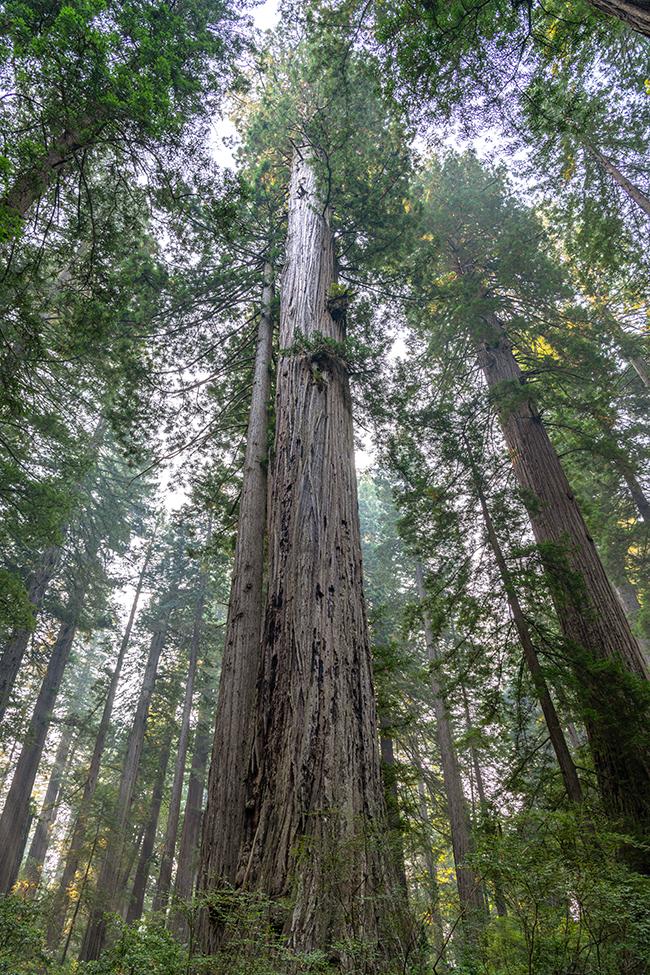
Redwoods reaching toward the sky along Lady Bird Johnson Loop Trail, Redwood National Park, Redwood National and State Parks / Rebecca Latson
Misty or Smoke-Hazy Forests
Photographing trees veiled in swirling morning mist or smoky haze from wildfires adds a moody, haunting, fairy-tale impression to the scene. As with low-light shots, you might have to apply a little noise reduction software, because that mist or wildfire smoke often gets a little grainy.

Redwoods in the mist, Prairie Creek Redwoods State Park, Redwood National and State Parks / Rebecca Latson
Forest Fire Remnants
Speaking of wildfires, forest remains after a burn present stark, striking imagery, with blackened trunks standing like toothpicks along the flanks of a hill or mountain. You’ll see things in the background previously hidden by forest growth.
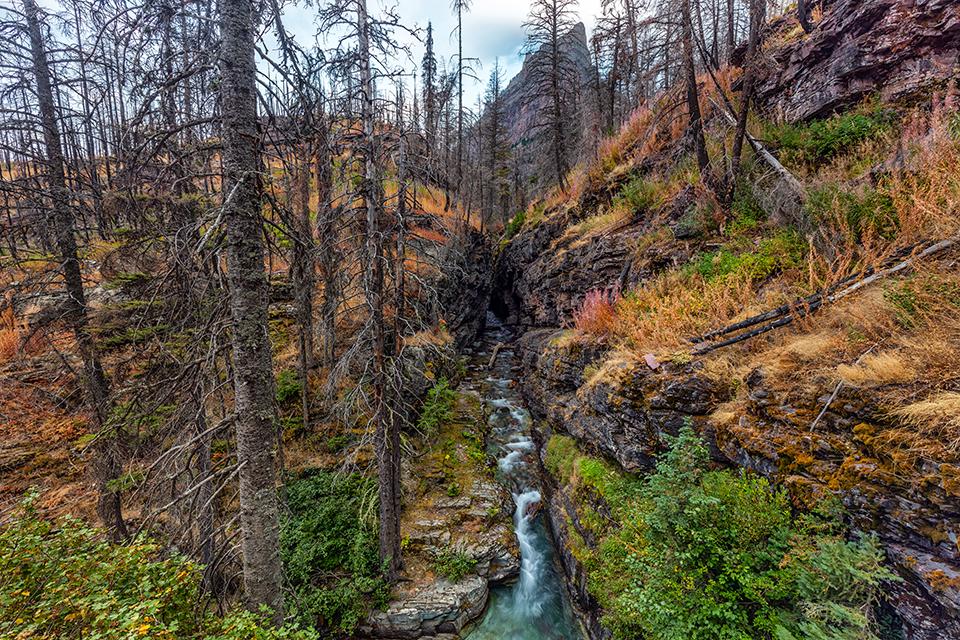
Charred trees around Sunrift Gorge, Glacier National Park / Rebecca Latson
Rebirth and revitalization make nice subjects for your compositions, too, with green vegetation sprouting around and alongside the contrasting stark, charred trees. Glacier National Park and Whiskeytown National Recreation Area are prime examples of park units which were ravaged by wildfires. I would imagine that Rocky Mountain National Park is another good example after the East Troublesome and Cameron Peak fires.
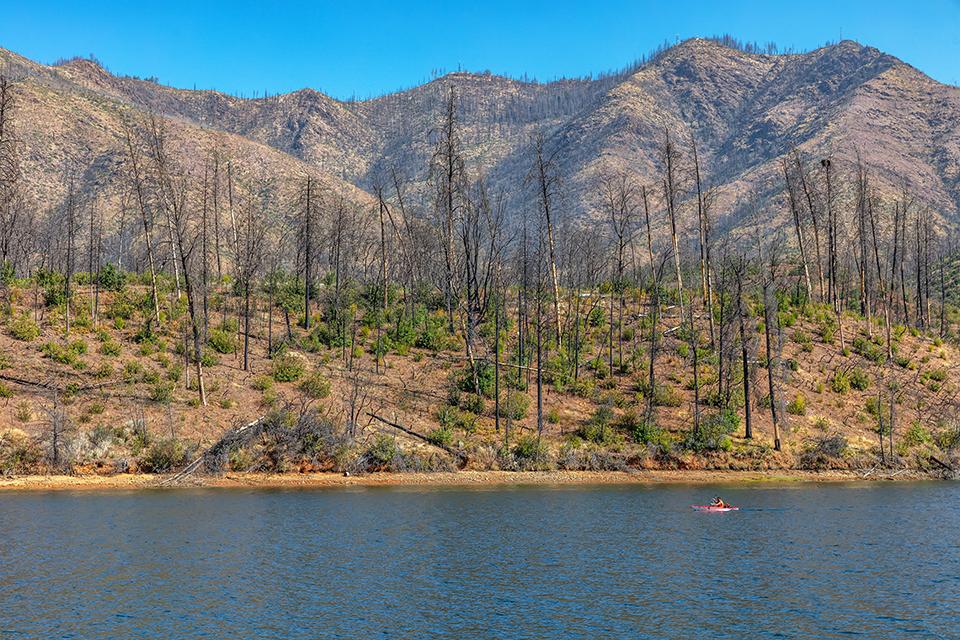
Paddling the lake in the Whiskey Creek area, Whiskeytown National Recreation Area / Rebecca Latson
Don’t let that old saying “you can’t see the forest for the trees” prevent you from bringing home great images of both forest and the trees. In addition to your wildlife and other landscape images, forests and trees flesh out a national park story and they definitely add to the story of your park trip.



 Support Essential Coverage of Essential Places


Comments
As is usual, your work is remarkable, and several of these photos are reminisent of Bev Doolittle's "camoflage" watercolor style.
[lightly edited, as most sentences are improved by including verbs.]
Gorgeous photographs, thank you
[edited correcting spelling improves too]