Who's afraid of using a square format? Not this bison, Grand Canyon National Park / Rebecca Latson
Back in 2016, I penned an article about Instagram. I was using it mainly for iPhone pics, believing it to be a platform for nothing else, essentially. As such, I was on the fence regarding this application. Later, I read a comment from another photographer who said she edited her SLR images on her computer, then emailed those edited images to herself for uploading to Instagram using her smartphone. How ‘bout that? While I like the basic editing tools Instagram offers to help me spiffy up my smartphone shots, I much prefer the greater control and look I get with SLR photos I’ve edited using my Lightroom and Photoshop programs. Then I upload them to Instagram.
I’d also heard rumors that Instagram wanted to use contributors’ photos without their permission. Worrying about that was an excuse to not really investigate any further into Instagram’s uses. I had a “meh” attitude toward this platform.
Fast forward to late 2017, when, shortly after an autumn trip to Glacier National Park, I started guest-posting for the Traveler’s own Instagram account @national_parks_traveler. I’ve been using Instagram on the Traveler’s behalf for over a year now, and I’ve learned some interesting things simply by using that square format Instagram loves.

Bare trees and Baring Creek, Glacier National Park / Rebecca Latson
I’ve never been much of a fan for a square photo. I’ve tried hard to always include every bit of landscape deliciousness I could manage in my uploads, so the formats were usually panoramic, 5x7, or 8x10 in size. I had to admit, however, that viewing a landscape photo I’d uploaded to Instagram on a smartphone made my gorgeous horizontal, wide-angle landscapes appear far away, obscuring much of that lovely detail. I tried using vertical shots, too, but noticed I was limited in just how much of that vertical shot I could actually display.
Photographers are always learning and honing their editing skills. Using their improved skills, they will rework previously edited images as well as images they considered useless but had not yet consigned to the virtual trash bin. I ignored a number of my images because of a blurry leaf among otherwise clear, dew-dropped leaves, or the accidental inclusion of a car passing by a picturesque subject. Realizing a square crop could remove the blurry leaf or passing car while keeping a good portion of my landscape story intact suddenly made those previously discarded images into viable compositions for upload. OK, I could just remove them with Photoshop's clone-out tool, but this is an article about square format, and cropping is much easier for everybody, so humor me.

Christine Falls (and the passing car), Mount Rainier National Park / Rebecca Latson
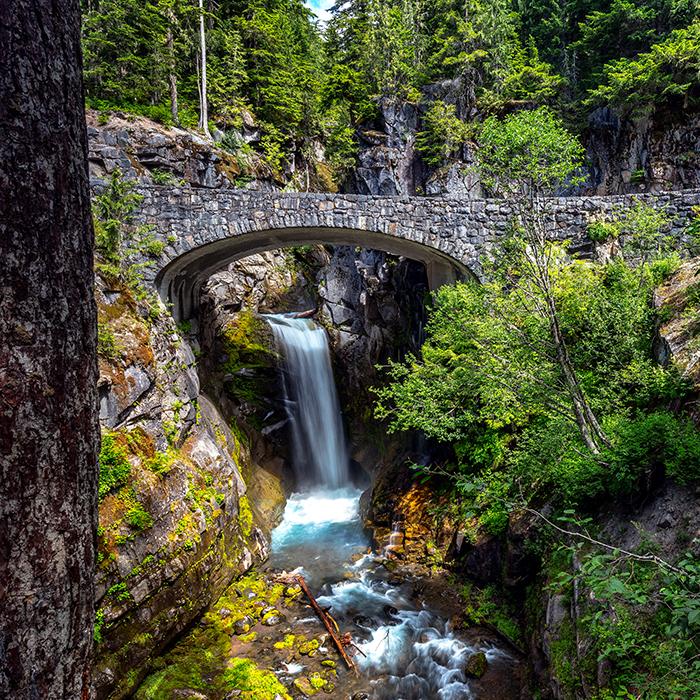
Christine Falls, square format, Mount Rainier National Park / Rebecca Latson
Square compositions should make you really think about placement, compelling you to decide which part of the photo you wish to crop while keeping intact your national park narrative. Remember my article about negative space? Cropping your composition to fit a square format really makes you consider just how much negative-to-positive space you want to include. Below is the original horizontal shot of a scene on the North Rim of Grand Canyon National Park. The negative space is the sky, while the positive space (the subject), is the canyon scene and the moon (to a lesser extent). In both crops, I removed some of the sky (the negative space), one more than in the other, in order to emphasize more of the canyon (the positive space).

Sunset and moonrise at the North Rim - Original shot, Grand Canyon National Park / Rebecca Latson
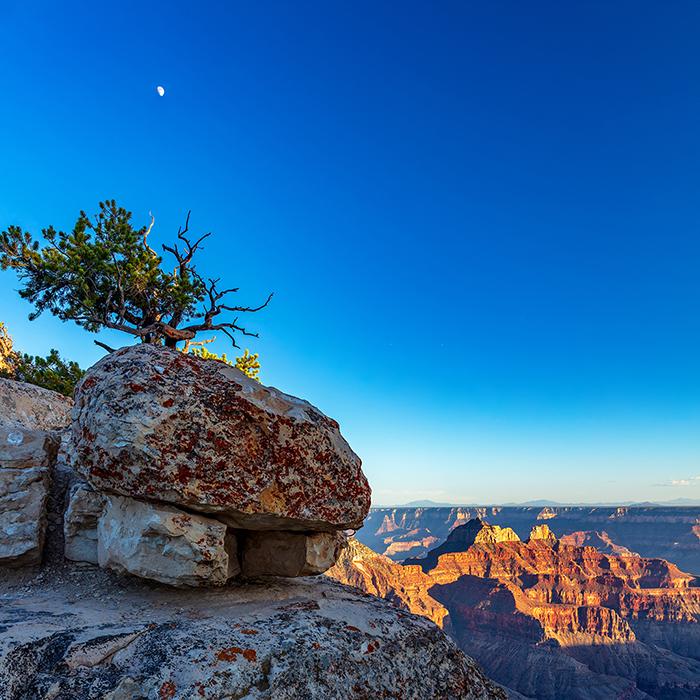
Sunset and moonrise at the North Rim - Crop #1, Grand Canyon National Park / Rebecca Latson
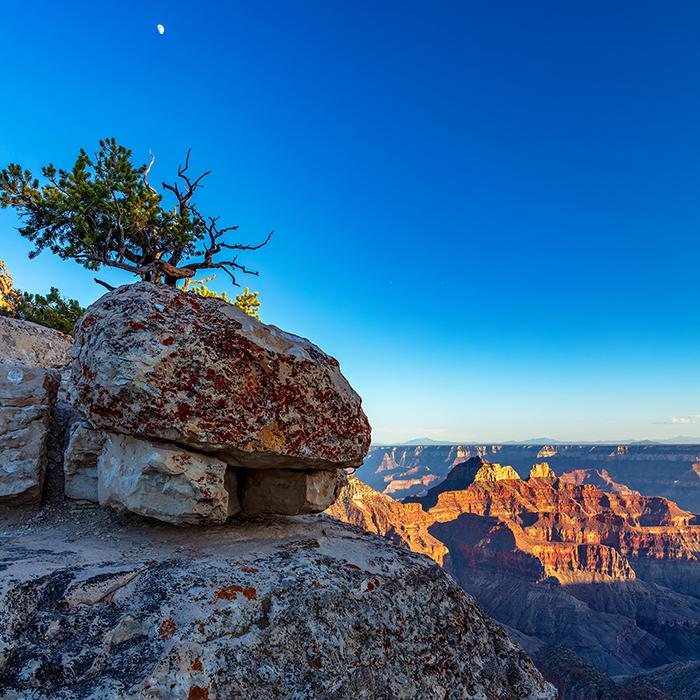
Sunset and moonrise at the North Rim - Crop #2, Grand Canyon National Park / Rebecca Latson
A square format also prompts you to decide which portion of your original image should be cropped and still tell the story that the original image conveys. Try this out for yourself: Take one of your photos and get your square crop tool from whatever photo editor you use. Place the crop in the middle of your shot. Now, place the crop to one or the other side of your shot, left, right, top, or bottom. Do you see different stories arising out of that single image? Is there more emphasis on different things in each crop? In the photo captured at Acadia National Park, below, the first square crop primarily emphasizes the stone cairn. The second square crop emphasizes the cloud and the scenery.
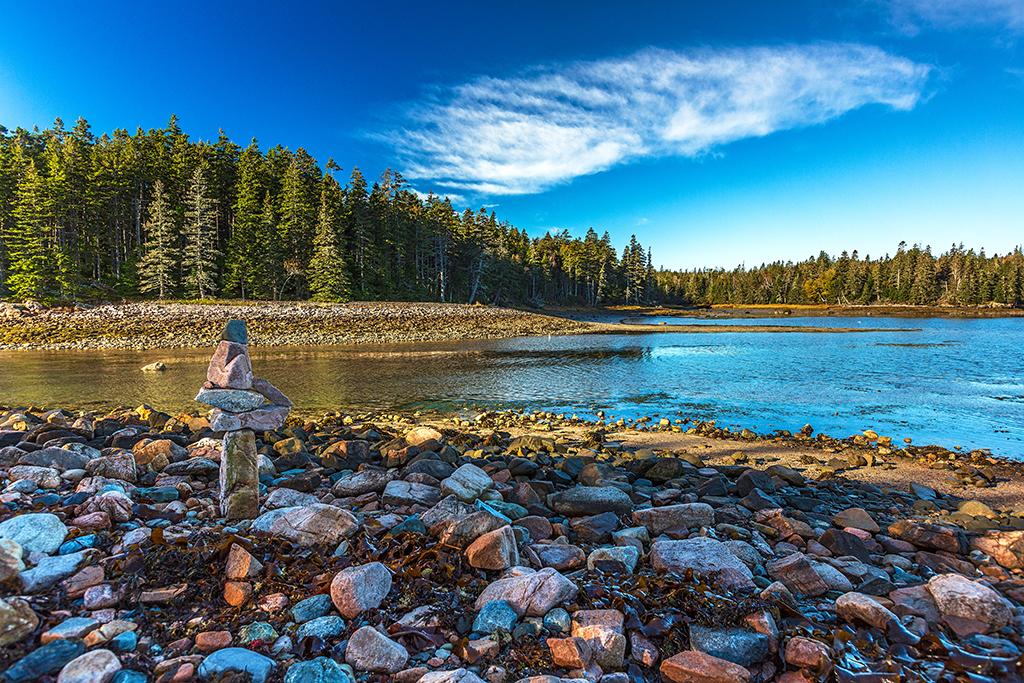
Stone sentinel watching over the scenery - Original shot, Acadia National Park / Rebecca Latson

Acadia scenery - Crop #1, Acadia National Park / Rebecca Latson
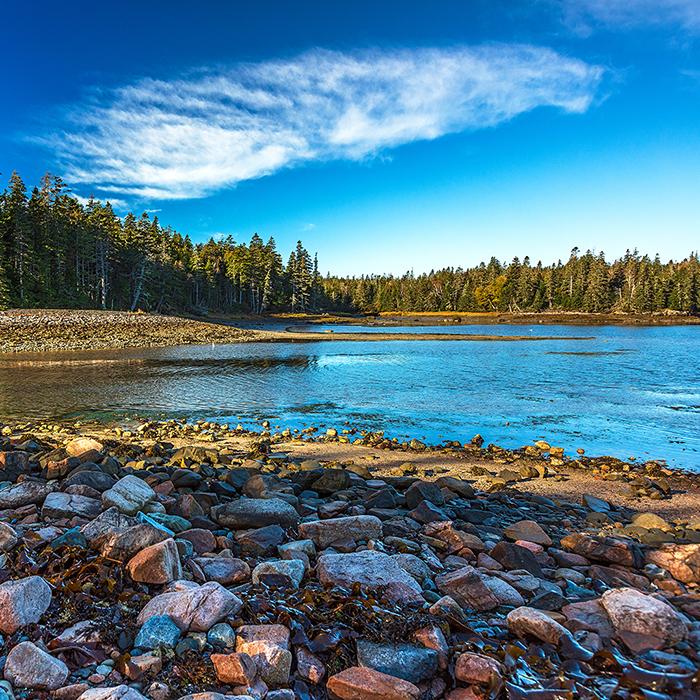
Acadia scenery - Crop #2, Acadia National Park / Rebecca Latson
I’ve also been working with the Traveler’s development manager regarding text placement within the image, for a newspaper-type headline or marquee to grab the Instagram audience’s attention and (hopefully) entice them to tap on the website link in the Traveler’s profile for further reading. It’s paramount I stay within the square format boundaries for all the text to be seen.

Instagram marquee advertising a Traveler podcast episode, Glacier National Park background / Rebecca Latson

Instagram marquee with text advertising one of the Traveler's articles, Petrified Forest National Park background / Rebecca Latson
Speaking of text in your photos -- which you might like if you use your photos for a blog post, website, or advertising -- there are scads of photo text apps out there for your smartphone and iPad. Try out InstaSize, Layout, Over, WordSwag, and Text On Photos And Videos. Some of the apps are intuitive, while others take a bit of practice. Or, do what I do, which is use the text tool my photo editing software offers. Personally, I feel like I have more options with my Photoshop tools.
While I do not capture every photo (actually, I do not capture any photo) with Instagram in mind, I do admit I have Instagram to thank for making me rethink my compositions and subject placement, albeit after the fact. And, while I’ve mainly written about the square format in this article, the same goes for any type of cropping you might do to your photo after the fact, whether it is a panorama-type crop, 5x7, 4x6, or some other size. Think about the story your image tells the audience. Think about the story you want your image to tell the audience. Does anything change when you use a square format for your Instagram upload?
P.S. I actually must use a square format for the "teaser" image you see next to the short description (abstract) for the photo articles I upload to the Traveler. That's yet another reason for me to become better-acquainted with my square crop tool.

A forest fire sunrise over Lake McDonald, Glacier National Park / Rebecca Latson



 Support Essential Coverage of Essential Places