Carlsbad Caverns National Park in New Mexico is a cave-centric park, and the star of the show is Carlsbad Cavern, itself. Naturally you should want to photograph this cave and its formations (aka speleothems) while capturing more than just a grab shot. It may take a little more effort to photograph the low-light landscapes you view along the trail, but the resulting images will impress your family, friends, and co-workers.

The settings you normally use for sunlit photos aboveground will be completely different when it comes to walking the trail through Carlsbad Cavern, whether you use a digital SLR or your smartphone’s camera.
Natural Entrance Images

Before even setting foot within the Dark Zone of the cave, where no natural light penetrates from the natural entrance, you will want to capture those switchbacks leading down into the cave’s gaping maw. Both SLR and smartphone will capture nicely-lit shots of this feature, although the cave opening itself will be dark and featureless. Sure, you could expose for the cave opening, but doing so will blow out (overexpose) your view of the paved switchbacks. Better to use daylight settings, later lightening the shadows when editing the image.
Low-Light Cave Interior Images
Once you enter the cavern itself, the lighting changes dramatically and so should your camera settings.

Most of you will be using a smartphone. You will have several options regarding how you capture an image with your smartphone camera. You can use the flash setting, you can use the night setting, or you can use no setting at all and just snap the photo. That last choice may very well be the best choice. Why? The flash setting means the flash is facing outward straight in front of you, so only a certain amount of the scene will be brightly (perhaps too brightly) lit. Using the night setting means you need to hold your smartphone very still for about three seconds. Simply capturing a photo not using either flash or night setting turns out relatively well when aiming at one of the many lighted areas along the trail from the natural entrance down and through the Big Room.
For SLR users, your settings/choices are going to be slightly more involved to capture a great, detailed cavern photo. The gist is you need to allow as much light onto your camera’s sensor as possible, which means increasing the ISO, opening up the aperture (that opening between lens and camera sensor and known as the f-stop), and slowing down the shutter speed.

Tripods, bipods, and monopods are not allowed in the cave, and with good reason. The paved trail is narrow and a tripod/bipod/monopod would block other cave visitors, plus you wouldn’t want any part of your camera setup to be off trail, since that would destroy very fragile formations. So, you will be handholding your camera. For all the non-flash shots seen here, the ISO was 3200, aperture was f1.8, and shutter speed was 1/40 – enough to let more light onto the sensor without risking too much camera movement blur. With the added lighting in the cave, the majority of the photos you capture should turn out well. Bear in mind, not all lenses have the same f-stops, the widest of which will vary from f1.4 to f4.

When handholding the camera, it’s extremely helpful to apply the burst method of holding down on the shutter button for several clicks. Out of the photos captured this way, at least one shot is going to be sharp and clear. The caveat is the amount of memory card space taken up by this method, so remember to bring along extra memory cards.
If you are using a flash, the burst method is not necessary. A flash handles a single shot well to produce a clear image. However, just as with the flash on a smartphone, if you point your flash directly in front of you, the rocks/formations nearest you will be completely blown out and the view ahead won’t be as well lit as you might think. The trick to using a flash is to point the flash head directly toward the ceiling, where the light hits and then is bounced (reflected) over a much wider swath of area. Flash does produce a different composition which is not quite as moody as using the artfully placed artificial light within the cave. A flash also uses up battery power quickly, so bring extra batteries (usually AA or AAA) along with those extra memory cards. And carry the discards back out with you. Remember, always pack out what you pack in.

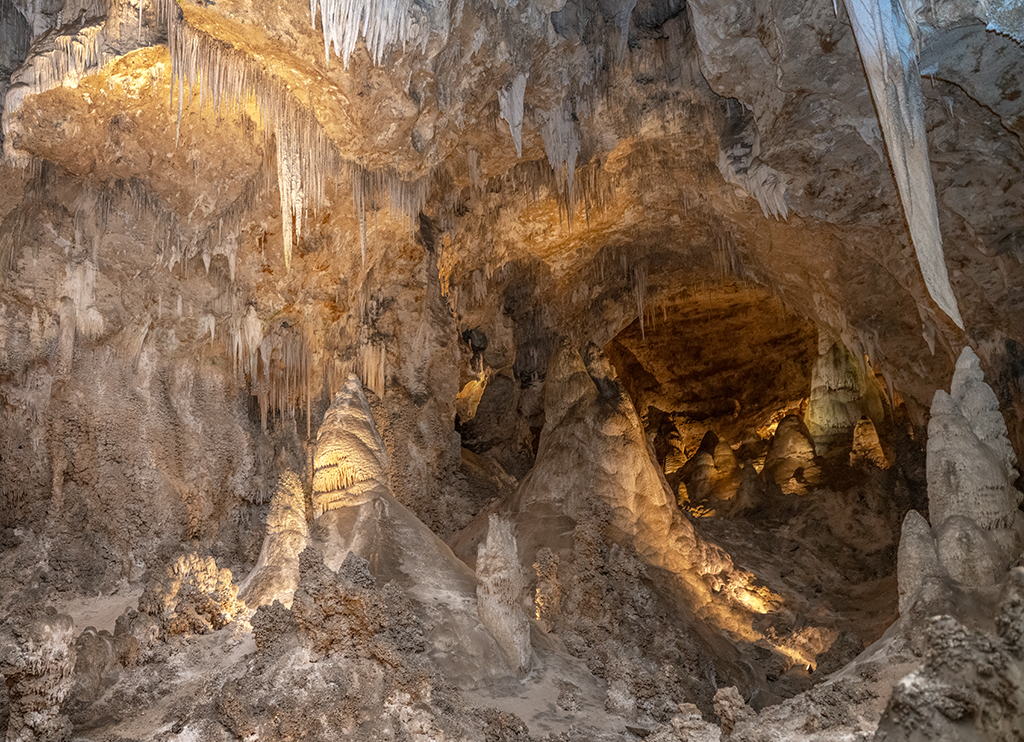
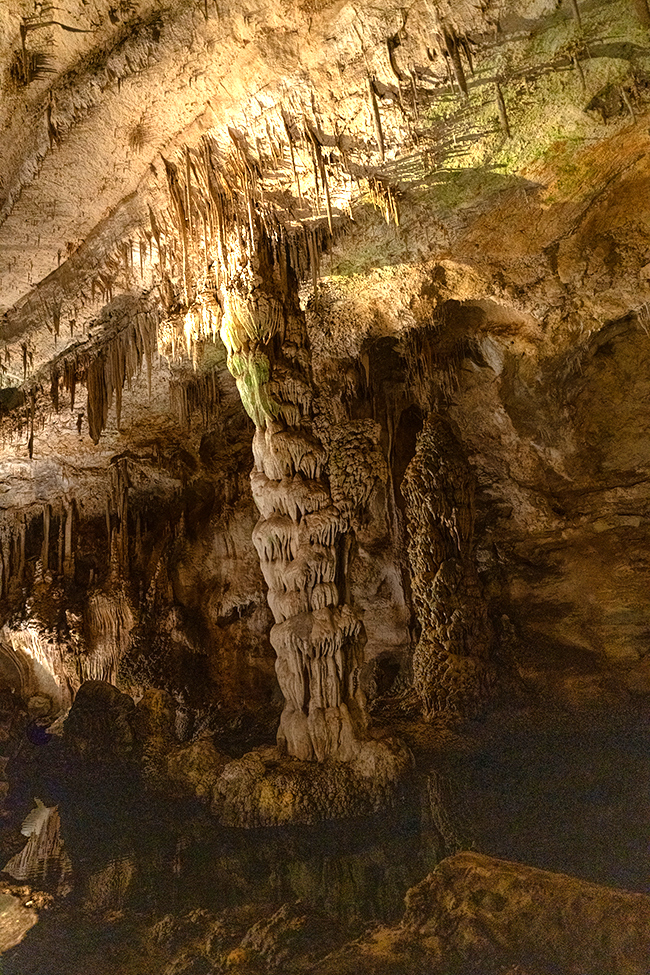
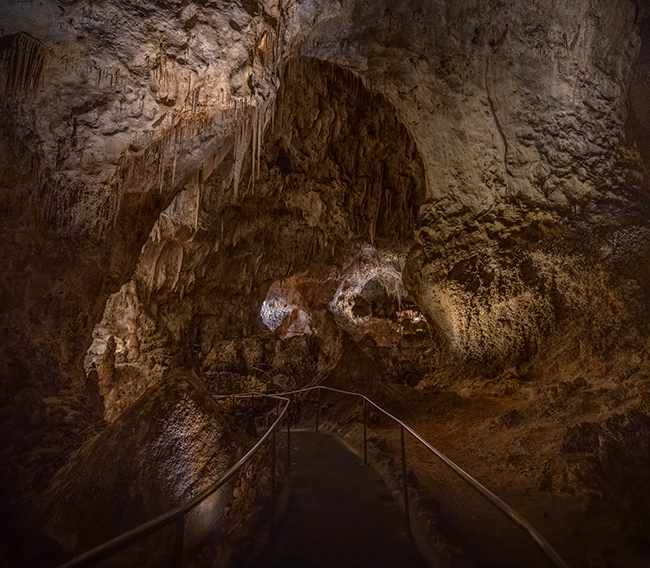
As you wander the paved trail down to and around the Big Room, you will want to get both close-up and wide-angle shots of the various speleothems. Close-ups reveal details of each formation, and wide-angle images give your viewer an indication of the immensity and depth of the Big Room filled with those baroque formations.

During the editing stage, one of the first things you will notice is the amount of noise (graininess) on your shots. This is due to the very high ISO to counteract the low-light cave interior. Sometimes you will only notice it around the edges and corners of an image, but other times, you will see it all over – particularly in the shadowed portions. Stand-alone noise reduction software or a plug-in app that integrated with your photo editing software will effectively reduce or even remove the noise, but must be applied judiciously or the entire composition will look like melting plastic. If you are only going to use your images to show off on your smartphone or keep small on a website, this is not so noticeable.
A handy trick to keep any edge noise from being too noticeable is to darken the edges and sides of the image. This is known as vignetting and it was a popular look for old-time monochrome photos of serious-faced people sitting for their portraits. The vignette technique is applied to focus the viewers’ eyes on the subject(s), and most photo editing software or plug-in apps will have some sort of vignette application.
You already know national parks aboveground are photogenic, but national parks below ground are just as photogenic, too. The information here should help you capture your own awesome images of the amazing subterranean scenery at Carlsbad Caverns National Park.
- By Rebecca Latson - July 16th, 2025 4:11pm


