
A telephoto look into Fairyland Canyon, Bryce Canyon National Park / Rebecca Latson
If you’ve followed this Armchair Photography Guide for Bryce Canyon National Park, you’ll have read Part 1 and wandered along the Rim Trail from Sunrise Point to Sunset Point, with a trip down the Queens Garden Trail and up Navajo Loop Trail. Part 2 took you from Inspiration Point, elevation 8,100 feet, all the way up to Rainbow Point, elevation 9,115 feet, with a side hike along Bristlecone Loop Trail. This final Part 3, designed for use during the summer and early fall months, leads you through sections of Fairyland Canyon along the Fairyland Loop Trail.

A map view of the Fairyland Canyon area, Bryce Canyon National Park / NPS
The National Park Service webpage considers this hike to be strenuous due to its length and elevation changes. While you can reach the Fairyland Loop Trail via the Rim Trail near the General Store, if you want to begin hiking the trailhead at the Fairyland Canyon parking lot, be aware there is no shuttle service to this parking area and the road to the trailhead closes during the winter. During the summer months, it’s dry and can get hot on this trail (actually, on any of the Bryce Canyon trails), so wear sunscreen and a hat, bring plenty of water with you, something to snack on, and remember to pack out what you pack in. In winter, the sun reflecting off snow at this high altitude also can burn you, so be sure to wear sunscreen during those months, too. For a list of suggested camera gear and an explanation of the circular polarizer (CPL) and graduated neutral density (grad ND) filters, refer back to Part 1 of this guide. Click this link for a map view of the entire Bryce Canyon National Park.
Starting Your Hike At The Fairyland Canyon Trailhead
After arriving at the parking area and prior to commencing your day on this dry, exposed trail down into the amphitheater, why not first meander over to the fenced view area to read the placard explaining the geology of Fairyland Canyon while you take in the scenery of colorful hillsides and hoodoo formations? Someday (some century), the constant daily erosional processes will enlarge this small amphitheater to the size of nearby Bryce Amphitheater.
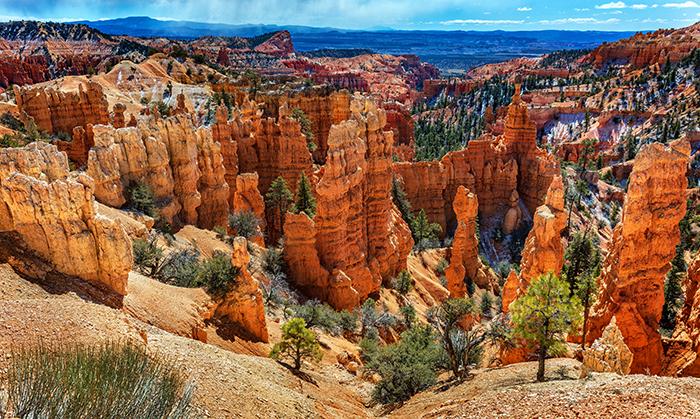
Welcome to Fairyland Canyon, Bryce Canyon National Park / Rebecca Latson
Photos you capture here are going to be pretty bright, even on cloudy days. The rock and soil is light in color. Depending upon the time of day you reach Fairyland Canyon, you might want both a lens hood and your CPL already affixed to your lens. A lens hood will prevent flare spots if you point your camera anywhere near the sun. Keep your grad ND handy as well, because you’ll need to mitigate overexposure of the sky while you expose for the landscape below the horizon line.

The scenery gets better with each step in Fairyland Canyon, Bryce Canyon National Park / Rebecca Latson
The hike down is a little steep, but not too bad. A hiking stick (or your tripod as a hiking staff) will help steady yourself. Practically every step is a photo op, so prepare for a very long day out here if you intend to hike the entire loop. The trail is a little narrow in places, so remember to be courteous and step aside for other hikers to pass by you and your tripod setup.

Hoodoos and spires in Fairyland Canyon, Bryce Canyon National Park / Rebecca Latson
From the images below, you can see this area is a jigsaw puzzle of colors, textures and shapes. People looking at your photos might feel there is almost too much to take into a single photo, so try capturing a few telephoto closeups of particular scenic areas or formations for a more intimate snapshot of this vast landscape.

The colors of Fairyland Canyon scenery, Bryce Canyon National Park / Rebecca Latson

Fairyland Canyon fins, hoodoos, and spires, Bryce Canyon National Park / Rebecca Latson

Fairyland Canyon scenery, Bryce Canyon National Park / Rebecca Latson

More Fairyland Canyon scenery, Bryce Canyon National Park / Rebecca Latson

A hoodoo closeup in Fairyland Canyon, Bryce Canyon National Park / Rebecca Latson
Use a tree or the trail as an anchor point and frame of reference to help your viewers orient themselves to the landscape. Trails also provide great leading lines to guide the viewer’s eye from one part of your photo to another. Include people in a few of your images as well, since humans provide great frames of reference and scale to the scenery.

A view of the landscape along Fairyland Canyon Trail, Bryce Canyon National Park / Rebecca Latson
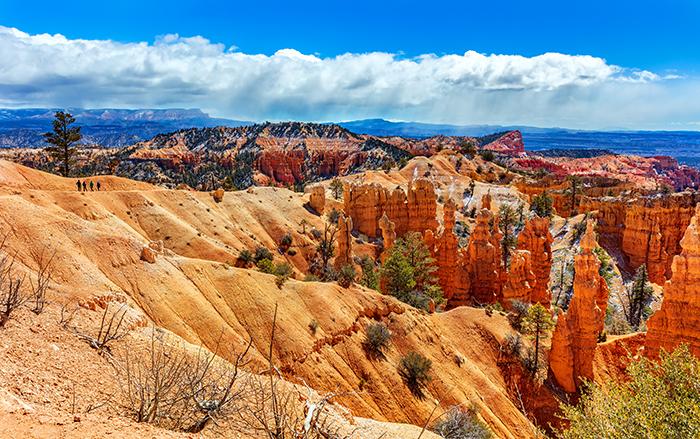
Mid-morning hikers along the Fairyland Canyon Trail, Bryce Canyon National Park / Rebecca Latson

Hiking the trail in Fairyland Canyon, Bryce Canyon National Park / Rebecca Latson
Tear your eyes away from the wide-angle landscape to observe things nearby. There are plenty of what I call “accessory images” to flesh out the story of this hike. What kind of images are “accessory images?” Look at the trees along the trail. You will notice, as I did, their different bark colors, textures, and patterns. Get some close shots of that tree bark as well as such things as plants and their leaves, pine cones, and anything else that catches your attention. Take your time framing your composition. A "grab shot" won't hold your or your viewer's interest for very long. You want your viewer to take their time looking at your gorgeous images, and you, yourself, want something worthy of a place in your national park photo gallery.

Tree bark texture and pattern, Bryce Canyon National Park / Rebecca Latson

Another closeup of tree trunk texture and pattern, Bryce Canyon National Park / Rebecca Latson

Pine cone and plant, Bryce Canyon National Park / Rebecca Latson
If you decide not to hike the entire trail, instead choosing to return the way you came (like I did), then take a moment to look up and frame a shot of the view area from whence you started. I guarantee you will want to return someday, sooner rather than later, to either finish the hike among this fairyland of scenic (and geological) wonders or start it from a different direction, as I did during my July visit.

Heading back to the top, Bryce Canyon National Park / Rebecca Latson

A look up toward the Fairyland Canyon view area and the scenery directly below, Bryce Canyon National Park / Rebecca Latson
Starting Your Hike From Sunrise Point
During my summer move from southeast Texas up to central Washington, I returned to Bryce Canyon for three days. I captured more images to flesh out this Part 3 by hiking the 3-mile out-and-back portion of Fairyland Loop Trail from the Rim Trail near Sunrise Point to Tower Bridge. Morning hours provided very nice lighting and cooler temperatures. A number of nice leading line shots can be photographed along this route as you begin your walk through a more wooded portion of the trail. Remember, in addition to getting wide-angle shots, take a few telephoto landscapes as well. Getting a feel for Bryce Canyon scenery means closeups of the strange and beautiful formations populating the park.

Taking a hike down the Fairyland Loop Trail, Bryce Canyon National Park / Rebecca Latson

Scenery along the Fairyland Loop Trail toward Tower Bridge, Bryce Canyon National Park / Rebecca Latson

Fairyland Trail scenery, Bryce Canyon National Park / Rebecca Latson
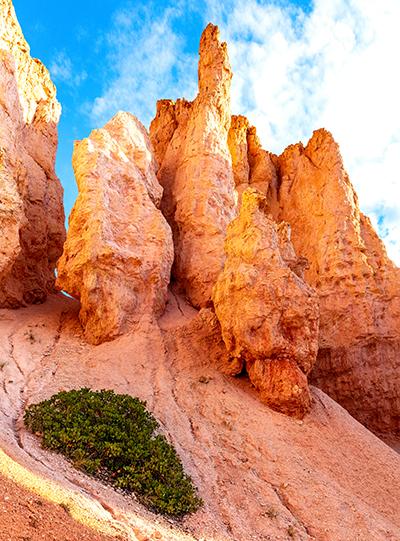
Strange geology, Bryce Canyon National Park / Rebecca Latson
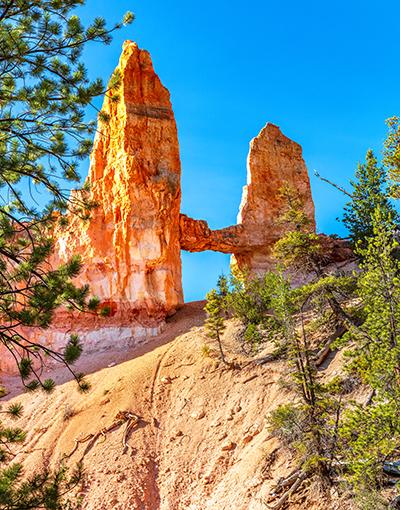
Tower Bridge, Bryce Canyon National Park / Rebecca Latson
After you reach your destination, either continue along the trail or head back up to the Rim Trail. If you choose to return to the top, don't put your camera away. You'll see things you missed while hiking down, revealed under different lighting conditions due to the sun's angle and your direction of travel.
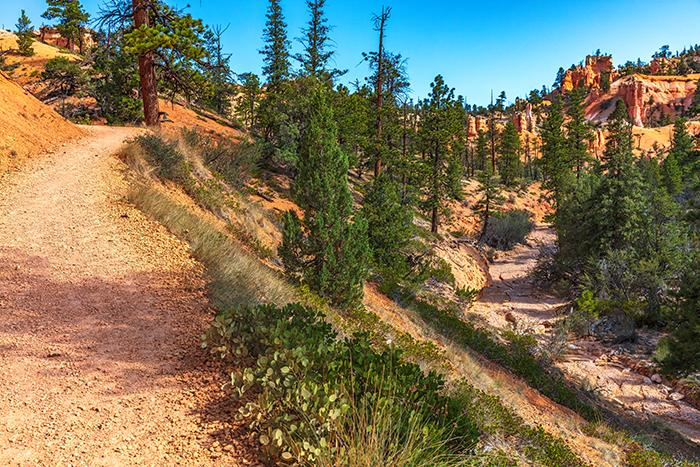
Dry trail, dry wash, Bryce Canyon National Park / Rebecca Latson
For the photo above, note the trail placement. Not only is the leading line technique used, but also the rule-of-thirds technique, by placing the trail to the side of the photo instead of in the middle. Little things like this add interest to the shot and your viewer will spend more than a mere glance at your image.
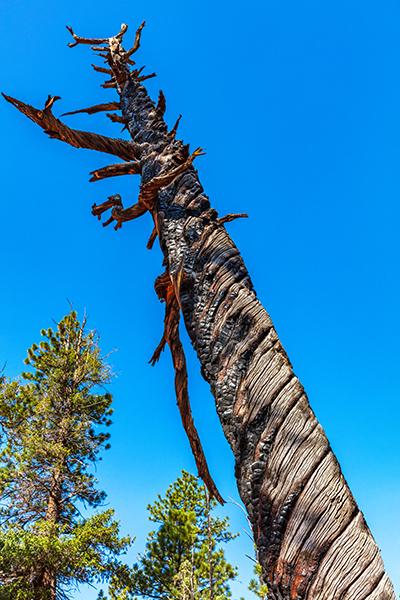
Twisted and charred by a lightning strike, Bryce Canyon National Park / Rebecca Latson
I'd missed this tree on the way down, but noticed it on my return hike to the top. A lightning strike had apparently zapped this tree with its interesting bark striping. In addition to capturing the charred and twisted bark, I also framed the tree diagonally, bottom to top.
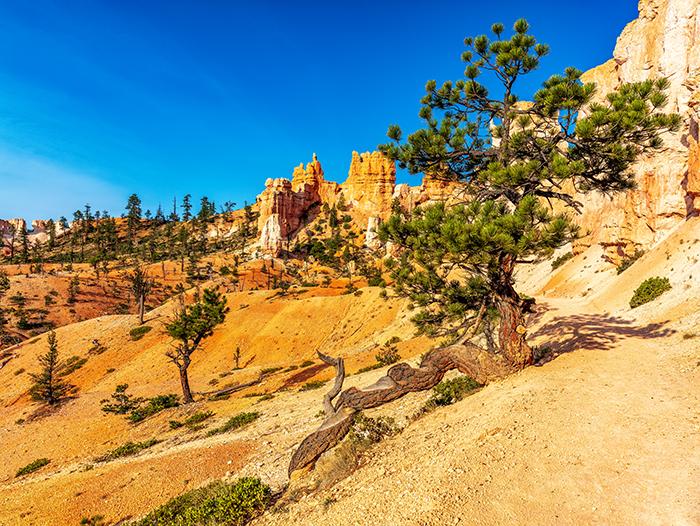
Twisted tree along the trail back up, Bryce Canyon National Park / Rebecca Latson
I'd seen this twisted tree during the hike down, but the angle of the sun left the tree in deep shadow with very bright backlighting. So, I photographed this interesting tree during my return hike up to the Rim Trail, placing my subject to the side of the composition and making certain I captured the entire twisting trunk, top to bottom.
Although I did not finish the entire loop, I hope the images you see here will be enough to get you started on your own further photographic adventure. I overheard one returning hiker tell another hiker just starting out: "The view gets better and better with each step you take." I agree 100 percent, not only for the Fairyland Trail, but for every trail in Bryce Canyon National Park.



 Support Essential Coverage of Essential Places



Comments
I saw a little of Bryce many years ago. At that time wasn't prepared to hike & explore. Your beautiful photos and descriptions greatly encourage me to go back and really SEE Bryce Canyon NP. Thank you so much for your article, and the time it takes to produce these for us. Wondeful job!
Another good guide. I save all of them and print out to take with us when we go. Can't wait for the next one!
Thanks again, Rebecca, for a great article and photos.
One of the very best things about Bryce is that it's almost impossible to take a bad photo there. If you do, you really have to work at it. So even us duffers have a chance of nearly matching your work.
Thanks so much for all of your kind comments, everybody. They are much appreciated and I hope they do, indeed, encourage you to get out in this incredible national park for some hiking and photography.