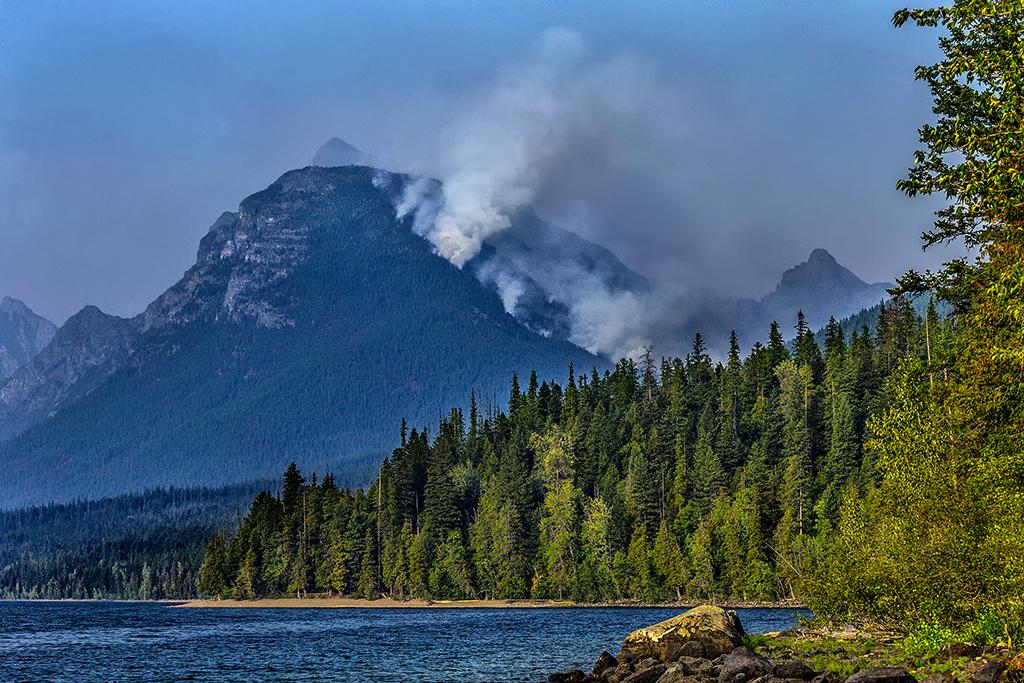
A telephoto view of the Sprague Fire, Glacier National Park / Rebecca Latson
I’m dating myself, I know, but the Platters’ “Smoke Gets in Your Eyes” was the perfect title for this month’s article. You see, the majority of you will visit a national park during the summer and early autumn months, due to work and school considerations, not to mention wanting good weather for your travels. While you already know and have planned for crowds during those months, you might not have factored another issue into your national park visit which might throw a kink into what you can see and photograph: smoke from forest fires.
I never thought much about this until I made an early autumn trip to Glacier National Park during the year of the Sprague Fire (2017). I had no earthly idea just how much the smoke would limit my landscape views. They even closed a portion of Going-to-the-Sun road, at one point, because of the spreading fire and smoke hazard.
During my move from Texas to central Washington in 2018, I once again experienced smoky skies in Grand Teton National Park, as well as along the North Rim of Grand Canyon National Park.
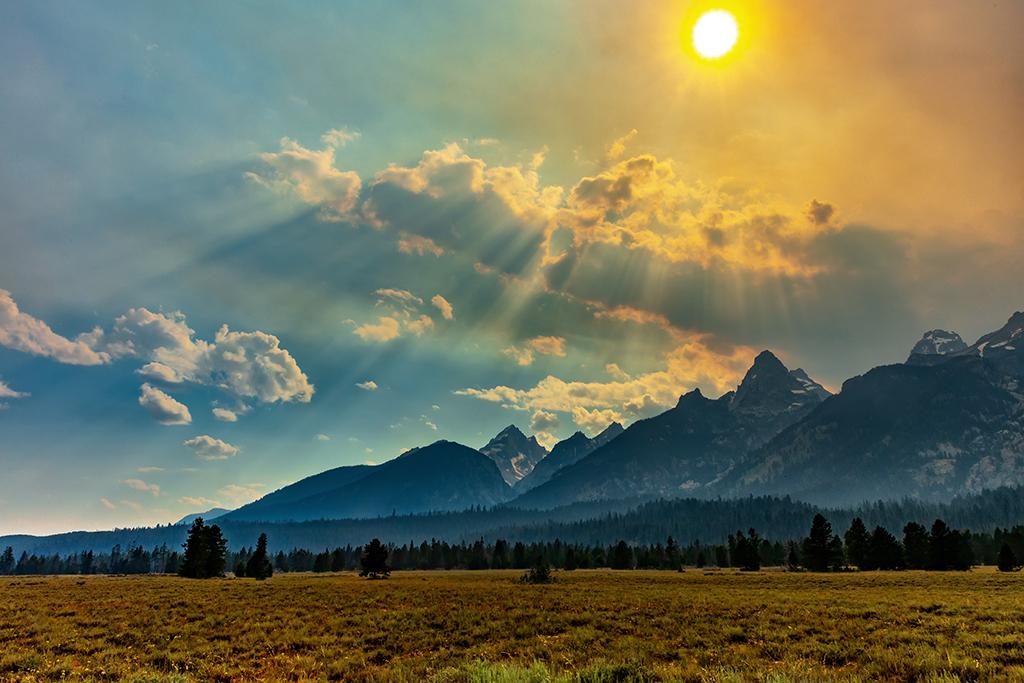
Evening smoke from the forest fires, Grand Teton National Park / Rebecca Latson
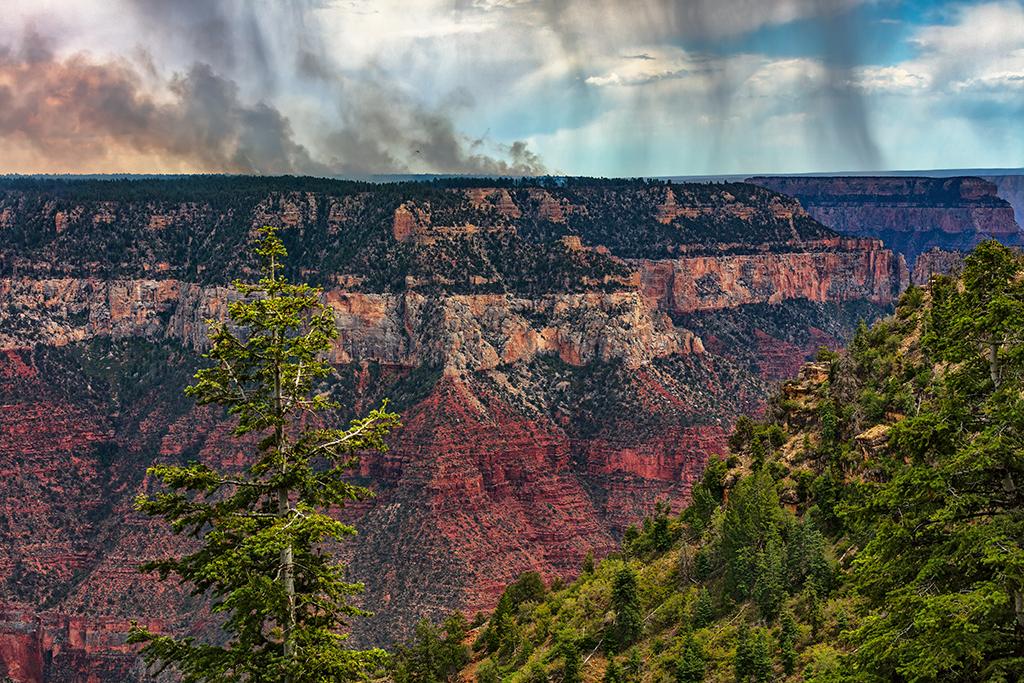
Forest fires and summer monsoons along the North Rim, Grand Canyon National Park / Rebecca Latson
While the thick haze did throw a spanner into my scenery shots, it didn’t prevent me from still capturing great photos within these parks. Forest fire smoke shouldn’t stop you, either, but you should keep expectations to a minimum so you won’t be disappointed when you realize you might not be able to get that wide-angle composition seen from a particular view area. Think of smoky skies as a photo challenge to help improve your compositional (and editing) prowess. As an acquaintance once told me: “there are always options.” While I might not get the exact shot I planned on, I can at least start thinking about existing alternatives regarding photography in that particular national park. Of course, even with alternatives, I honestly won’t know what kind of photo ops to expect until I wander the area, myself. In this month’s article, I want to provide you with some tips and ideas to help you get WOW-worthy photos regardless of any forest fire haze which might confront you during your national park travels.
With every photo trip I plan, I always check the weather conditions, fire probability conditions, and I even look at the scenes from available park webcams. This gives me a good idea of what I may or may not be able to see upon arrival.
Note: some of the images you see here have been published in previous articles I’ve penned for the Traveler. In this article, I want you to take a closer look at these photos and think about how I used the smoke to my advantage. Look also at what I photographed in lieu of the wide-angle shots I really wanted but was unable to achieve due to thick smoke masking the distant scenery.
If you are within telephoto lens view of a forest fire, try incorporating that into a few of your shots for some dramatic imagery, like the shot at the top of this article. I was quite a distance away, on the southeastern shore of Lake McDonald, but my 100-400mm telephoto lens brought the drama of the fire in close.
You might also try getting some wide-angle landscape shots incorporating the fire. For instance, I was standing on the southern shore of Lake McDonald, waiting for sunrise, I could see in the distance the bright orange speck of the Sprague Fire. The dark blue line of haze from the fire provided a nice background highlighting that speck of flame on the mountain and its reflection in the mirror-smooth lake water. The morning sunlight brightened the sky above and everything else remained silhouetted. That one bright speck of orange embedded within the smoky haze that hid much of the mountain scenery told a story in and of itself.
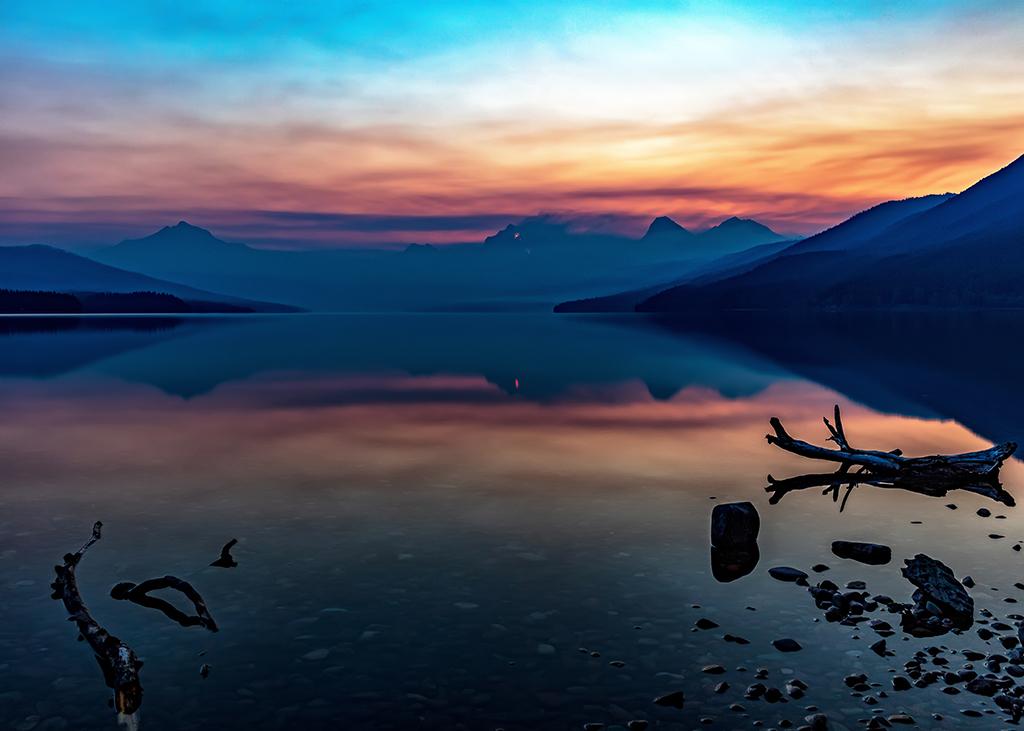
A forest fire sunrise at Lake McDonald, Glacier National Park / Rebecca Latson
Speaking of sunrises (and sunsets), smoky skies create a great reflective background for the play of light and color from a sunrise or sunset. That same smoke also screens out much of the blindingly bright light to allow you and your camera intense views of the resulting red-gold-orange orb floating in that hazy sky.
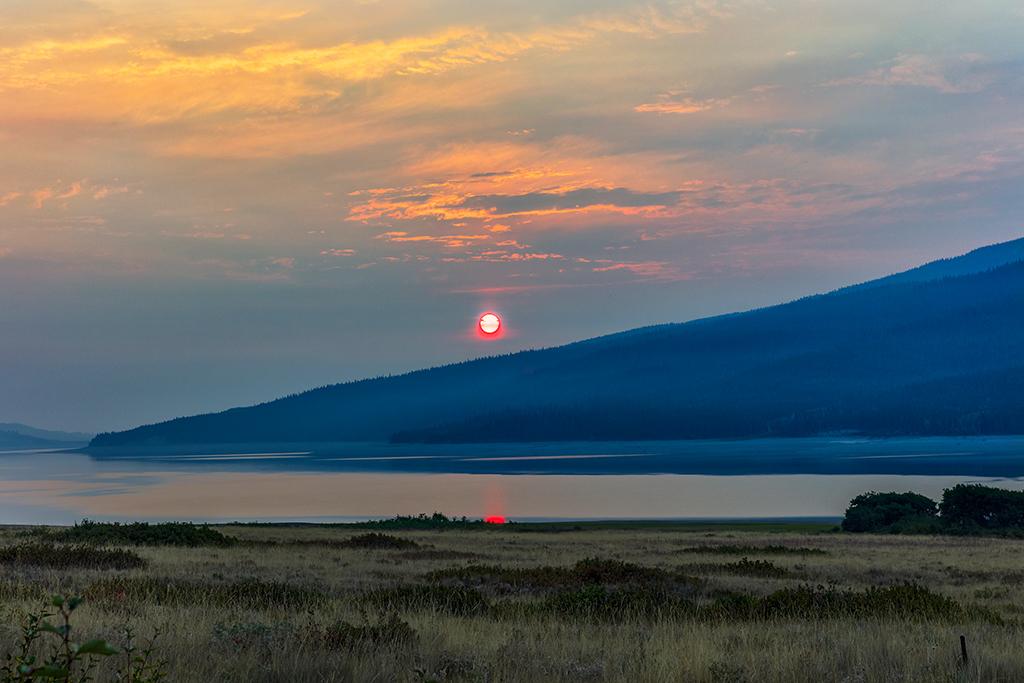
A smoky sunrise over Lake Sherburne, Glacier National Park / Rebecca Latson
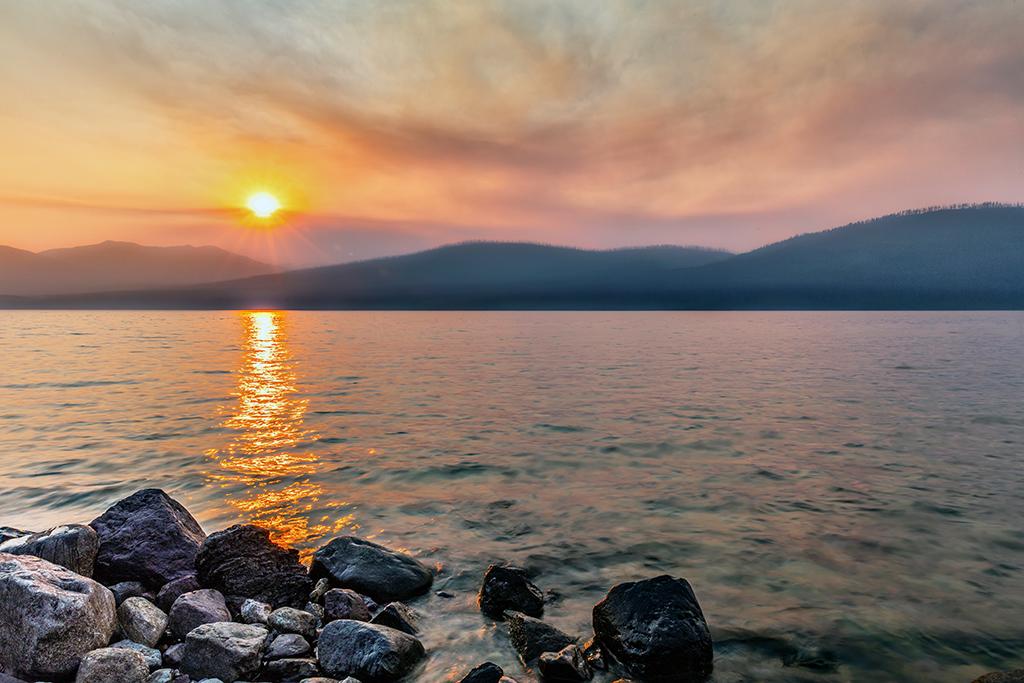
A smoky sunset over Lake McDonald, Glacier National Park / Rebecca Latson
In addition to capturing a wide-angle shot or two, use your telephoto lens to zoom in on that circle of sun, the colorful sky, and the silhouetted mountains, trees, or rock formations. The telephoto compression effect of things in the background becoming larger and "compressed" creates some dramatic imagery.
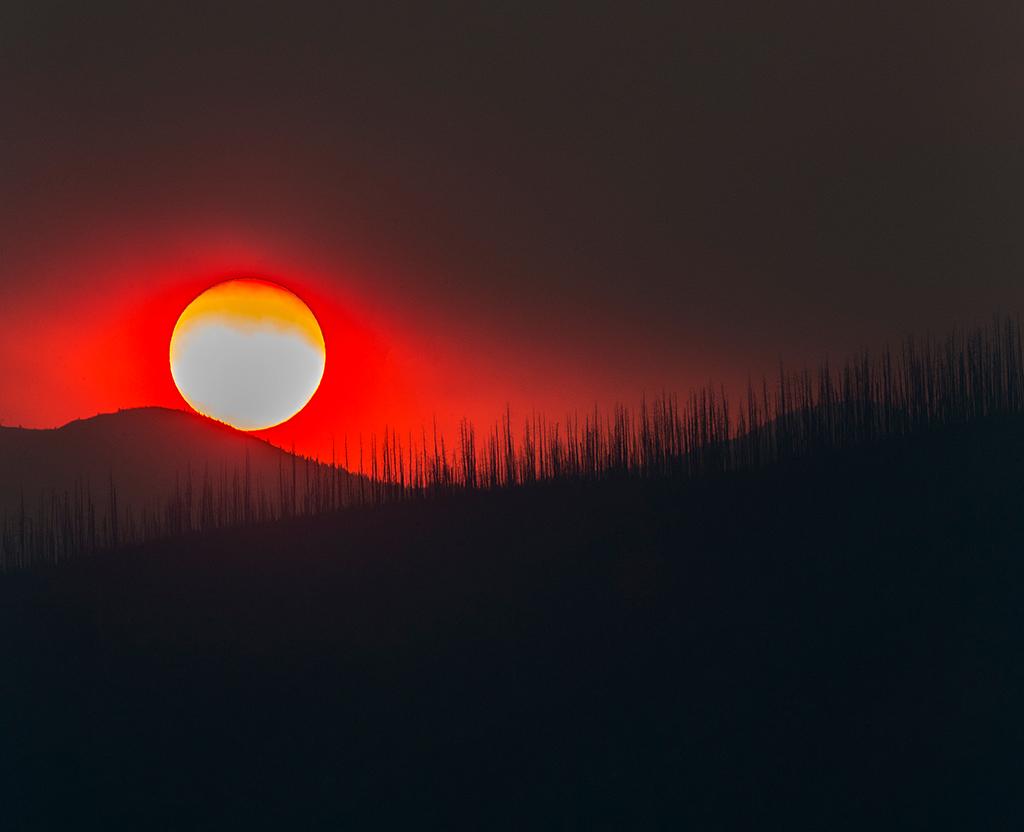
A telephoto sunset, Glacier National Park / Rebecca Latson
Include images of the overall smoky scenery in your national park photo album. Those shots create an interesting dichotomy between what the landscape normally looks like versus what it looks like during a powerful environmental event such as a forest fire. For example, while navigating Going-to-the-Sun road from Lake McDonald to the Logan Pass Visitor Center, the smoke continued to thicken, and I just managed to make it up the road before park staff closed the route between Avalanche and Logan Pass. Those of us already on the road were permitted to continue up to the visitor center but were not allowed to turn around and return to the west side. I stopped at the Loop to photograph the dramatic appearance of the valley below me, or rather, what little I could see of it, to show viewers a part of my experience.
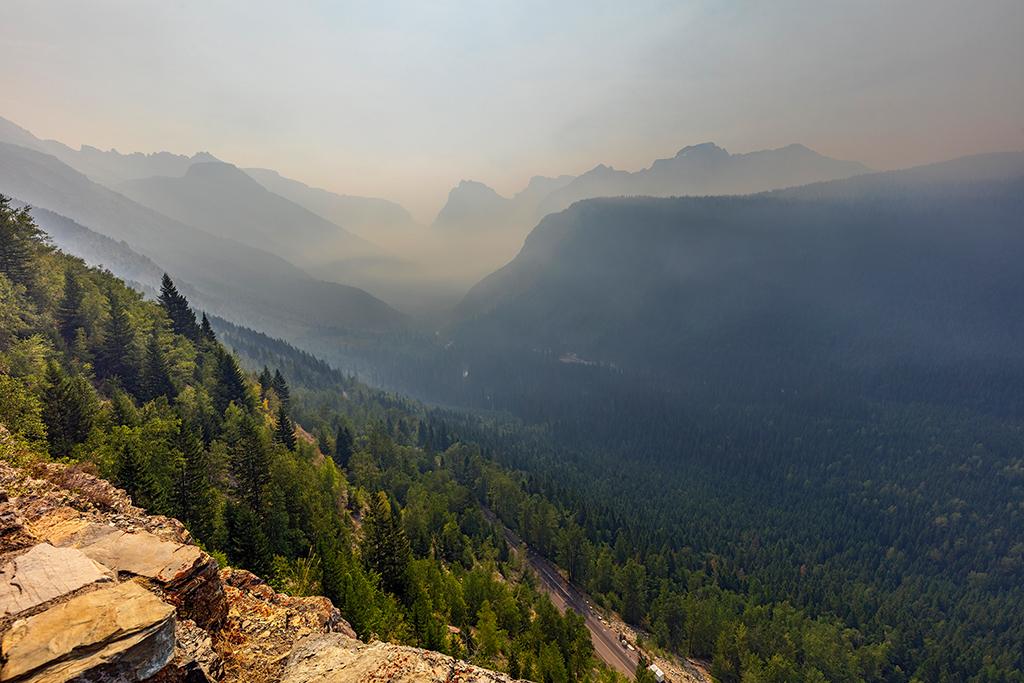
The smoky valley below, Glacier National Park / Rebecca Latson
Smoke can make a landscape look ethereal or eerie. As I stood on a large rock formation at the Wizard Island view area at Saint Mary Lake, I watched the smoke from the Sprague Fire slowly roll through the valley, blotting out the distant scenery.
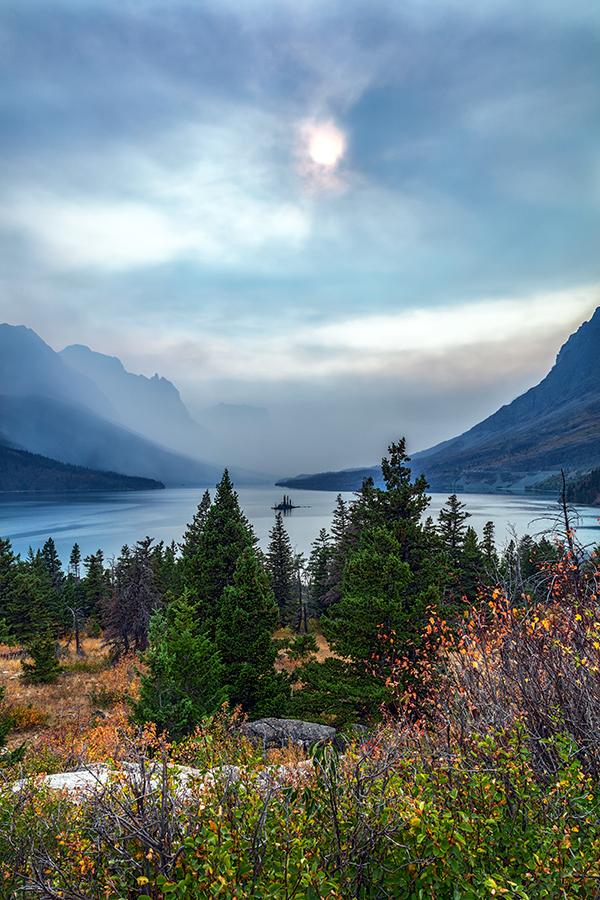
A smoky late-afternoon view at Saint Mary Lake, Glacier National Park / Rebecca Latson
Now, that photo above looks pretty cool in color, but to highlight the structure and texture of the smoke, I also converted the image from color to monochrome. Black and white shots accentuate texture, pattern, and shading. You might not be able to achieve a bright, clear, crisp color rendering of a scene obscured by forest fire smoke, but you’ll be surprised how interesting that same scene becomes when a monochrome conversion reveals hidden details and those nuances between light and shadow.
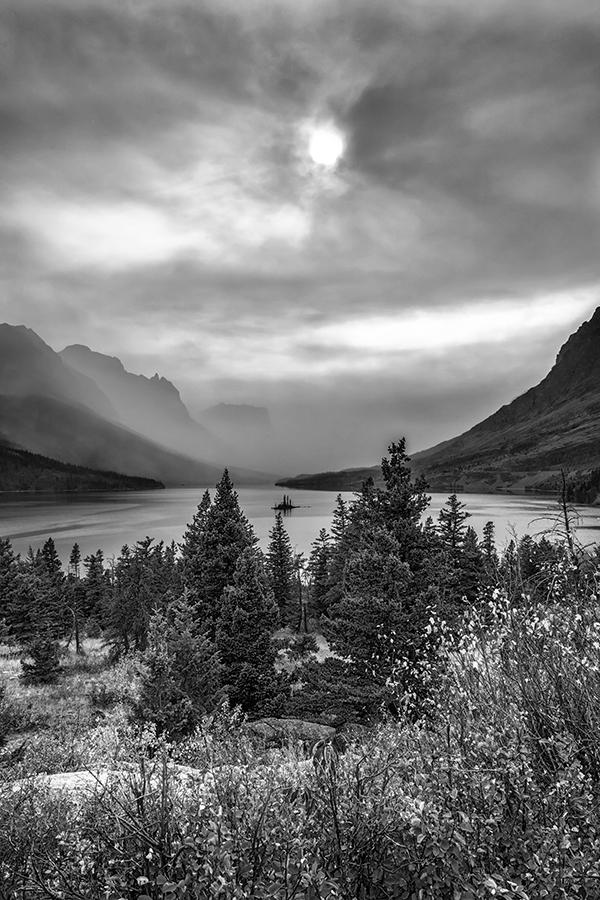
A smoky late-afternoon view of Saint Mary Lake in monochrome, Glacier National Park / Rebecca Latson
There were some days during my stay in Glacier when the mountains in the distance were completely concealed behind the curtain of thick smoke that had traveled from the west side over to Many Glacier, where I spent quite a bit of time. Even the nearby atmosphere was a bit murky. During those days, I focused my lens on photo ops that didn’t require a view of the sky, such as the moose in Fishercap Lake and the bright yellow butterflies on the lavender wildflowers. Focusing on things other than wide-angle landscapes also flesh out the story of your national park stay.
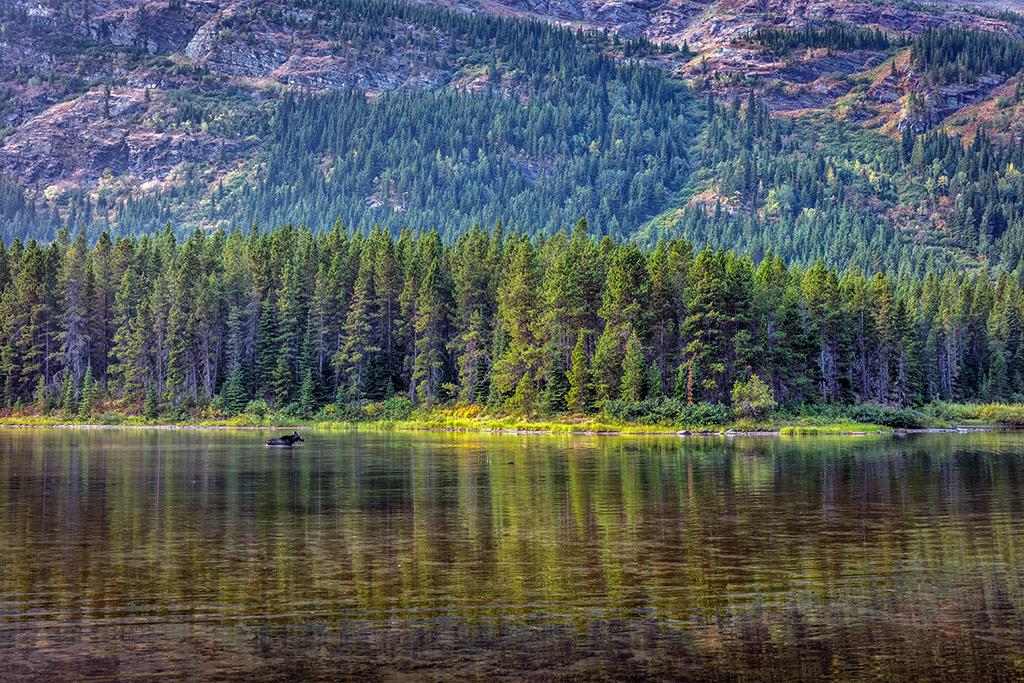
A moose in the lake, Glacier National Park / Rebecca Latson
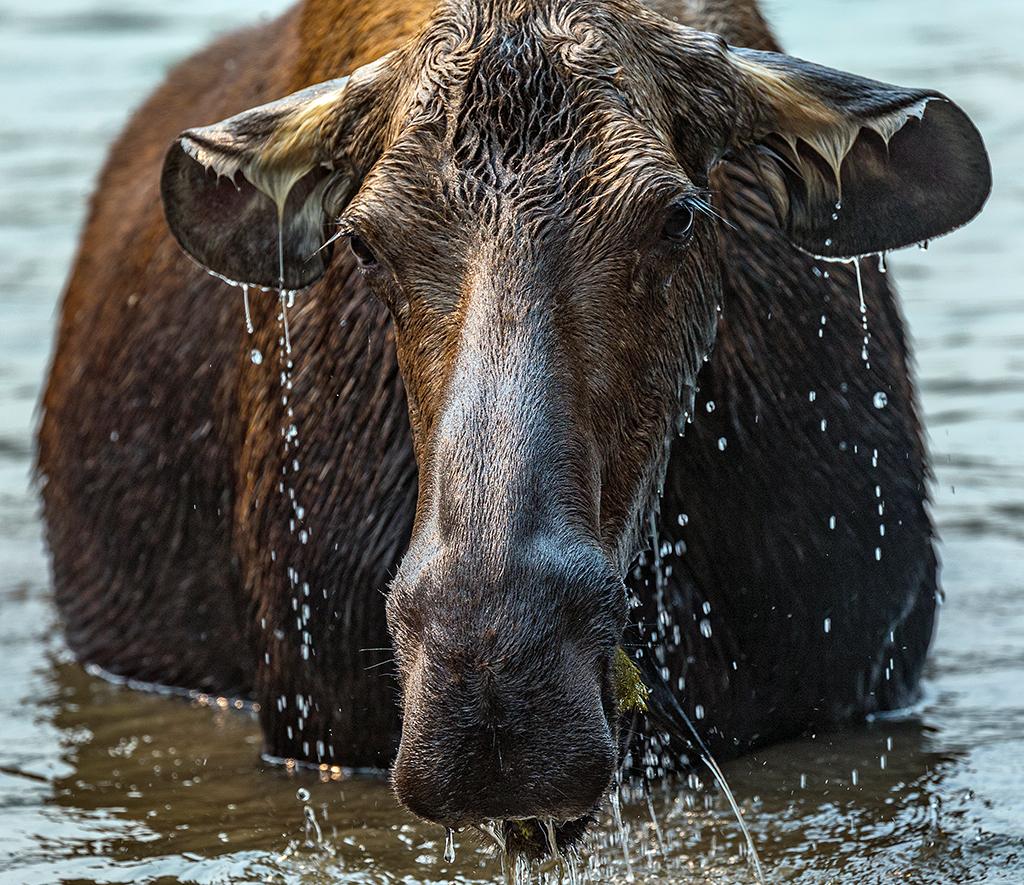
A moose cow in Fishercap Lake, Glacier National Park / Rebecca Latson
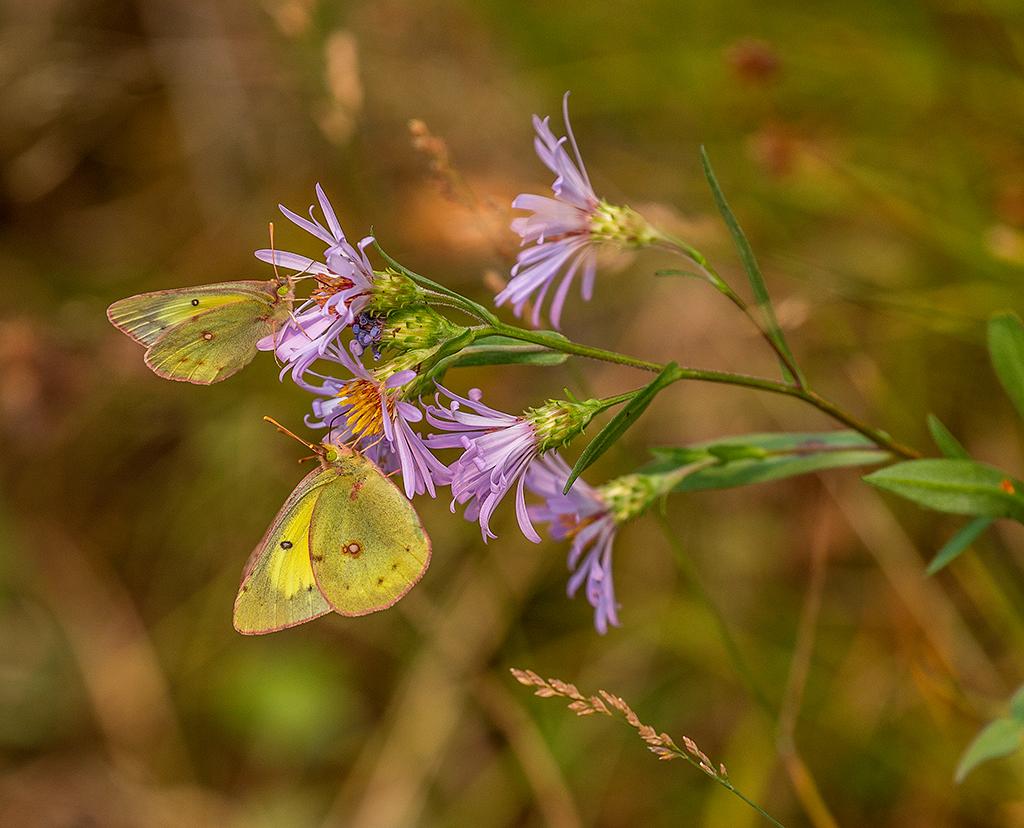
Yellow butterflies and lavender wildflowers, Glacier National Park / Rebecca Latson
As you review your photographs captured during a hazy day in the park, you might notice little round spots on the lighter portions of your images, especially against the background of the sky. These are called “sensor spots.” Among other things, smoke is comprised of particulate matter. These tiny bits of ash and other grains not only will make your photos look a little “noisy” (grainy), but if those of you using SLRs find yourself changing your lenses often, you might also end up with those particulates getting stuck to your digital camera’s sensor to create those bothersome spots on your photo. Most photo editing software offers some sort of removal tool to get rid of sensor spots. Adobe Photoshop has several different tools to use specifically for that purpose, and I can tell you they each work very well.
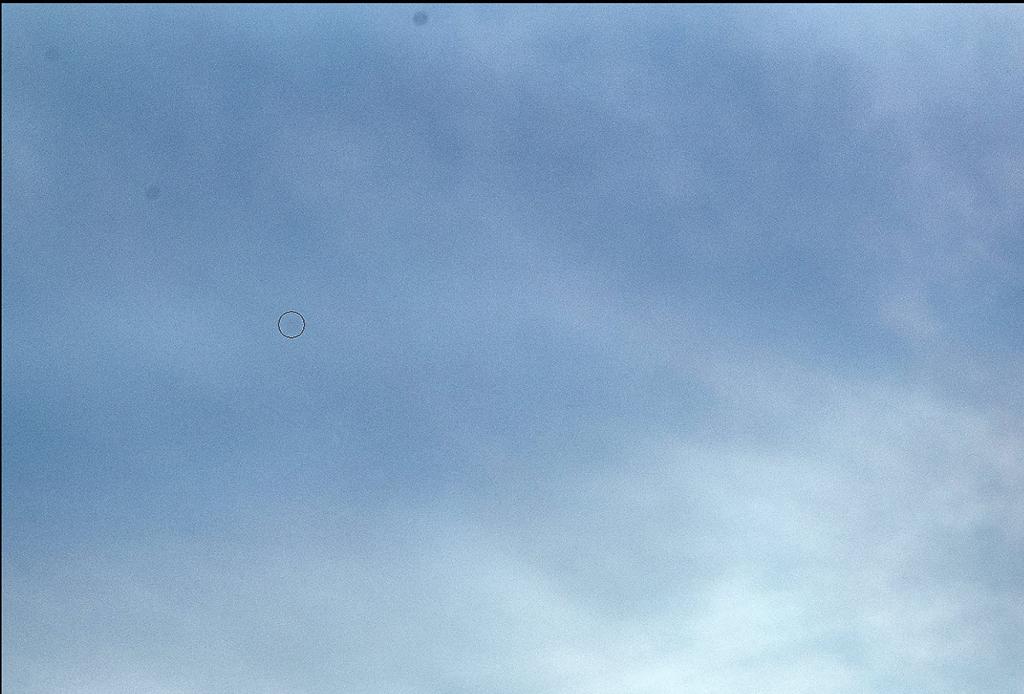
Sensor spots / Rebecca Latson
You can also tone down the graininess of those smoky images with noise-reduction software that may come included in your photo editor, or as plug-ins, such as Imagenomic’s Noiseware, Topaz Denoise AI, Noise Ninja, or any number of other great brands out there. I ran a Google search and pulled up a website listing the best noise reduction software (in their opinion, of course).
For the record, I know forest fires leave much destruction and devastation in their wake.The Australian fires are prime examples and it leaves me feeling so very sad for the people and the wildlife. I am not in any way glorifying that with photography. I also know, however, that a planned-and-paid once-in-a-lifetime trip to a national park brings with it the possibility of experiencing smoke from a forest fire, near or far. Don’t let smoky days in a national park ruin the enjoyment of your stay or deter you from using your camera. You may not be able to photograph what you expected, but using the suggestions in this article, you will still come away with awesome shots of your stay that tell a serious story at the same time.
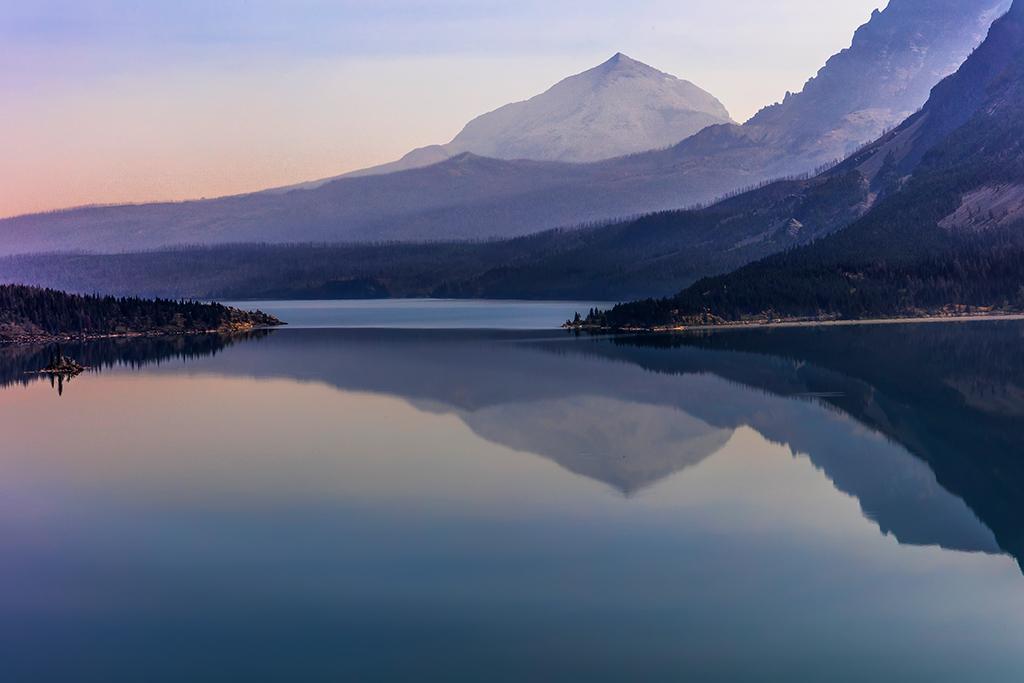
Saint Mary Lake reflections on a hazy day, Glacier National Park / Rebecca Latson


Comments
Excellent pix.
Stunning photos. Thanks for sharing.
Great photos/article. Thanks for all you do.