You are here

Observation And Composition

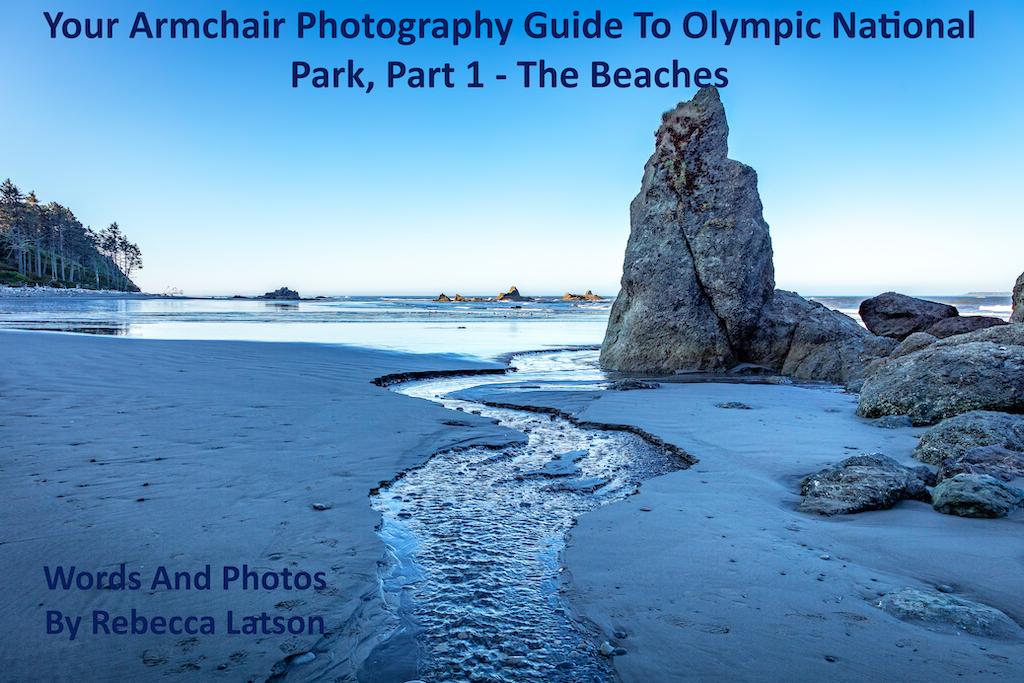
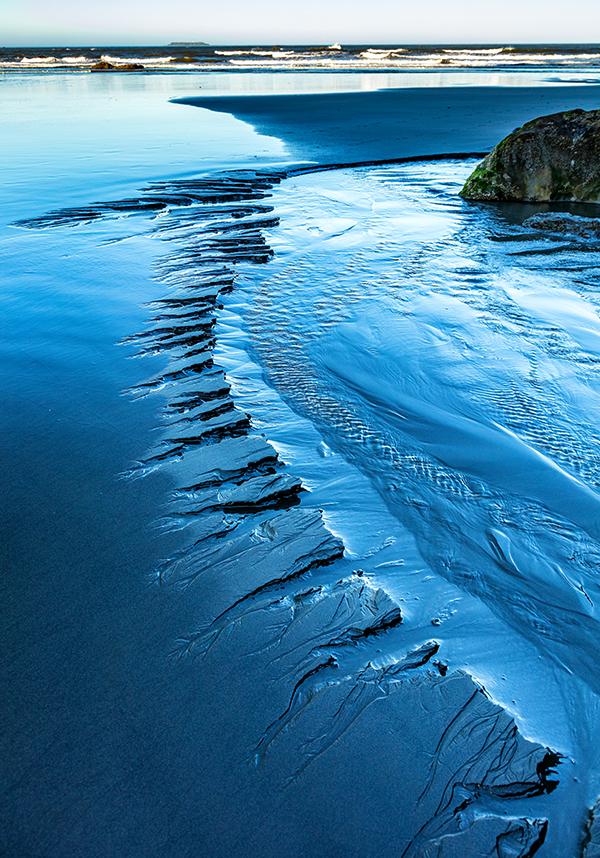
Rivulets and runoff at Ruby Beach, Olympic National Park / Rebecca Latson

Rivulets and runoff at Ruby Beach, Olympic National Park / Rebecca Latson

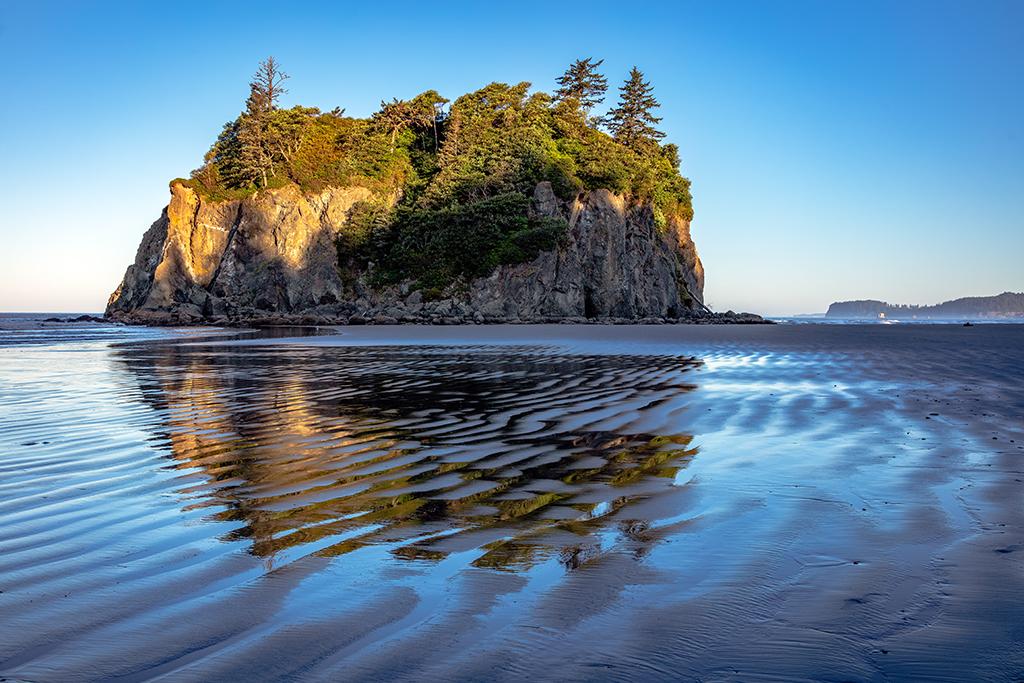
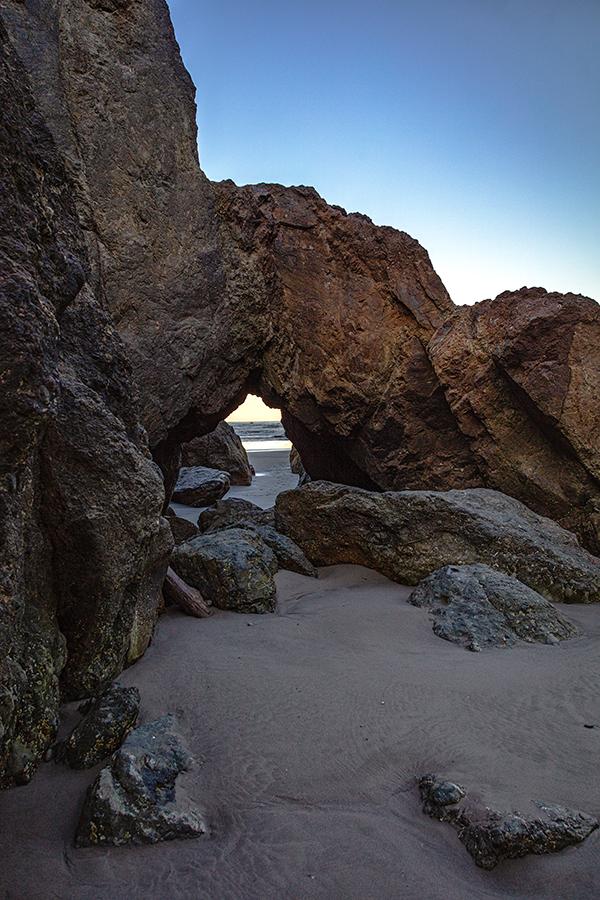
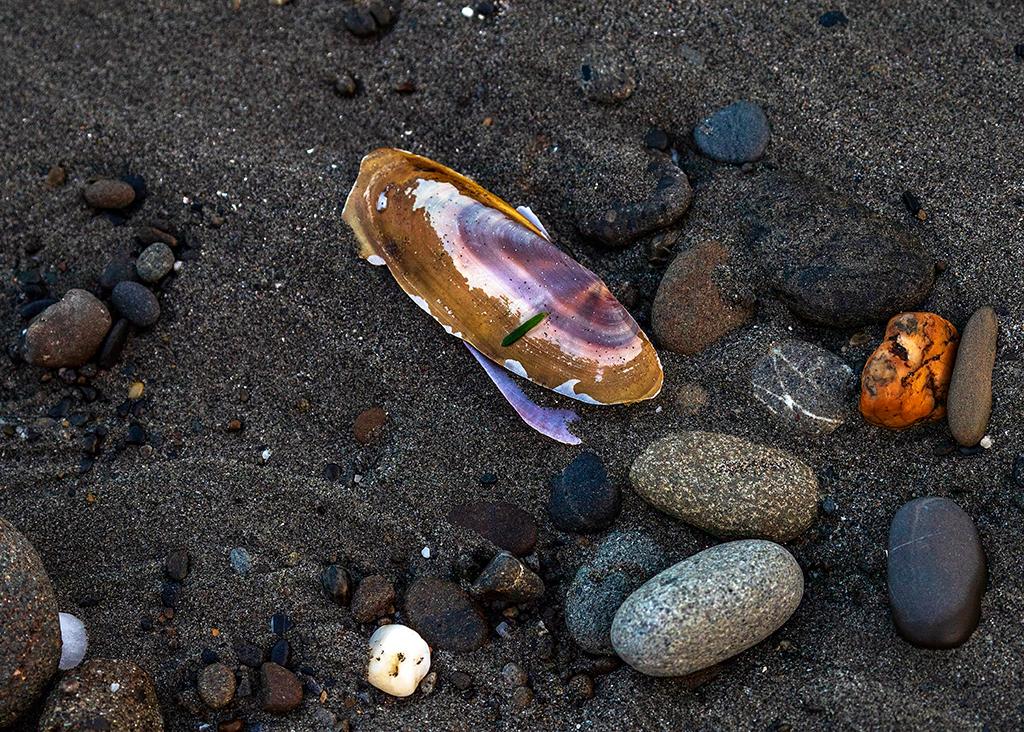
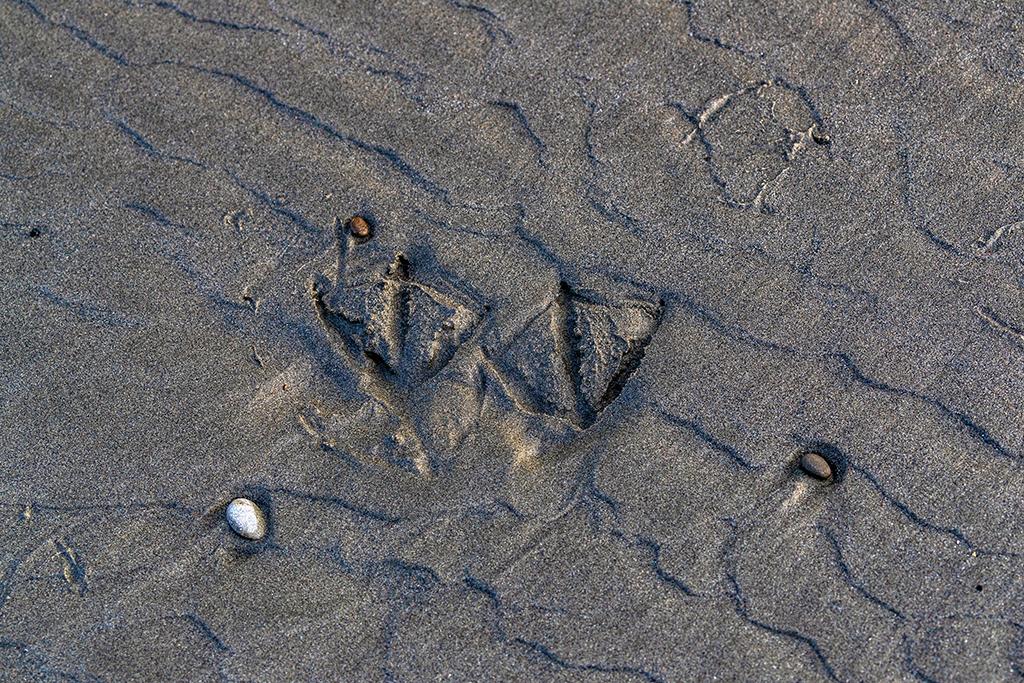
The key to a great composition is how well you observe your surroundings. Generally visitors will see just the overall landscape upon initial arrival at Olympic's beaches and get plenty of wide-angle shots but maybe not much else. Remember that many things come together to make up that beach scenery and you should flesh out your national park photographic story by looking for those parts constituting the whole. With your camera and powers of observation, explore the landscape for such things as patterns and texture in the sand, such as rivulets and ripple marks. Use parts of the sea stacks and rock outcrops as natural frames. Photograph interesting reflections in the pools of seawater on the sand. Look for little things like seashells, crab carapaces, and bird prints in the sand.

As you photograph these things, you might notice that your bright background is a bit overexposed. In that case, pull out your graduated neutral density (grad ND) filter to keep those lighter parts of your image from blowing out while you expose for the darker foreground beach and rocks. What's a grad ND? It's a circular, square or rectangular piece of glass or resin, half clear and half shaded that can be attached (or handheld flush) in front of a camera lens. A grad ND comes in handy for scenes with very obvious differences between the bright light above the horizon versus the darker foreground below the horizon, such as the bright sky above the darker ocean and sandy beach. Online sites like bhphotovideo.com and adorama.com have a wide variety of grad ND filters to fit every size of lens. 

Abbey Island reflections, Ruby Beach, Olympic National Park / Rebecca Latson

Abbey Island reflections at Ruby Beach, Olympic National Park / Rebecca Latson

A tiny view of the morning sea through a small arch, Ruby Beach, Olympic National Park / Rebecca Latson

A tiny view of the morning sea through an arch at Ruby Beach, Olympic National Park / Rebecca Latson

Beach detritus, Kalaloch Beach, Olympic National Park / Rebecca Latson

Detritus, Kalaloch Beach, Olympic National Park / Rebecca Latson

Flipper prints in the sand, Olympic National Park / Rebecca Latson

Flipper prints in the sand, Olympic National Park / Rebecca Latson

Creating Sunbursts

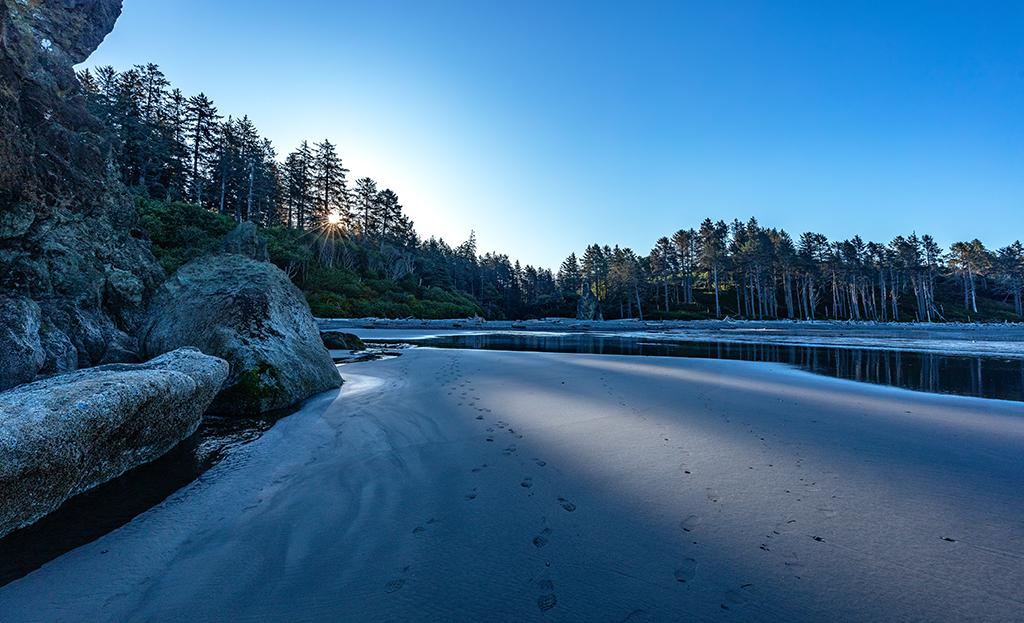
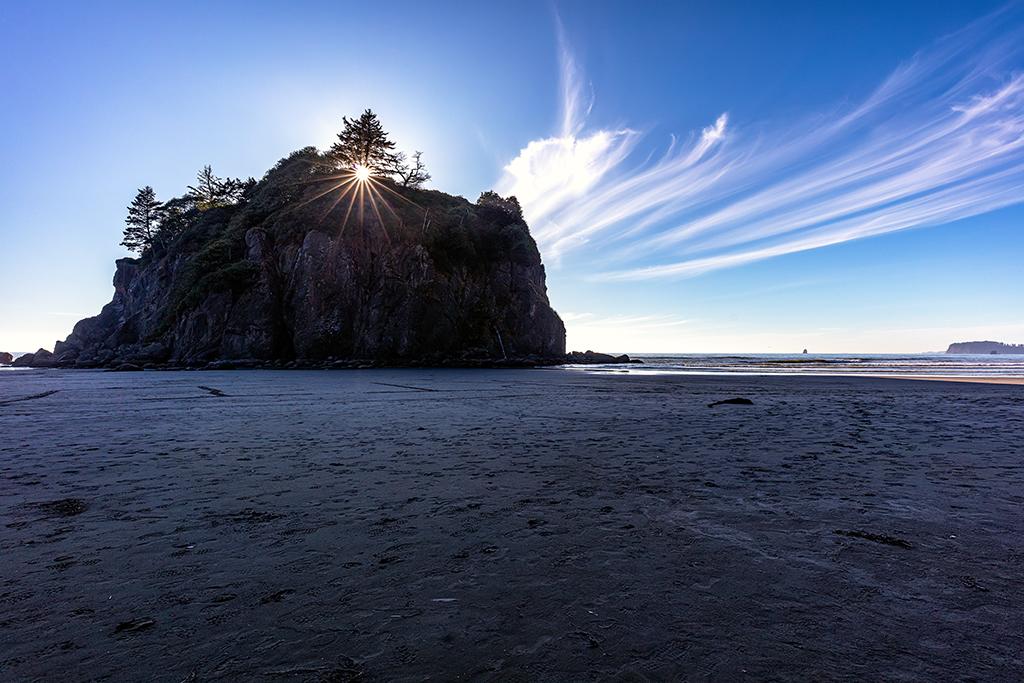
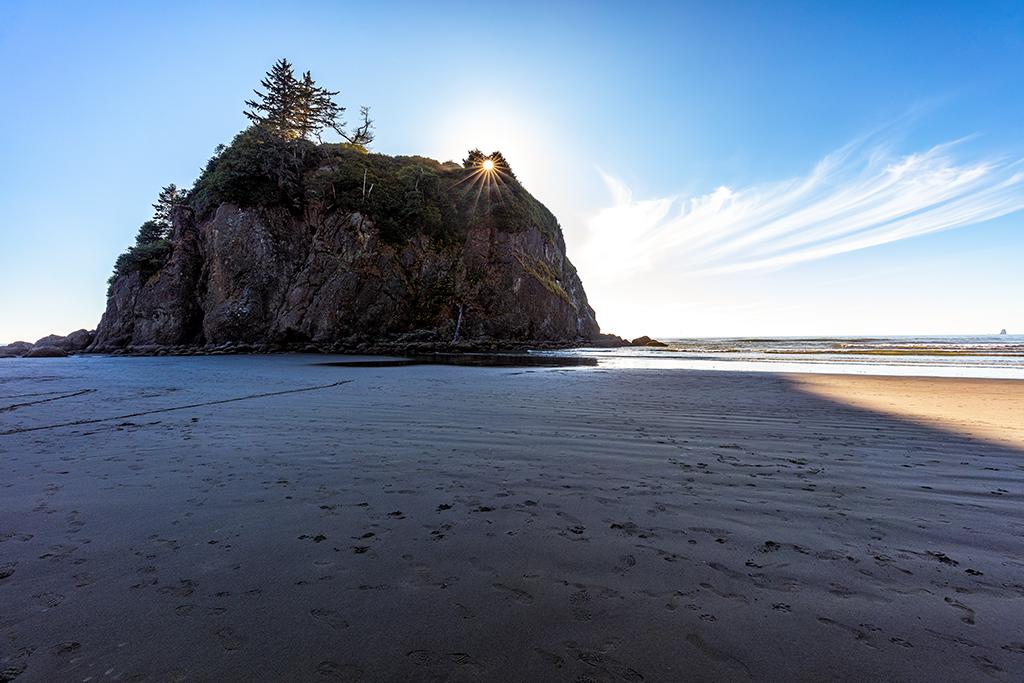
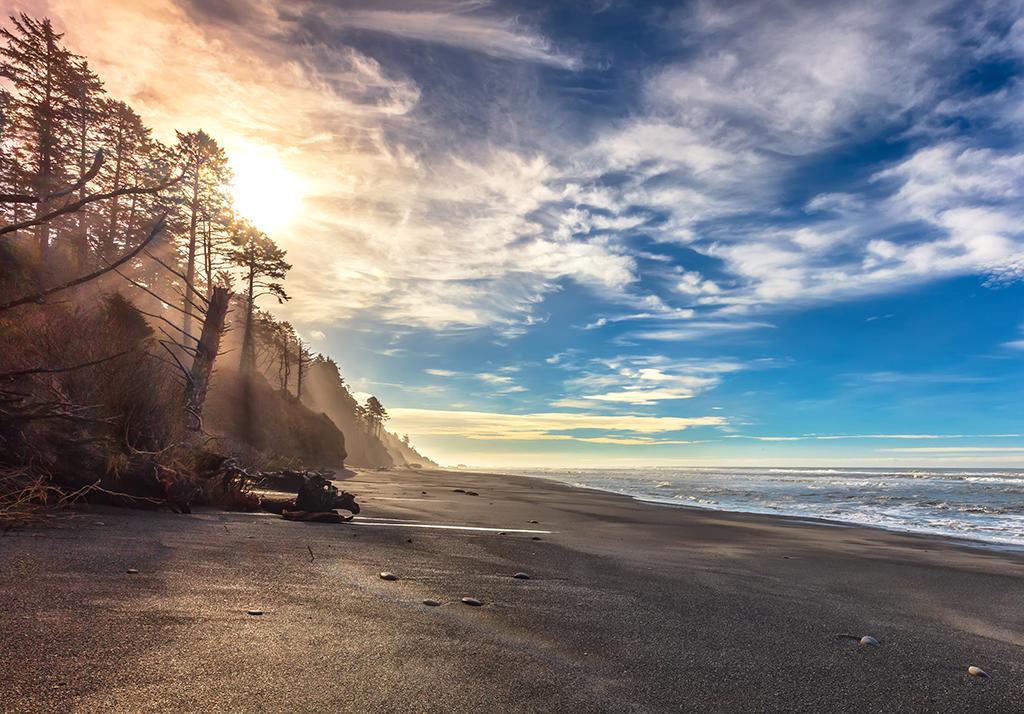
While visiting the beaches during sunrise or shortly thereafter, point your camera toward any single points of sunlight you see peeking through the trees along the high bluff to achieve the sunburst effect by making your lens aperture very narrow (f/22) while maintaining other camera settings for a properly-exposed shot.  If you are visiting a beach with sea stacks, like Ruby or Rialto beaches, you can do the same thing a couple of hours prior to sunset, by looking for single points of sunlight through gaps in the rocks or between the trees atop the sea stacks like the images below of Abbey Island on Ruby Beach.

Sunburst over the bluff, Ruby Beach, Olympic National Park / Rebecca Latson

Sunburst over the bluff, Ruby Beach, Olympic National Park / Rebecca Latson

An Abbey Island sunburst, Ruby Beach, Olympic National Park / Rebecca Latson

An Abbey Island sunburst, Ruby Beach, Olympic National Park / Rebecca Latson

Another Abbey Island sunburst, Ruby Beach, Olympic National Park / Rebecca Latson

Another Abbey Island sunburst, Ruby Beach, Olympic National Park / Rebecca Latson

Photographing Sunsets

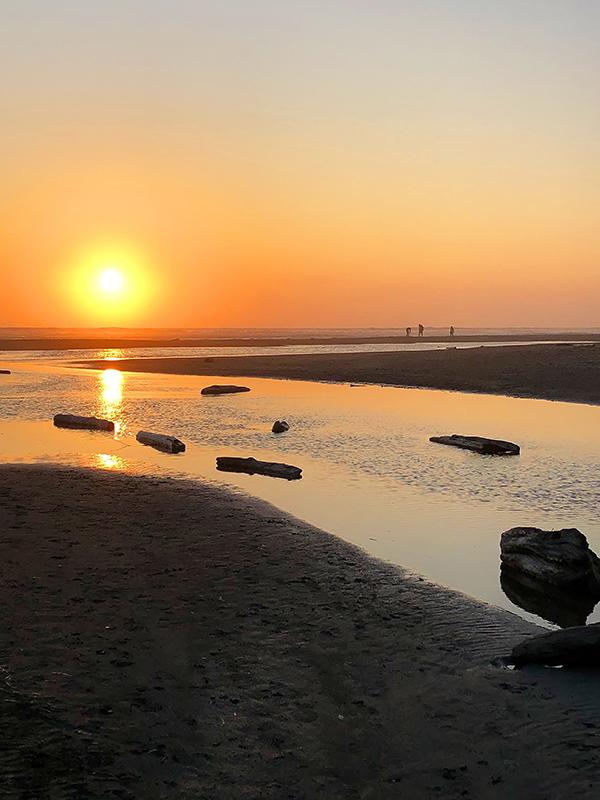
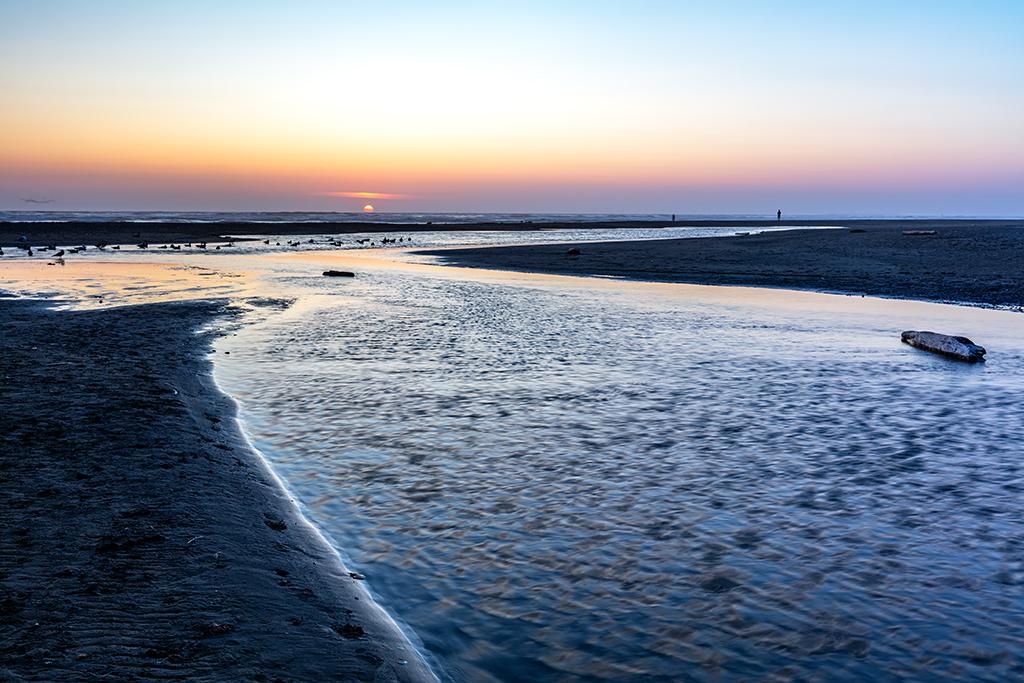
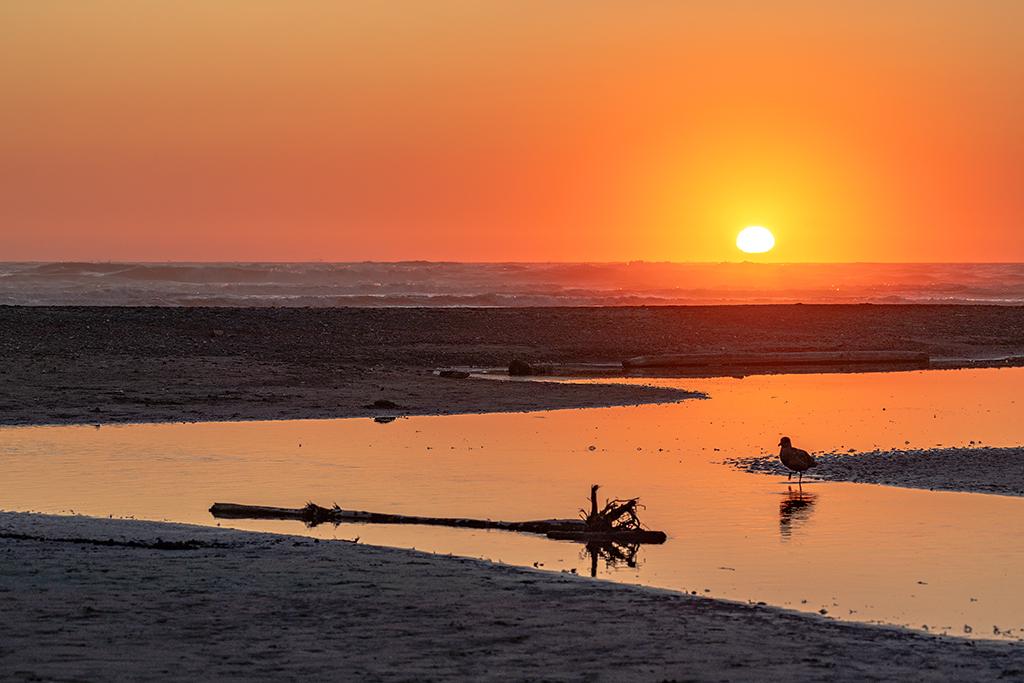
Sunrises tend to be pastel affairs if aiming your camera oceanward. Pacific Ocean sunsets, on the other hand, are quite showy, no matter which park beach you choose. Kalaloch Beach has no sea stacks to produce silhouettes against the brilliant sky, so instead, include interesting portions of the beach, such as Kalaloch Creek, or things you see on the beach, like driftwood, or even the silhouettes of people, while capturing that brilliant orange-red globe settling beneath the horizon.  

An iPhone shot of sunset at Kalaloch Beach, Olympic National Park / Rebecca Latson

An iPhone shot of sunset at Kalaloch Beach, Olympic National Park / Rebecca Latson

Sunset at Kalaloch Beach, Olympic National Park / Rebecca Latson

Sunset at Kalaloch Beach, Olympic National Park / Rebecca Latson

While you can handhold your camera for sunrise shots, you might want to use a tripod for those sunsets, because the landscape below the horizon line will darken sooner than the sky above the horizon line. You’ll definitely want to use a grad ND filter to prevent blowing out the area above the horizon. Those of you with smartphones can tap on a brighter portion of your viewfinder to darken the brightness a bit, or, you can try what a visitor from Boston did and use sunglasses in front of your phone camera lens. Hey, whatever works!
Photograph a "telephoto landscape" or two with your telephoto lens or telephoto setting on your point-and-shoot or smartphone to capture a more intimate sunset image.
A telephoto sunset at Kalaloch Beach, Olympic National Park / Rebecca Latson

A telephoto sunset at Kalaloch Beach, Olympic National Park / Rebecca Latson

As the sun continues to sink and the landscape darkens, keeping your camera on a tripod is highly recommended, as a slower shutter speed is needed to allow more light through the lens to your camera’s sensor. An added benefit to the slower shutter speed is what photographers call the “silky water” effect, about which I wrote in a previous Traveler article. Slow shutter speeds make moving water smooth(er) and satiny, creating a dreamy quality to images. This works well on Kalaloch Creek as it empties out into the sea.
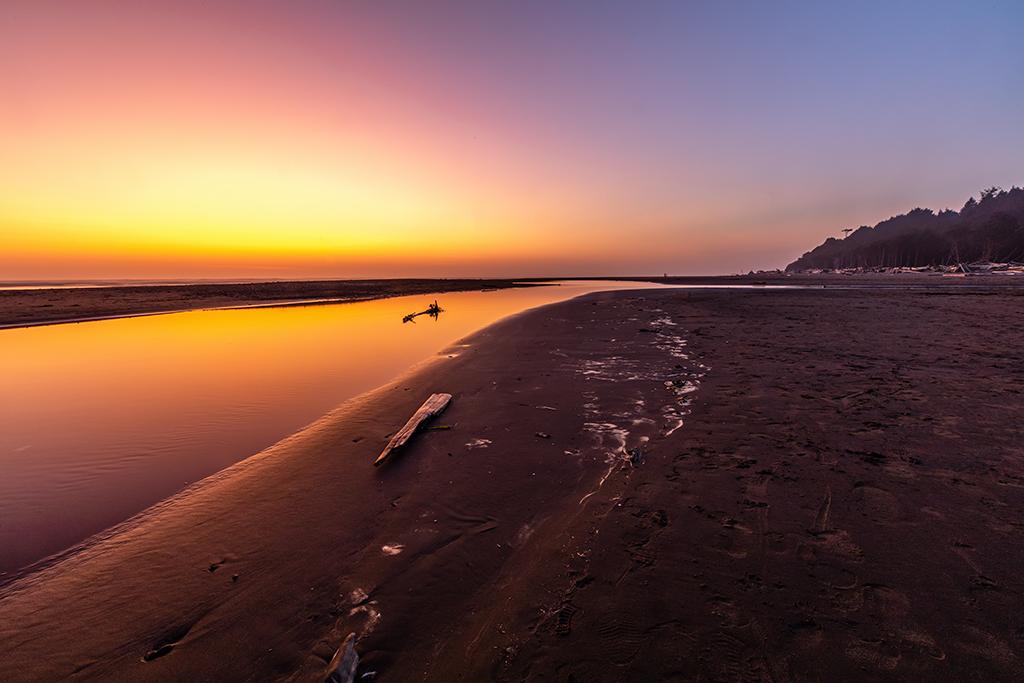
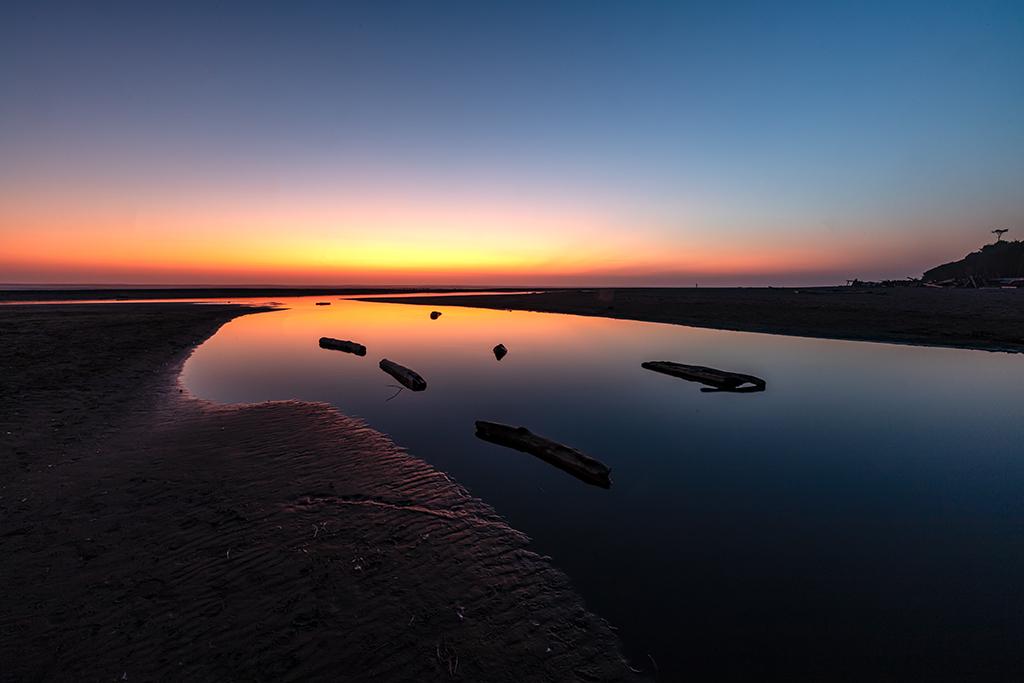
Sunset's afterglow at Kalaloch Beach, Olympic National Park / Rebecca Latson

Sunset's afterglow at Kalaloch Beach, Olympic National Park / Rebecca Latson

Kalaloch Beach afterglow, Olympic National Park / Rebecca Latson

Kalaloch Beach afterglow, Olympic National Park / Rebecca Latson

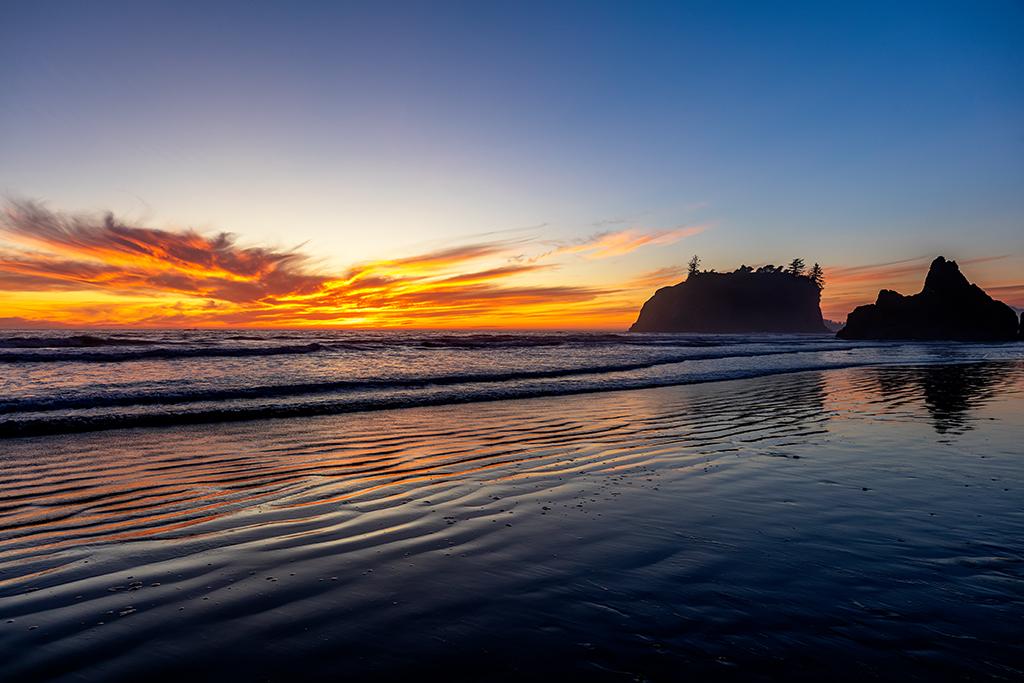
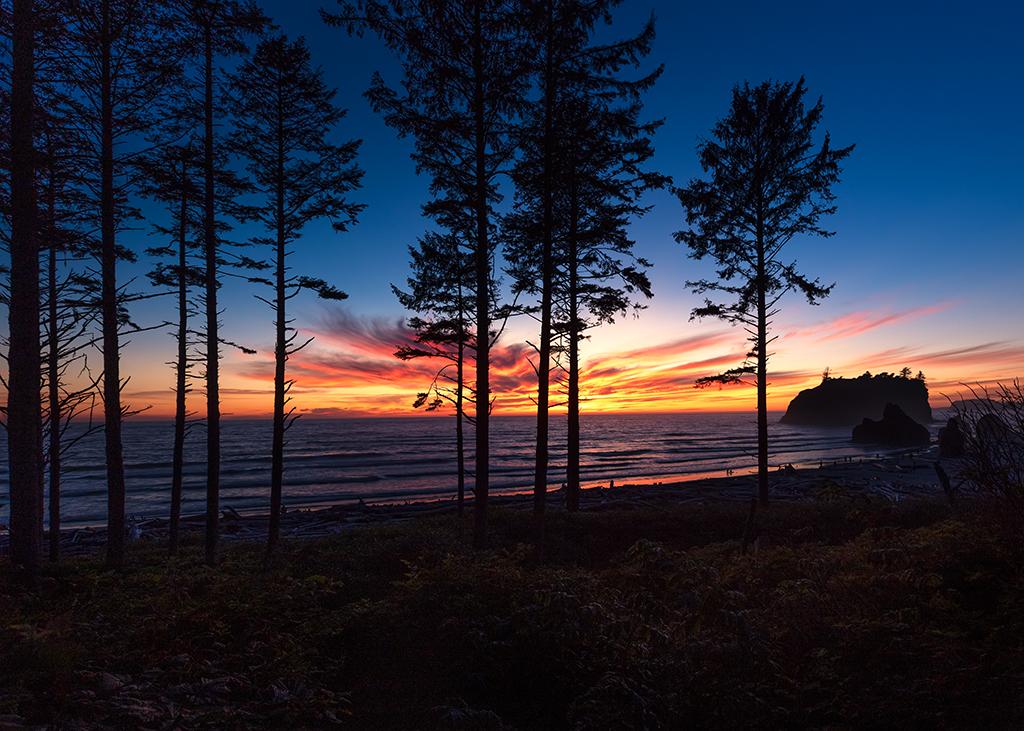
A Ruby Beach sunset is equally breathtaking, with the topography of sea stacks such as Abbey Island silhouetted against the blazing sky. Depending upon which month or season you visit, you'll want to keep track of where the sun sets in relation to this particular sea stack. Use a wide-angle lens (anywhere from 14mm to 35mm) or your point-and-shoot's wide-angle setting to capture the whole shebang.

A wide-angle sunset at Ruby Beach, Olympic National Park / Rebecca Latson

A wide-angle sunset at Ruby Beach, Olympic National Park / Rebecca Latson

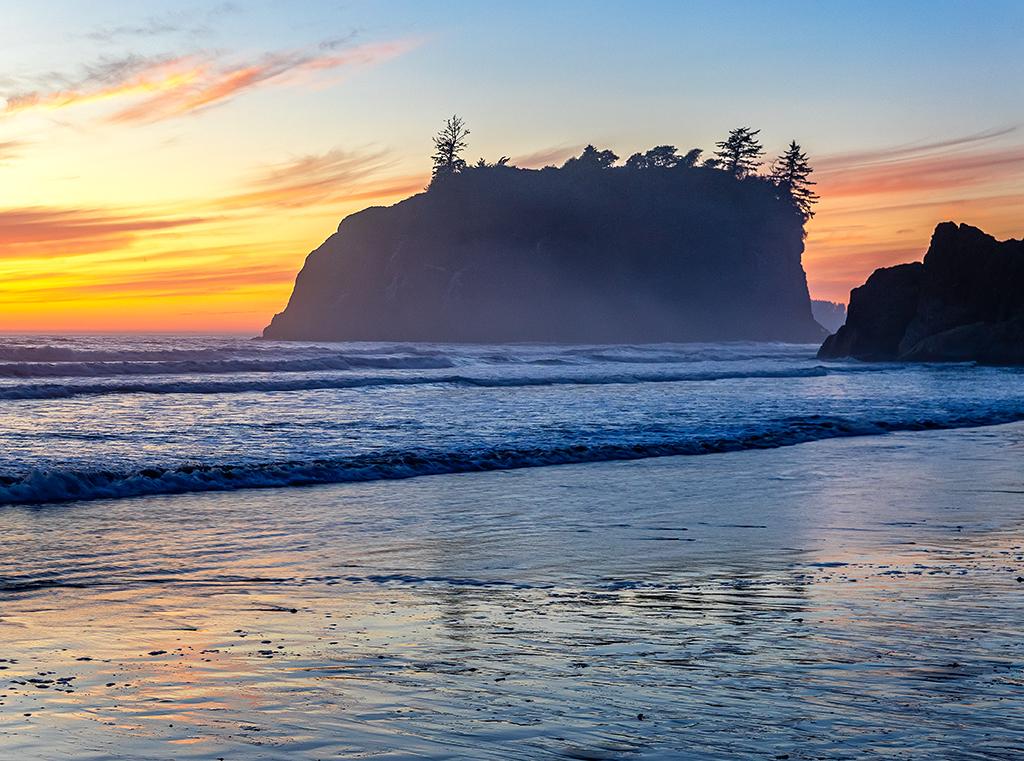
Then, use your telephoto lens or zoom setting on your point-and-shoot or smartphone for a closer look at the silhouetted sea stacks along the beach with the colorful sky in the background.

A telephoto sunset at Ruby Beach, Olympic National Park / Rebecca Latson

A telephoto sunset at Ruby Beach, Olympic National Park / Rebecca Latson

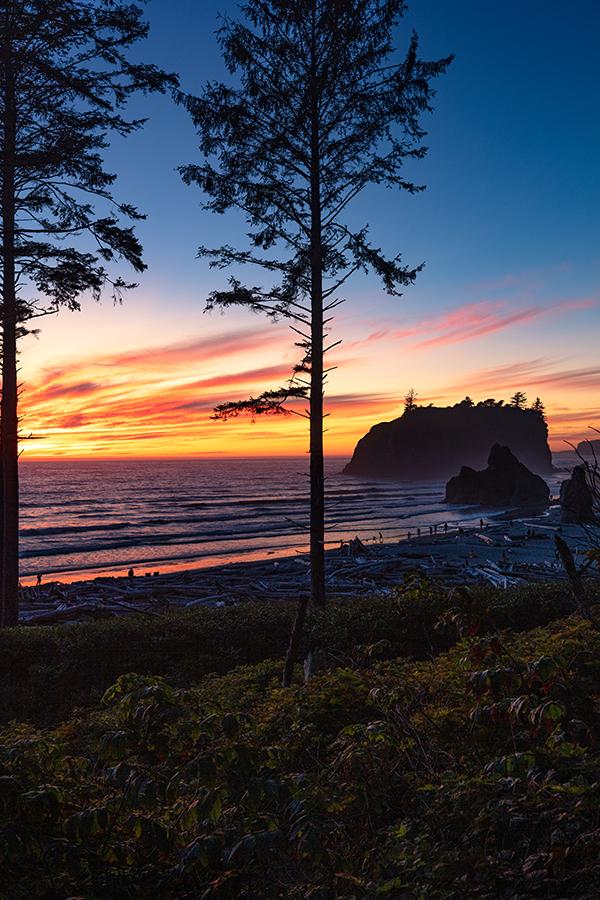
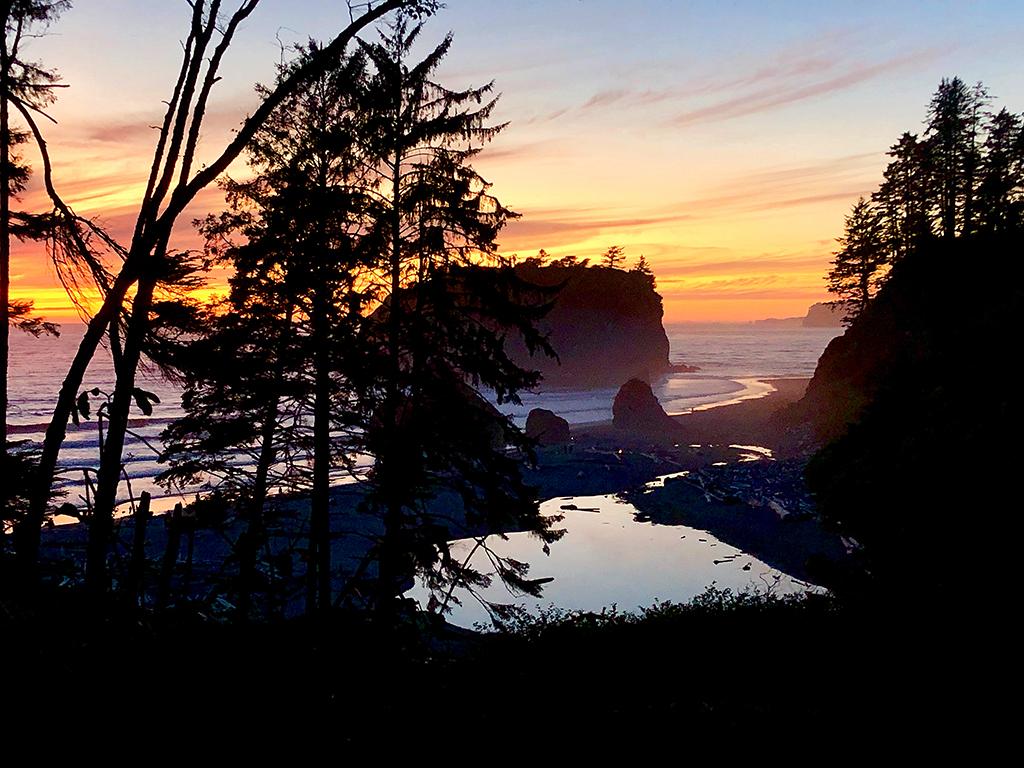
Just as you did with Kalaloch Beach sunsets, remember to capture some afterglow shots at Ruby Beach. The sun sinks and it’s a little dark for a moment, then suddenly there is a “last hurrah” color explosion lighting up the sky and silhouetting the sea stacks and the teeny tiny stick people standing on the beach before twilight settles in. Keeping your camera on a tripod is the best method for capturing the scene, but if you have already dismantled your gear (like I had while carrying it back up the trail to the parking lot), then handheld shots using a wider aperture and higher ISO will reward you with incredible images, as well. Your point-and-shoot on Auto as well as your smartphone will adjust for the differences in light well enough to obtain some very nice images.

Sunset's "last hurrah" at Ruby Beach, Olympic National Park / Rebecca Latson

Sunset's "last hurrah" at Ruby Beach, Olympic National Park / Rebecca Latson

A smartphone shot of the Ruby Beach afterglow, Olympic National Park / Rebecca Latson

A smartphone shot of the Ruby Beach afterglow, Olympic National Park / Rebecca Latson

Photographing Tide Pools
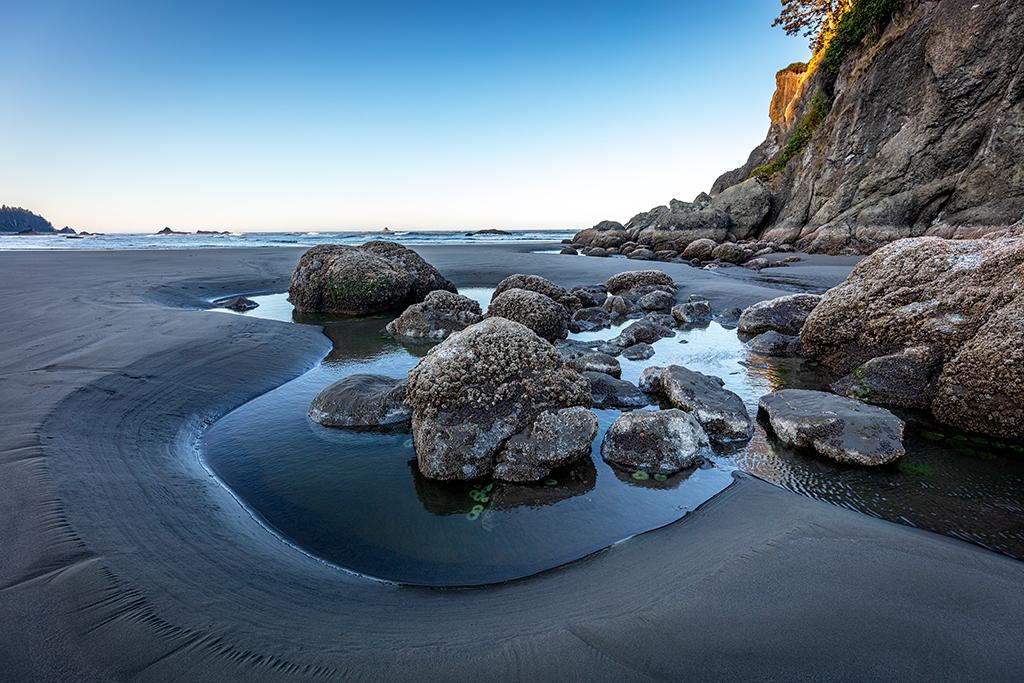
Approaching a tide pool near Abbey Island at Ruby Beach, Olympic National Park / Rebecca Latson

Approaching a tide pool near Abbey Island at Ruby Beach, Olympic National Park / Rebecca Latson

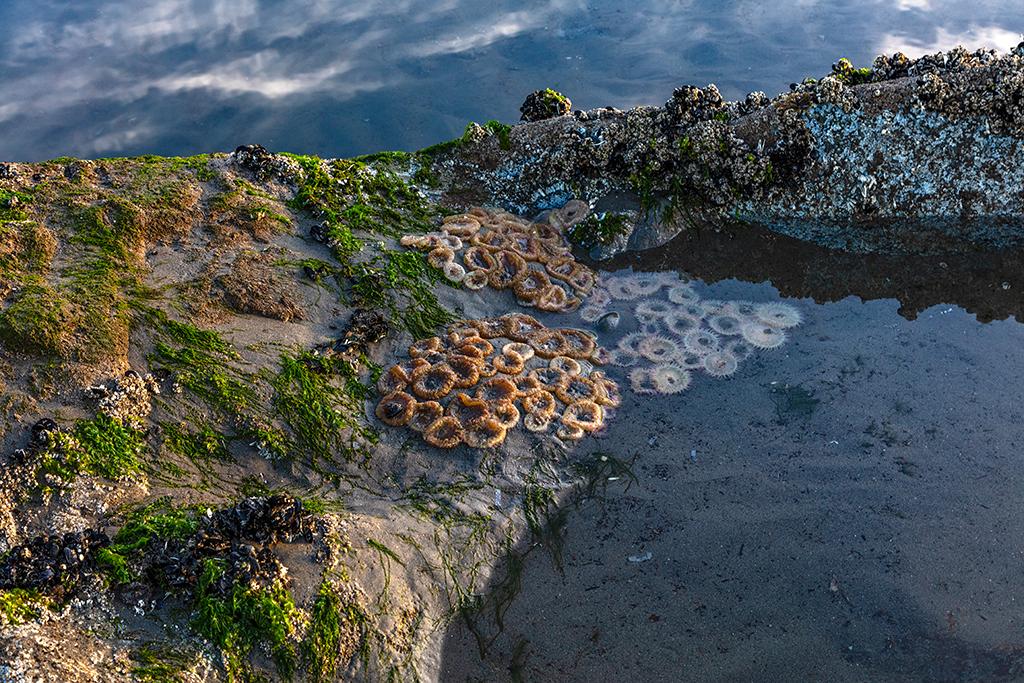
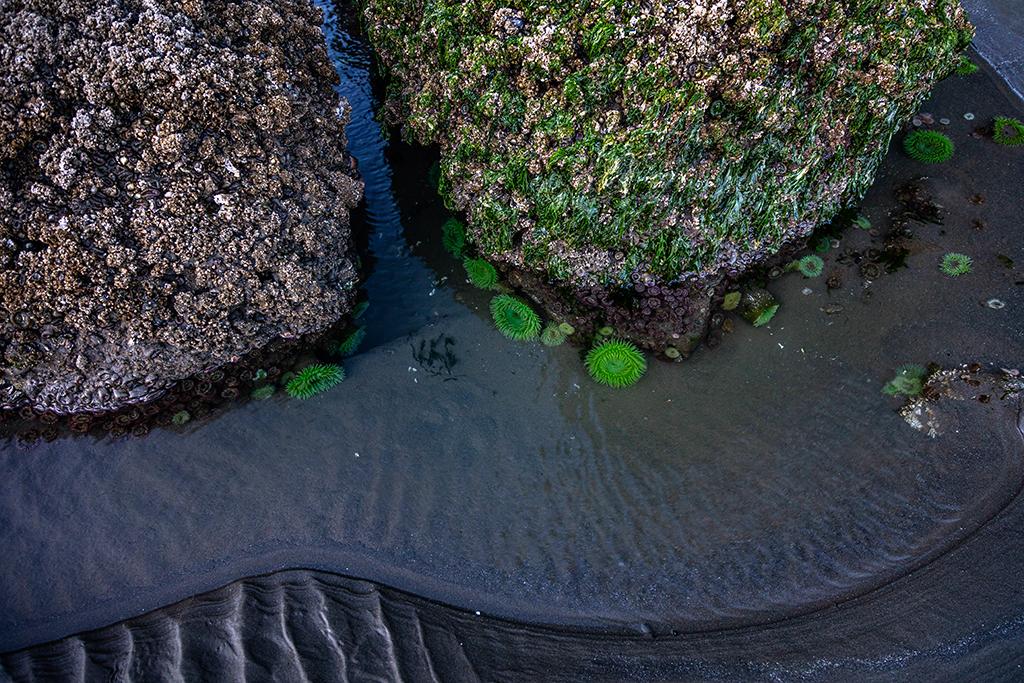
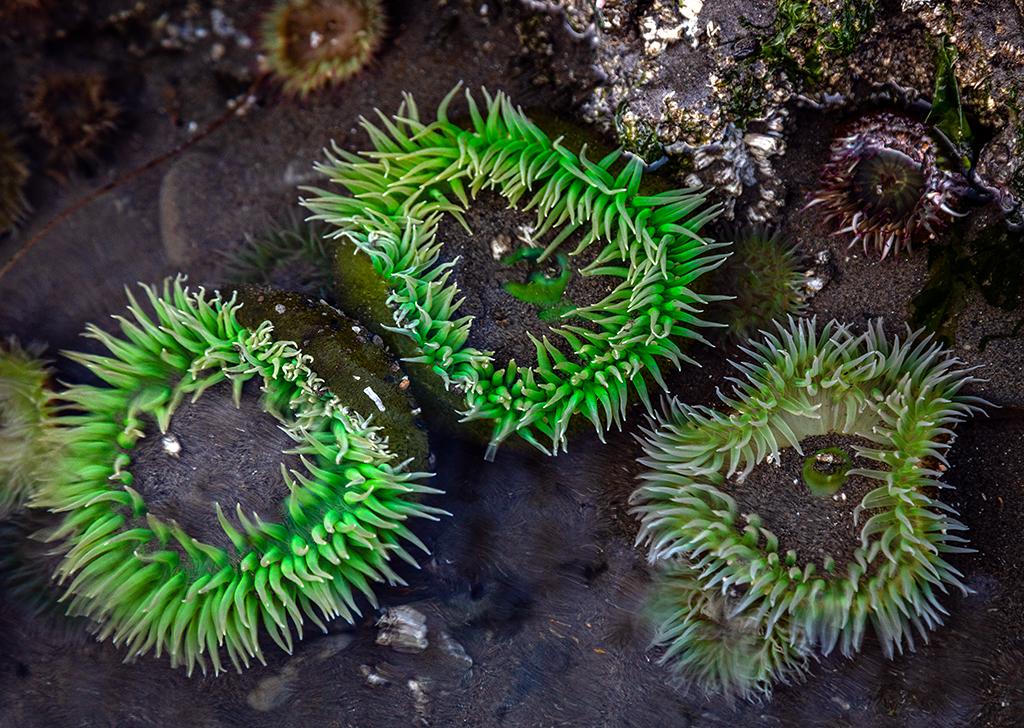
During my summer visit to Olympic's beaches, I found early mornings and a couple of hours prior to sunset to be the best times for low tide photographic tide pool beachcombing. My big hope was to see scads of anemones and sea stars clinging to the kelp-carpeted rocks and settled in the small, seawater-filled depressions left by the tide. What I ended up finding, at least at the beaches I visited in August, were mainly green anemones and aggregate anemones. I was thrilled just to see and photograph them. Here are a few tips for capturing your own tide pool denizens with your camera.
For clear shots of sea life under the tide pool water, early morning is great for glass-smooth water. Ripples might add a little texture to your composition, but they obstruct clear views of your subject. If you use an SLR, then place a CPL filter over your lens and rotate the filter to see if reflections and glare disappear for a clear shot of whatever is under the water.
Kalaloch Beach tide pool life, Olympic National Park / Rebecca Latson

Kalaloch Beach tide pool life, Olympic National Park / Rebecca Latson

Start out with wide-angle compositions of the tide pools, close in on the tide pool life with your telephoto lens or point-and-shoot / smartphone telephoto setting. If you see any interesting shapes or patterns as you photograph, add that to your tide pool life composition.
Ruby Beach tide pool life, Olympic National Park / Rebecca Latson

Ruby Beach tide pool life, Olympic National Park / Rebecca Latson

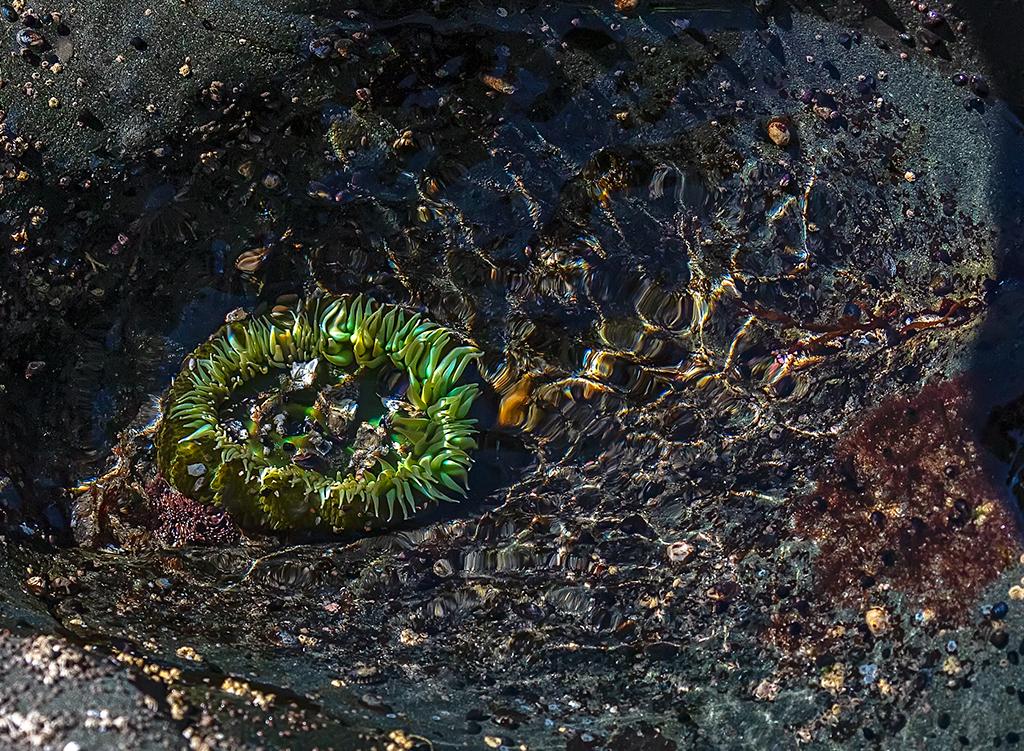
As you get closer to your subject, you'll want to try and freeze the motion of floating tentacles. To do this, if you are handholding your camera and precariously perched on uneven rock while aiming the lens down, then increase your ISO, increase your shutter speed, and hold down on the shutter button for several successive clicks. This is called the "burst method" (or, in jokey photography parlance "spray and pray") and out of those 4 or 5 clicks, you should get at least one clear, sharp image. The burst method does take up memory card space, so it's a good idea to keep several extra blank cards in your pocket or pack. Then, you won't have to stop what you are doing and review each and every shot to determine what you can delete to make more room for more photos.
Sea life beneath the rippled water, Kalaloch Beach, Olympic National Park / Rebecca Latson

Sea life beneath the rippled water, Kalaloch Beach, Olympic National Park / Rebecca Latson

Green anemones in a Ruby Beach tide pool, Olympic National Park / Rebecca Latson

Green anemones in a Ruby Beach tide pool, Olympic National Park / Rebecca Latson

Including Civilization In Your Shots
Many photographers hate adding anything manmade in their landscape images. Adding a few things like architecture or people help flesh out your photographic story of your visit to this national park and add interesting perspective, a sense of scale, and even a little depth to your composition. With that in mind, consider adding Kalaloch Lodge or those bluff-side cabins to a couple of your shots.
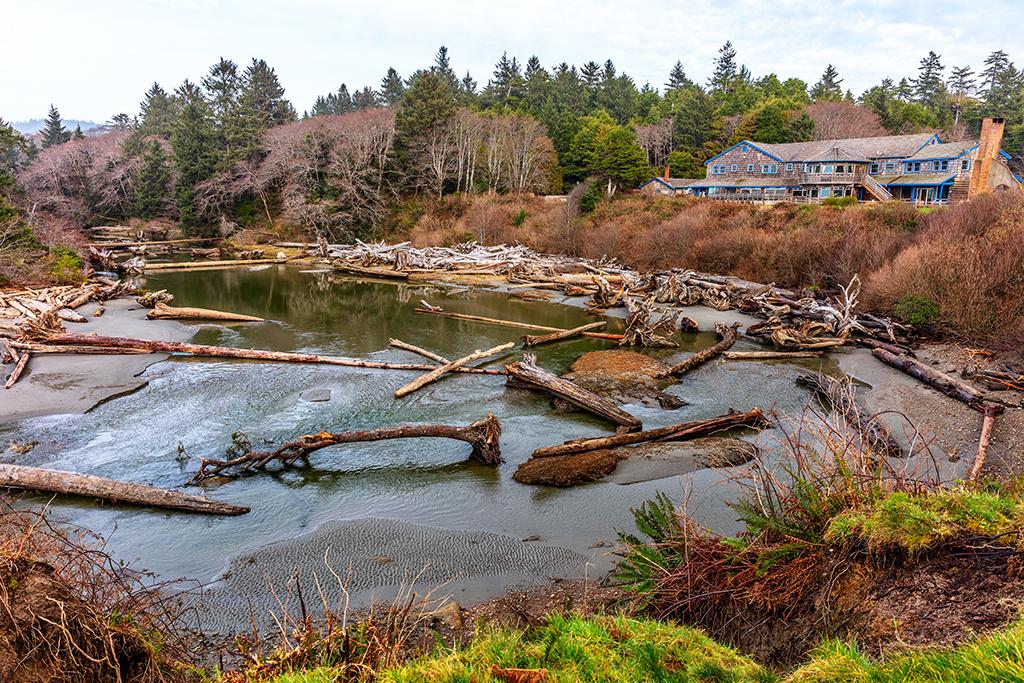
A winter view of Kalaloch Lodge and Kalaloch Creek, Olympic National Park / Rebecca Latson

A winter view of Kalaloch Lodge and Kalaloch Creek, Olympic National Park / Rebecca Latson

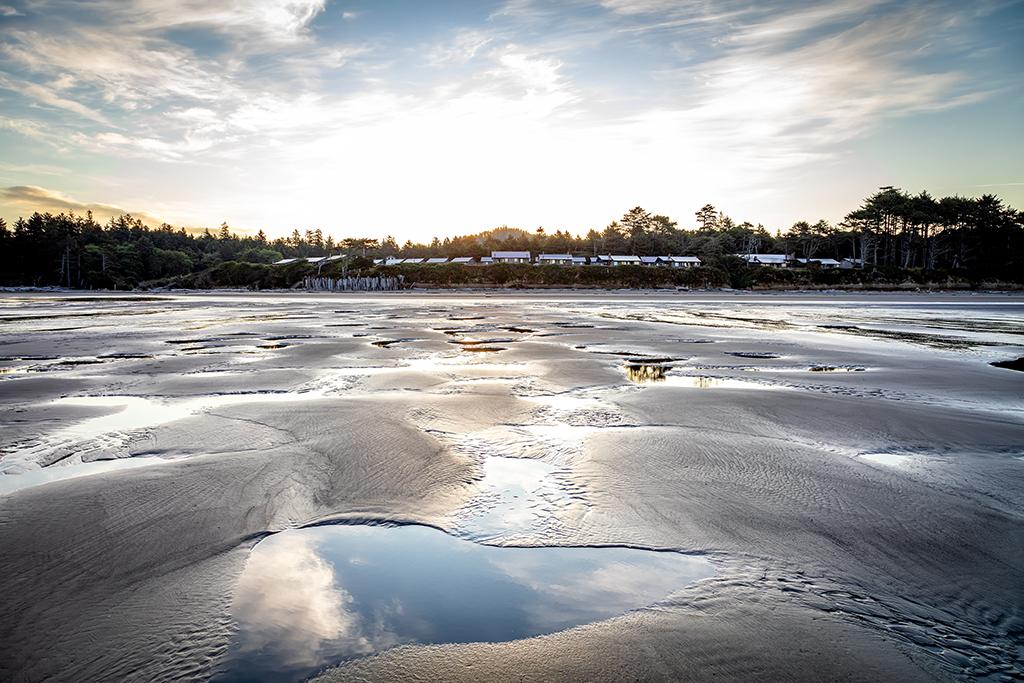
Kalaloch Lodge bluff-side cabins overlooking the beach, Olympic National Park / Rebecca Latson

Kalaloch Lodge bluff-side cabins overlooking the beach, Olympic National Park / Rebecca Latson

Visit The Same Place More Than Once
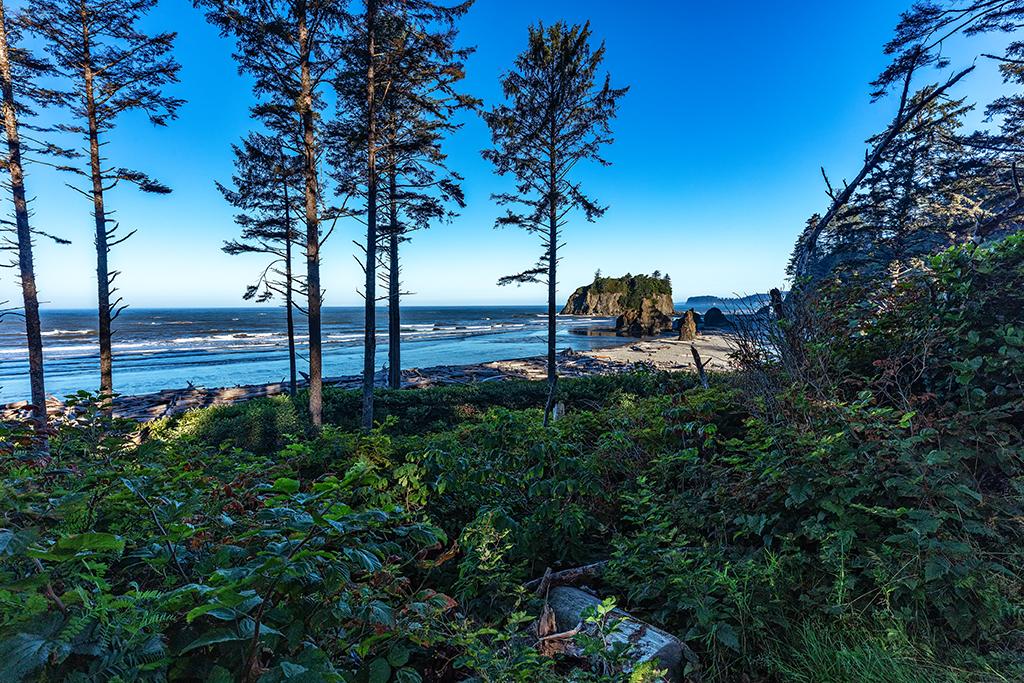
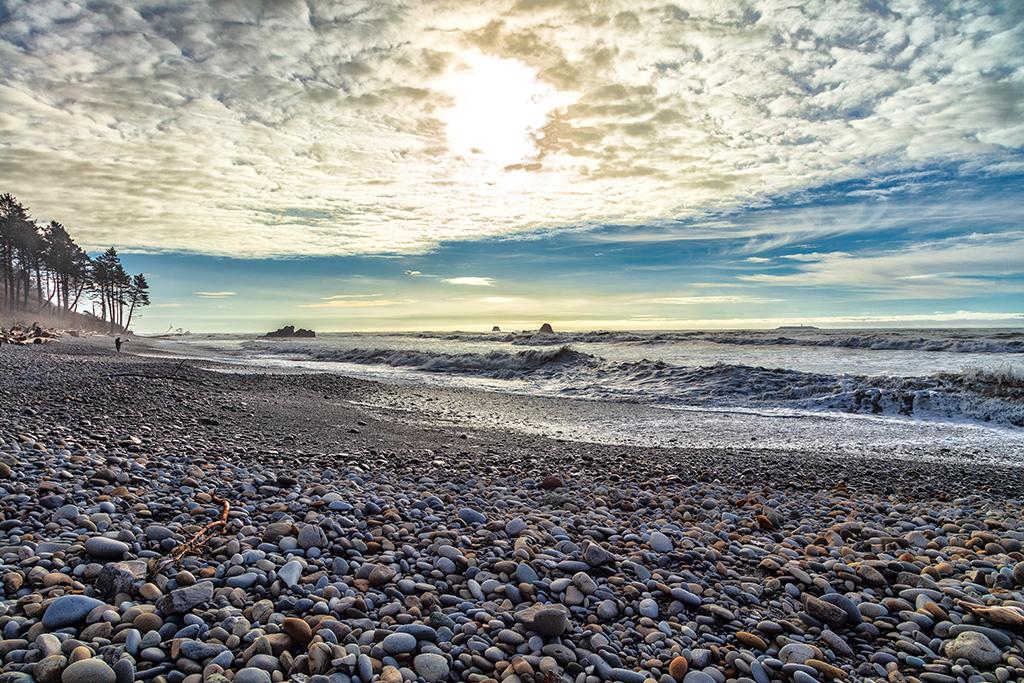
I’ve emphasized this bit in previous Traveler articles, and I’ll write it here, too. I encourage you to visit the same place in a park more than once, if you can, under different weather conditions and during different seasons and times of day, because the same scene can look markedly different each time. The images below of Ruby Beach should give you an idea of what I mean.
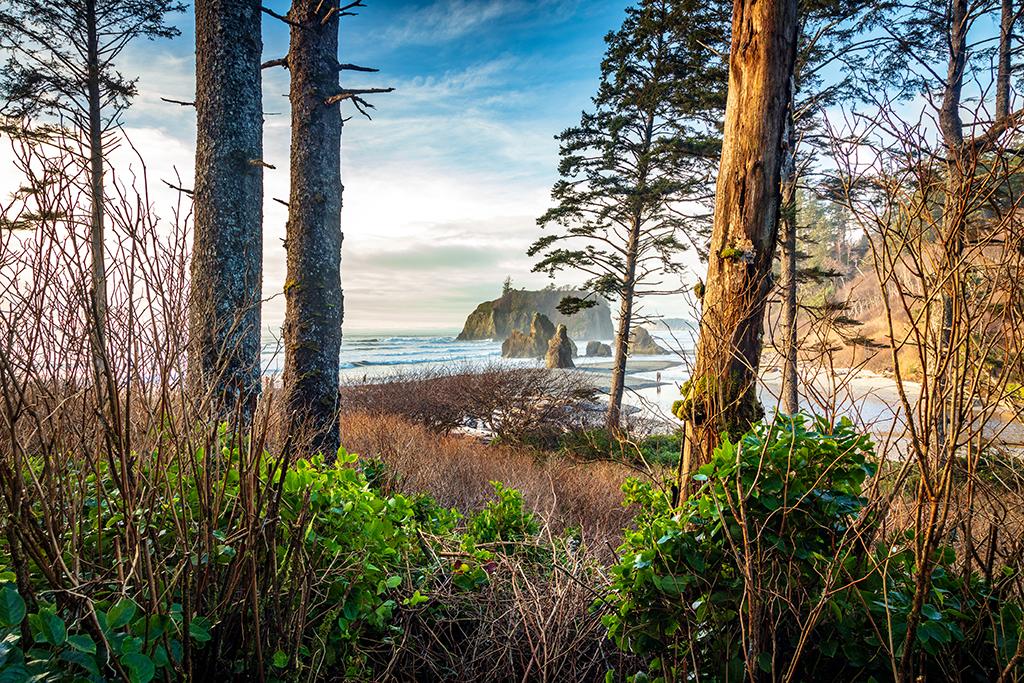
A winter view of Ruby Beach, Olympic National Park / Rebecca Latson

A winter view of Ruby Beach, Olympic National Park / Rebecca Latson

A summer morning view of Ruby Beach, Olympic National Park / Rebecca Latson

A summer morning view of Ruby Beach, Olympic National Park / Rebecca Latson

A summer sunset view of Ruby Beach, Olympic National Park / Rebecca Latson

A summer sunset view of Ruby Beach, Olympic National Park / Rebecca Latson

Camera and Lens "Housekeeping"

It's a wonderful fragrance, isn't it, that fresh salt air? Of course, that means there is salt in the air and salt is corrosive over time. So, when you return to your room, camper or tent at night, away from the windblown salt and sand, take a damp, soft cloth and wipe down your camera and lens to remove any residue. You might not see anything, but trust me, it's there, like an invisible film coating. Be mindful, too, when switching lenses on the beach, because you don’t want that salty, sandy residue inside your camera or lens. It's a quick "housekeeping" task that keeps your camera and lens in working order for another day of photography at the beach. 

A Last Bit Of Advice

Here's a repeat of something you read at the beginning of this guide: observation and composition are key in producing a great photo accurately depicting your memory of a scene. Don’t just opt for a “grab shot.” Look around you and give some thought to the scene you see in your camera’s viewfinder for a great image and a photo story your audience can appreciate and understand.

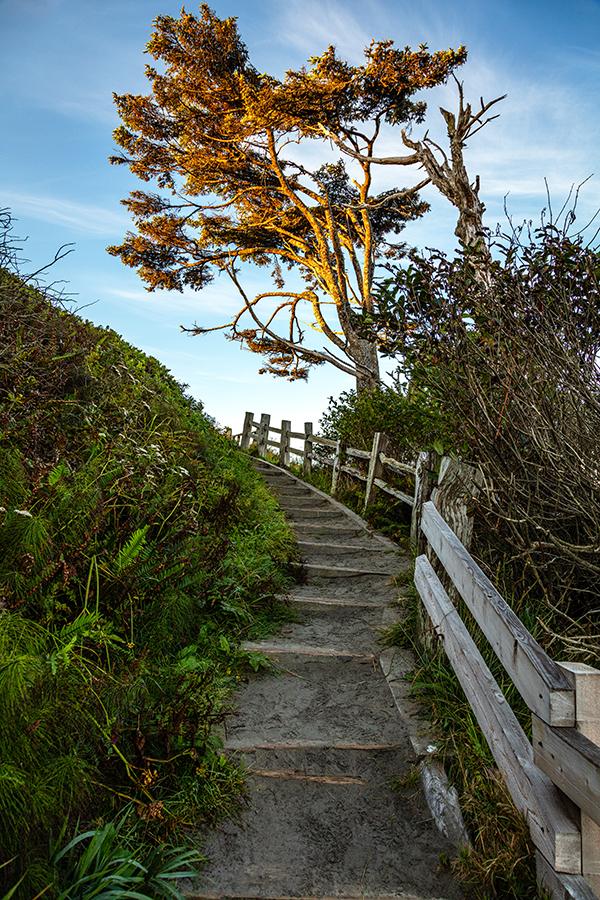
Up the steps from the beach and onward to the forests, Olympic National Park / Rebecca Latson

Up the steps from the beach and onward to the forests, Olympic National Park / Rebecca Latson

Olympic National Park is the place to go if you ever want to visit a national park covering a little bit of everything. Within an expanse of almost 1 million acres, you’ll see beaches, forests, and mountains veined with a network of clear, cold streams, rivers and waterfalls.

Because of the size of this national park, I made not one, but two trips, this year, from my home in central Washington. I didn’t get to all the places I’d intended, but I've covered enough territory to present you with another Armchair Photography Guide which you can use for fostering your own photographic adventures along the Olympic Peninsula.

If you are new to the Traveler or new to this photography column, I created these Armchair Photography Guides for those of you who cannot, or do not want to, hike long trails or deep into the backcountry with a pack full of camera gear. I believe you can achieve amazing images from pullouts, view areas, and along short trails with your smartphone, point-and-shoot, or SLR camera using tips and techniques I provide in these guides.

My January trip was short in duration and coincided with the partial government shutdown. I wrote a previous article for the Traveler about this visit. My recent late August / early September trip lasted a week, during which I managed to cover ocean, forest, and mountain views of this national park. Because there is so much to encompass, photographically, I figured I’d focus on the beaches in this article, with subsequent installments for the forests and mountains.

The map below delineates my combined winter and summer route through the park (yellow lines) and the route I took to visit the beaches listed here (red line). The photos you see in this article are a combination of mostly summer shots and a few winter images.

The photographic route through Olympic National Park for this article / NPS / Rebecca Latson

When planning your own trip to the coastal portions of Olympic National Park, be aware that, during the winter, the crowds are generally sparse, but the weather is wet and inclement and beach access might be a little more difficult due to trail washouts and huge logjams from storms. Summer access is considerably easier, with repairs to storm-damaged stairs and cleared paths around beached logs. While there are more crowds during the summer, early mornings and very late evenings are great for good lighting conditions and fewer people.

Kalaloch Beach

Let’s start this trip along the peninsula traveling south to north, with the first stop at Kalaloch Beach, below Kalaloch Lodge.

While there are no sea stacks here, there are rocks onto which waves crash for dramatic shots. To freeze the motion of a crashing wave, use a fast shutter speed and the “burst method” of holding your finger down on the shutter button for 4 – 5 clicks. Since fast shutter speeds (fps) mean less light going through the lens, you’ll want to open your aperture to maybe f/4 – f/6.3 and/or bump up the ISO anywhere from 250 to 1250, depending upon the time of day you are at the beach. SLRs and some point-and-shoot cameras have manual and aperture / shutter priority settings. If you are using a smartphone, touch that little white shutter button several times in succession for at least one clear shot. Use your telephoto lens or zoom setting on your point-and-shoot or smartphone to get really close to those waves (without getting wet and being pulled under by riptides).
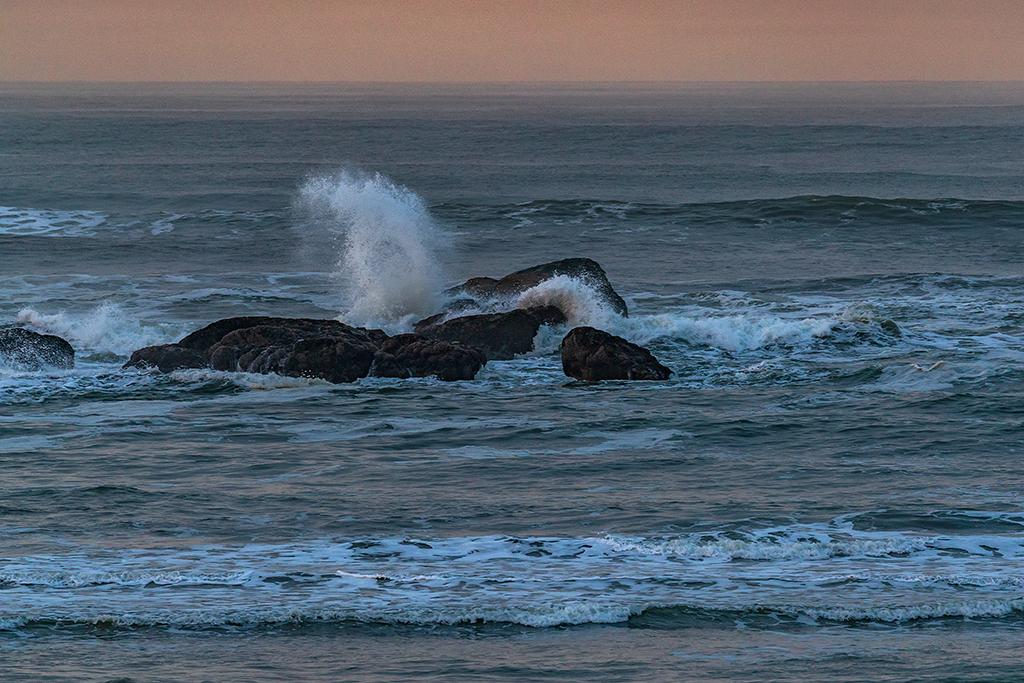
Crashing waves at Kalaloch Beach, Olympic National Park / Rebecca Latson

Crashing waves at Kalaloch Beach, Olympic National Park / Rebecca Latson

To capture the full spectacle of ocean motion and stormy skies (especially prevalent during the winter months), set your camera on a tripod and make use of either a circular polarizer (CPL) or a graduated neutral density (grad ND) filter to darken the horizon and delineate cloud texture. For those of you not familiar with CPL or grad ND filters, check out this article I wrote for the Traveler.

Tide levels change with the season, and summer mornings can produce very low tides at this beach with plenty of rocky tidepools to explore. Use your CPL to remove glare and reflections when photographing through the water. Smooth, ripple-free tidepool shots of anemones’ floating tentacles are best in the morning. Mornings are also great for mirror-still reflections of sky and scenery in pools of water along the beach during low tide.
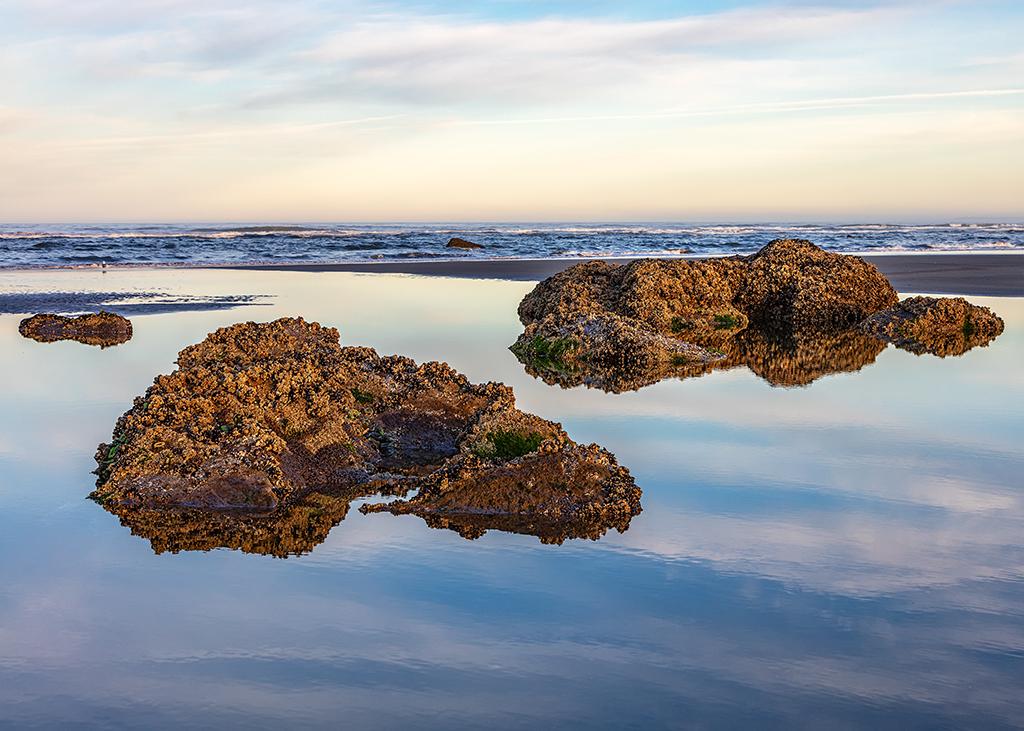
Rock, reflections, sand, sea, and sky, Kalaloch Beach, Olympic National Park / Rebecca Latson
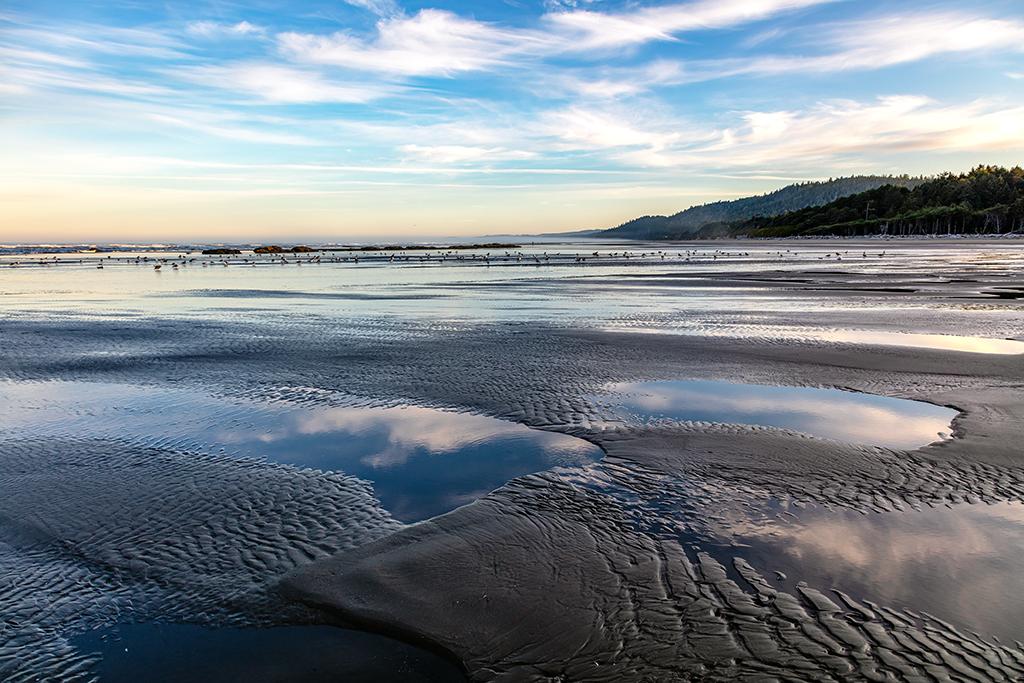
Rock, reflections, sand, sea, and sky, Kalaloch Beach, Olympic National Park / Rebecca Latson

Morning low tide scenery along Kalaloch Beach, Olympic National Park / Rebecca Latson

Morning low tide scenery along Kalaloch Beach, Olympic National Park / Rebecca Latson

Turn your camera away from the ocean and concentrate on outcrops. Make sure your settings are adjusted to account for the darker exposure of the trees and shrubs populating the high bluffs.
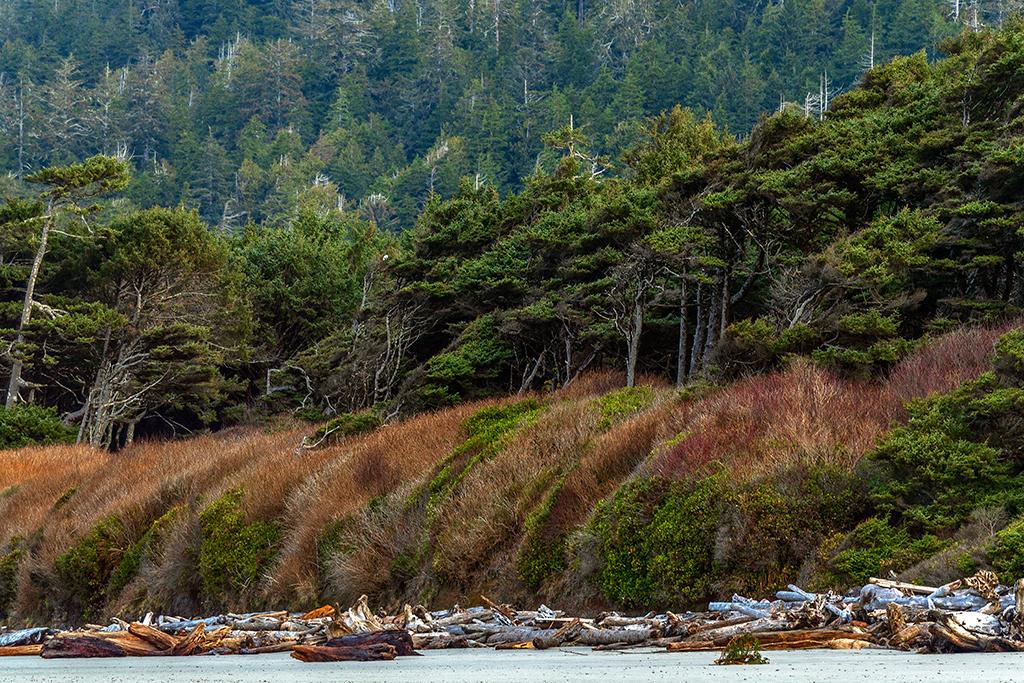
Bluff scenery at Kalaloch Beach, Olympic National Park / Rebecca Latson

Bluff scenery at Kalaloch Beach, Olympic National Park / Rebecca Latson

Capture a shot of the gulls flocked on the ground or in the air.
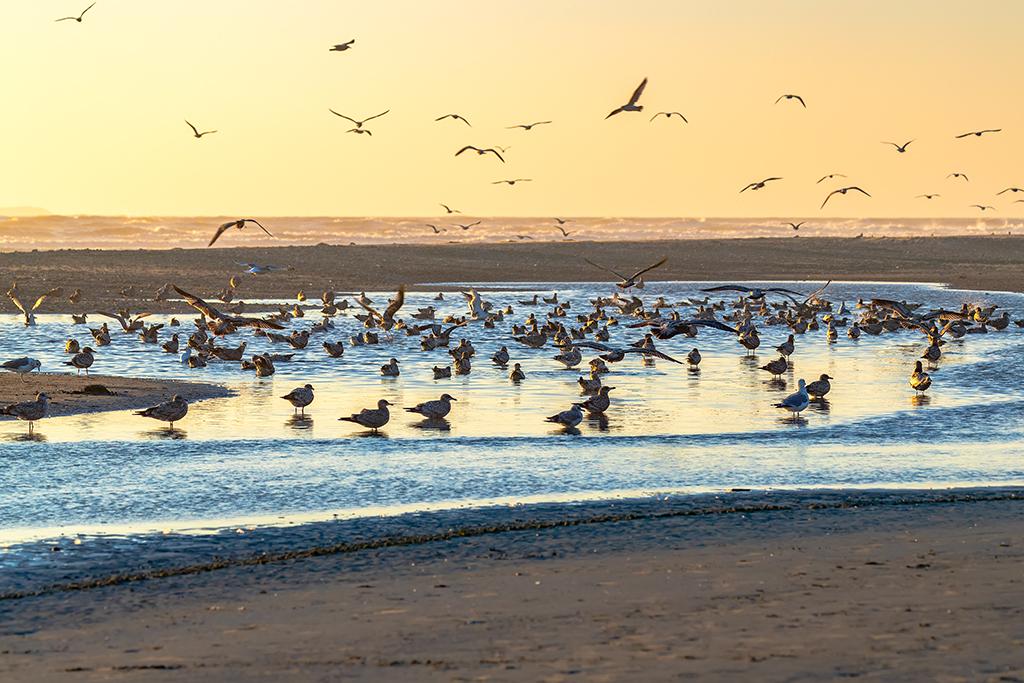
Gulls on the ground at Kalaloch Beach, Olympic National Park / Rebecca Latson
Gulls on the ground at Kalaloch Beach, Olympic National Park / Rebecca Latson

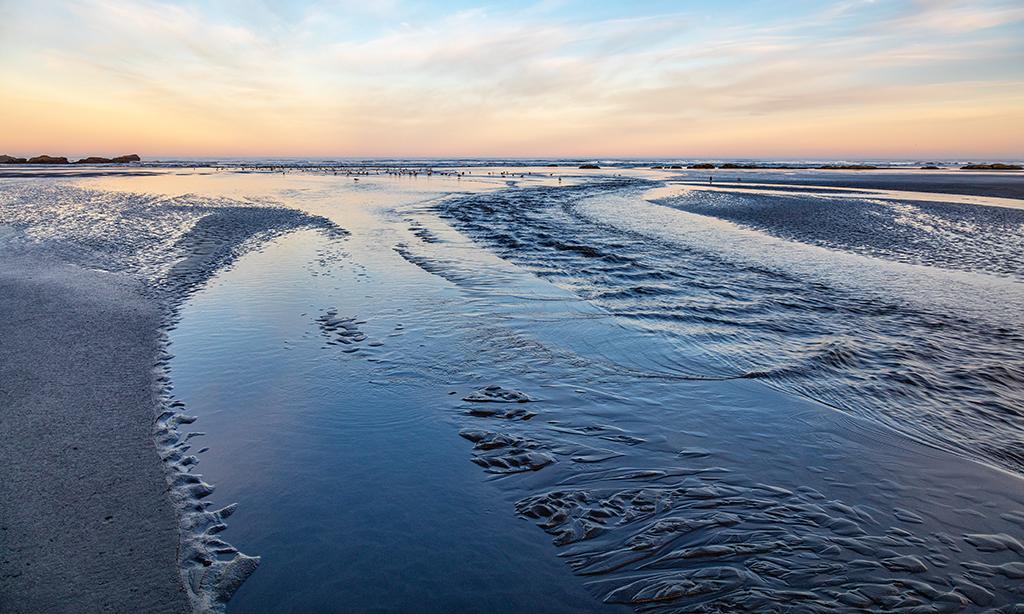
Mornings along the Olympic coast produce light pinks, lemony yellows and pale blues coloring the sky westward, with maybe a little bit of fog, too.
Sunrise on Kalaloch Beach, Olympic National Park / Rebecca Latson

Sunrise on Kalaloch Beach, Olympic National Park / Rebecca Latson
Olympic National Park beaches deserve a little video love, too. Still shots are just a part of your photographic story. There's something to be said for watching and hearing the waves pound the beach, after the fact. Use a dedicated video cam or your SLR's / point-and-shoot's / smartphone's video mode to capture short clips of your beach adventure.
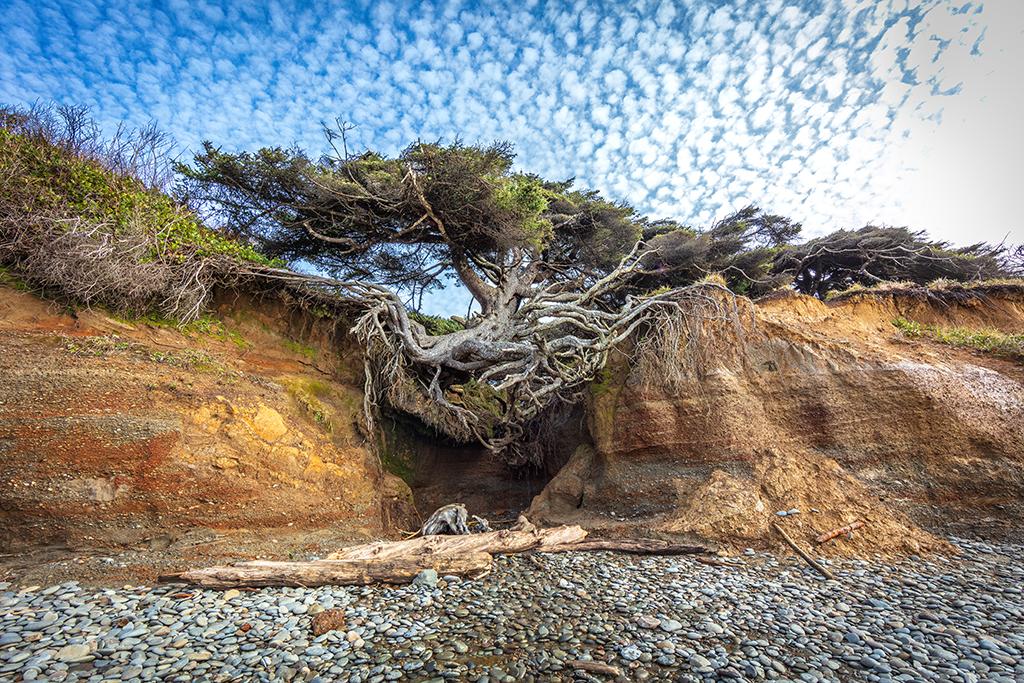
While at Kalaloch, you should definitely view the famous “Tree of Life,” a Sitka spruce holding its own over a bluff undercut by stream erosion. Drive north from the Kalaloch Lodge to the Kalaloch Campground’s day-use parking lot. Hike down the steps to the beach, turn right and walk about 50 yards. You can’t miss it. Sure, there are a gazillion photos of this natural oddity, but the photo you capture will be your own, taken with your own camera.
The "Tree of Life," aka the "Tree Cave," Kalaloch Beach, Olympic National Park / Rebecca Latson

The "Tree of Life," aka the "Tree Cave," Kalaloch Beach, Olympic National Park / Rebecca Latson

Beach 4

The beaches around Kalaloch are numbered and in my opinion, Kalaloch Beach 4 is one of the best of these, complete with a parking lot, restrooms, and a well-maintained trail ending at a bridge over a outcrop of tilted and overturned sedimentary rock layers through which runs a clear stream out to the ocean. You’ll have to do a little clambering down to get to the beach, but it’s not difficult, even for those of you with short legs, like me. I sat down on my rump and slid my way to the sandy ground. Before you do that, though, get some leading line shots of the trail and the bridge. The leading line technique guides your photo audiences’ eyes from one part of the photo to another. This technique also creates a sense of “where” and “what,” as in “where will that trail / bridge / road take you” and “what adventure awaits at the end of the trail, or across that bridge, or down the road?”
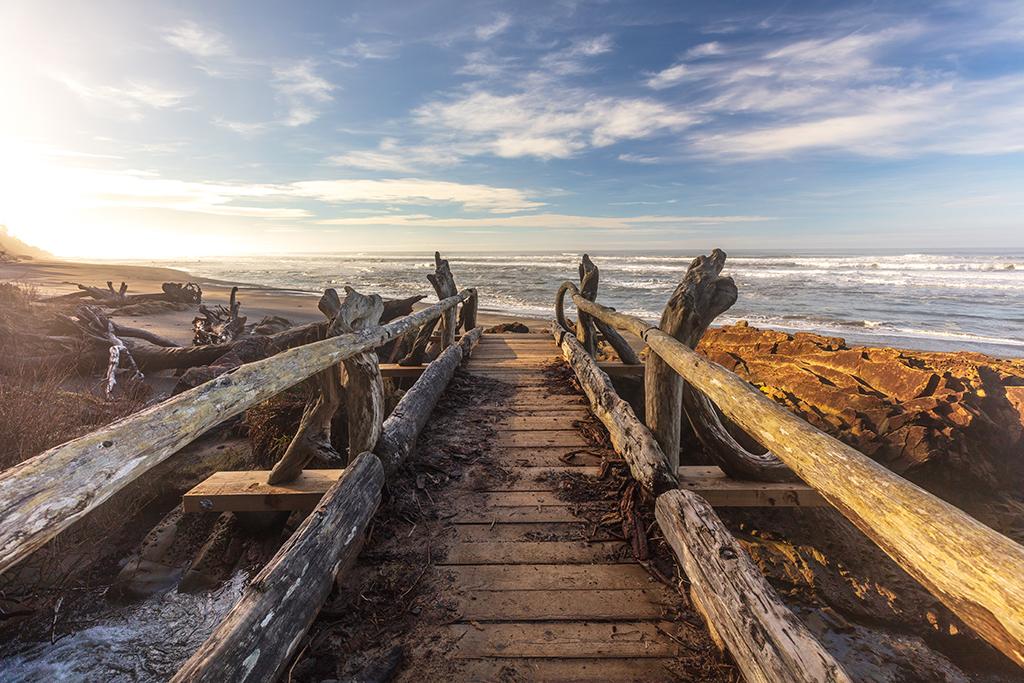
The bridge to Beach 4, Olympic National Park / Rebecca Latson
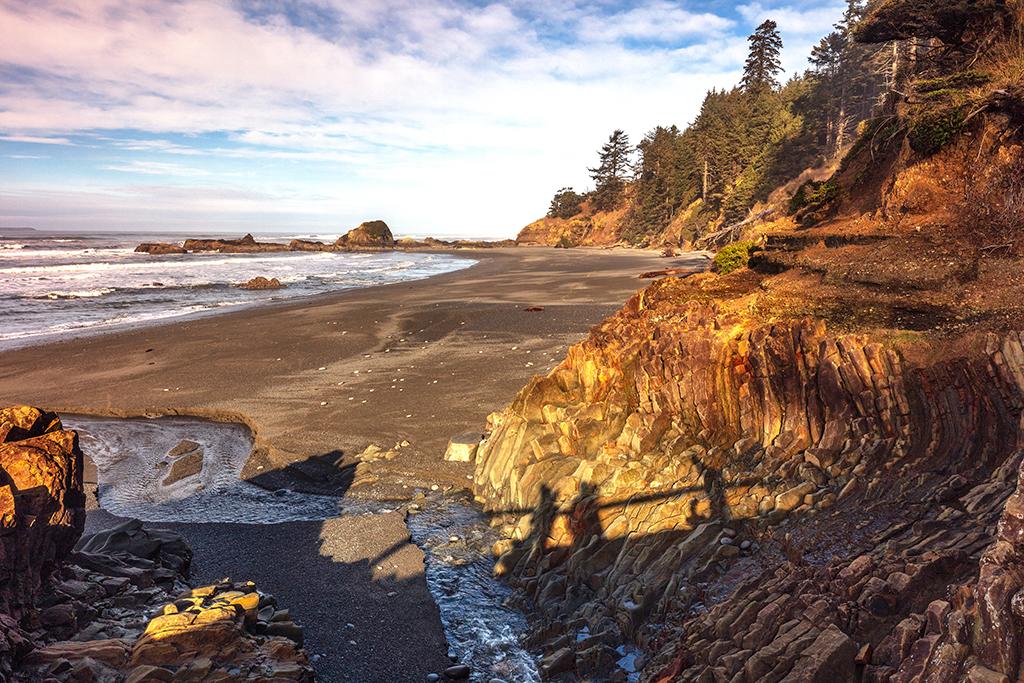
The bridge to Beach 4, Olympic National Park / Rebecca Latson

Tilted beds and Beach 4 scenery, Olympic National Park / Rebecca Latson
Tilted beds and Beach 4 scenery, Olympic National Park / Rebecca Latson

A Beach 4 southern view in the winter, Olympic National Park / Rebecca Latson
A Beach 4 southern view in the winter, Olympic National Park / Rebecca Latson

Ruby Beach
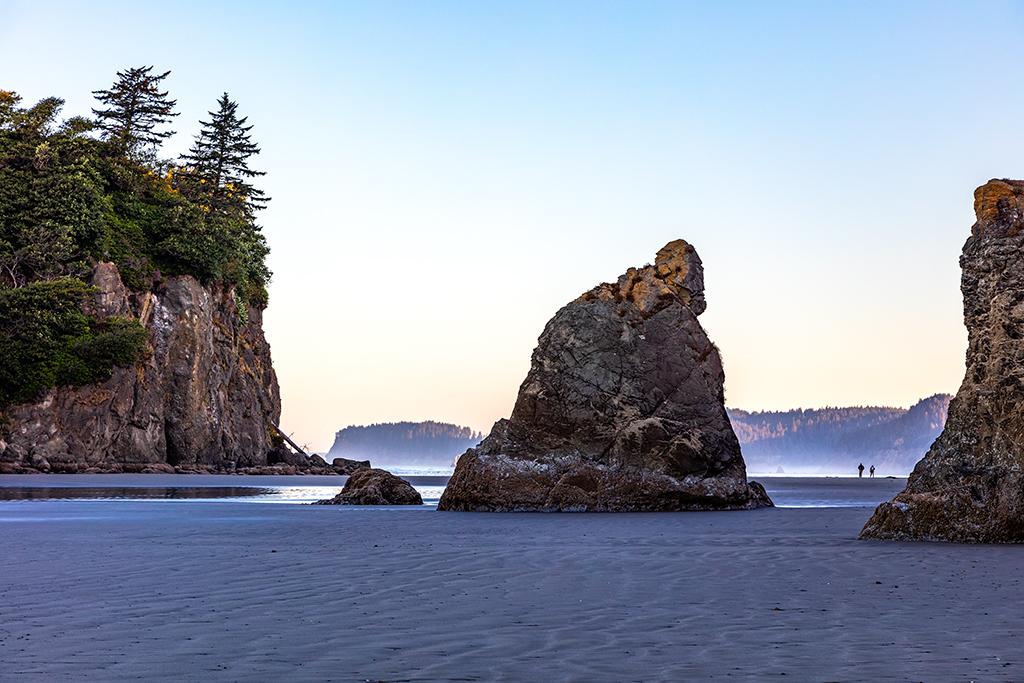
From Beach 4, it’s a little over 4 miles further north on Hwy 101 to Ruby Beach, famous for its rock islands (sea stacks) such as Abbey Island. Arrive there early on a summer morning prior to 8 a.m. or later in the afternoon, around 6 p.m. when low tides allow for exploration of the tide pools up against Abbey Island.

An early morning, low-tide view of Ruby Beach, Olympic National Park / Rebecca Latson

An early morning, low-tide view of Ruby Beach, Olympic National Park / Rebecca Latson
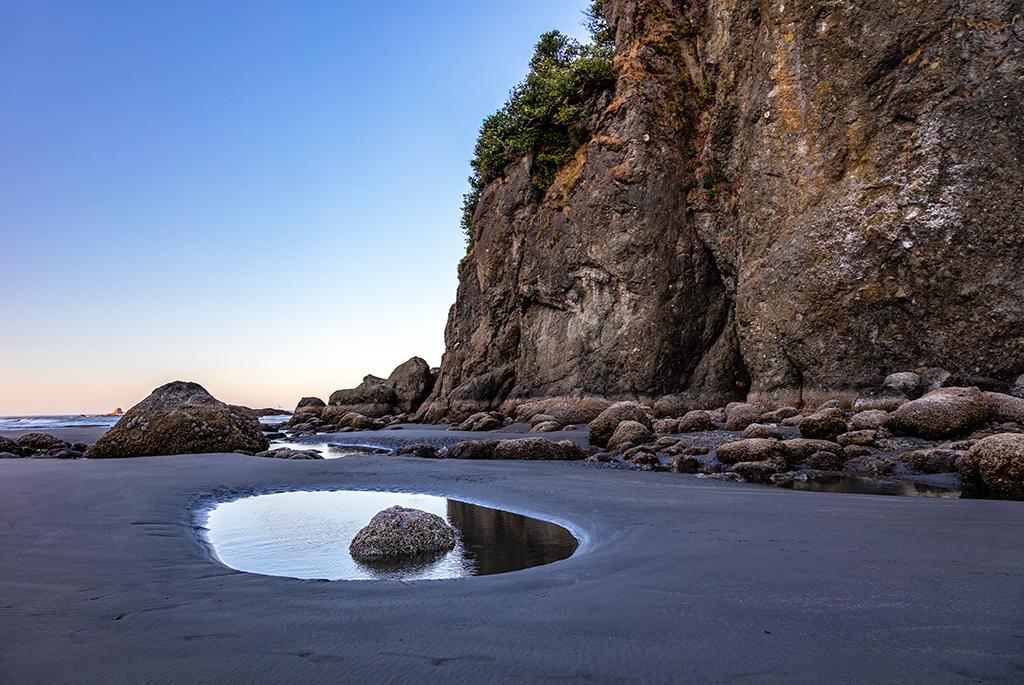
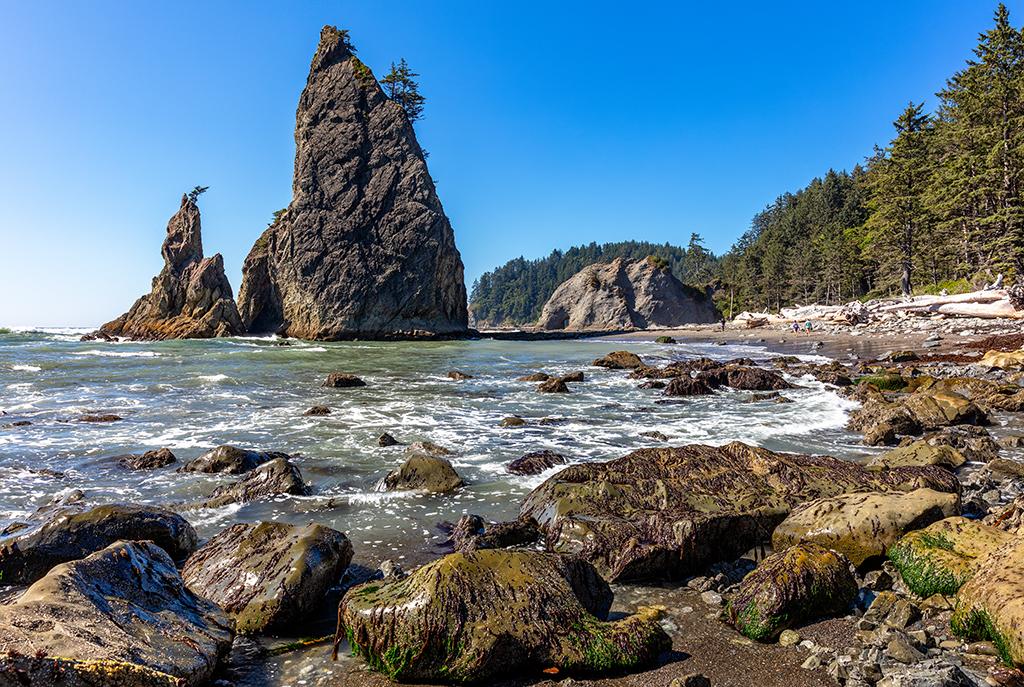
Approaching the tide pools near Abbey Island, Olympic National Park / Rebecca Latson
Approaching the tide pools near Abbey Island, Olympic National Park / Rebecca Latson

A winter afternoon at Ruby Beach, Olympic National Park / Rebecca Latson

A winter afternoon at Ruby Beach, Olympic National Park / Rebecca Latson

Rialto Beach

From Ruby Beach, head north on Hwy 101, turn left onto 110, and head toward the community of La Push. Turn right onto Mora Road and drive to Rialto Beach, with its large parking lot and very easy access. Depending upon your time of arrival, the atmosphere might be hazy and you’ll need to use your CPL filter and adjust your settings for the bright, flat light. If you use your smartphone, tap on the brightest spot you see in the viewfinder and your phone should adjust its exposure accordingly.
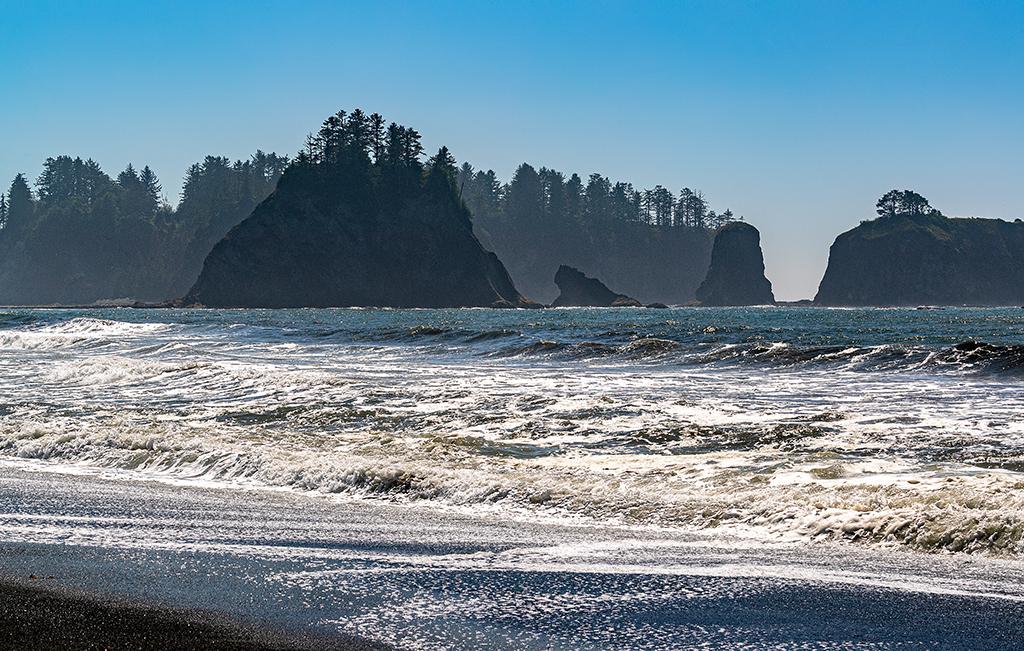
A telephoto landscape of Rialto Beach sea stacks, Olympic National Park / Rebecca Latson

A telephoto landscape of Rialto Beach sea stacks, Olympic National Park / Rebecca Latson

Use your wide-angle lens or wide-angle point-and-shoot setting for shots of the beach, bluff and sea stacks. Hunker down closer to the ground for a different perspective of the landscape. You might also get lucky and capture pelicans cruising the currents or riding the waves, so have your telephoto lens or telephoto setting at the ready.
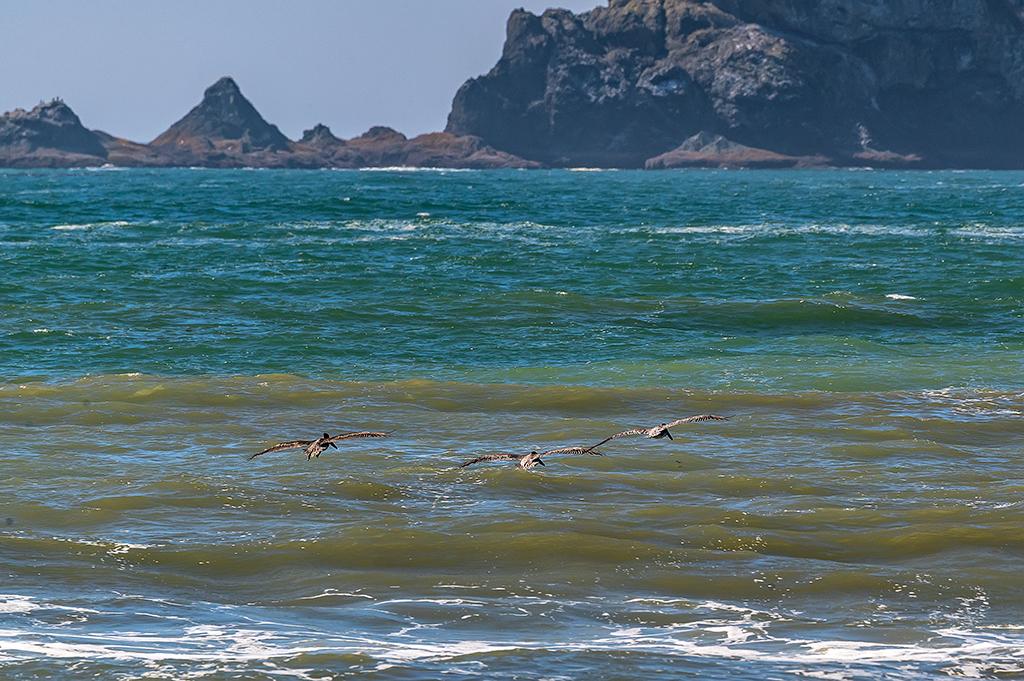
Cruising the currents at Rialto Beach, Olympic National Park / Rebecca Latson
Cruising the currents at Rialto Beach, Olympic National Park / Rebecca Latson

Sea stack scenery at Rialto Beach, Olympic National Park / Rebecca Latson

Sea stack scenery at Rialto Beach, Olympic National Park / Rebecca Latson

A 1.5-mile trek over a mostly pebbly beach with areas of packed sand will take you toward tide pools and sea stacks with such names as “Split Rock” and “Hole-in-the-Wall.” As you walk along, look up to the treetops lining the bluff where you might just see a bald eagle, or two. Consult a tide chart before making the trudge out and back, as you don’t want to get caught during high tide.
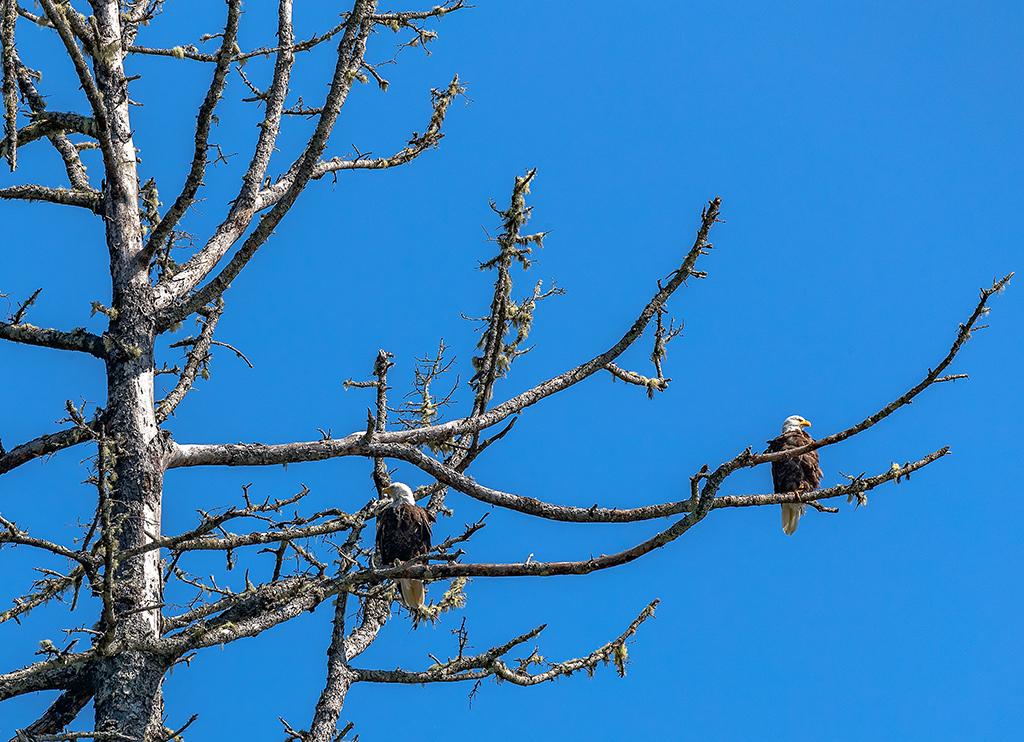
A perfect perch for viewing Rialto Beach, Olympic National Park / Rebecca Latson

A perfect perch for viewing Rialto Beach, Olympic National Park / Rebecca Latson

In truth, you could spend your entire trip simply touring the beaches within Olympic National Park, including Shi Shi Beach way up north on the peninsula, the beaches around Ozette, and beaches south of La Push. There’s plenty of scenery to explore and you are now armed with tips, techniques and gear suggestions for great Olympic coast photos.

The next installment of my Armchair Photography Guide to Olympic National Park will feature the forests, from the Quinault Rain Forest to the Hoh Rain Forest to the Sol Duc Valley to the forest around Lake Crescent.

Featured Article

Comments

A really good article, Rebecca.  And great photos and advice, as usual.


I really like how you captured the power of the ocean by turning your camera away from it for 'Bluff scenery at Kalaloch'.  The transition from reddish brush to green forest marks the trimline created by the highest winter surf that is rearranging the beach logs from year to year.  Even lesser storms with ten-foot waves, rather than winter's thirty-plus footers, can effectively cancel low tides for days.


Well done!  I spent a great deal of my youth and young adult life camping in that area. You captured it wonderfully.  


rebecca - take me along with you.. anywhere!


We visited Olympic National Park several years ago. The photos bring back mrmories. We saw a lot of sea stars in the tide pools at low tide.


Add comment

CAPTCHA

This question is for testing whether or not you are a human visitor and to prevent automated spam submissions.

Image CAPTCHA
Enter the characters shown in the image.