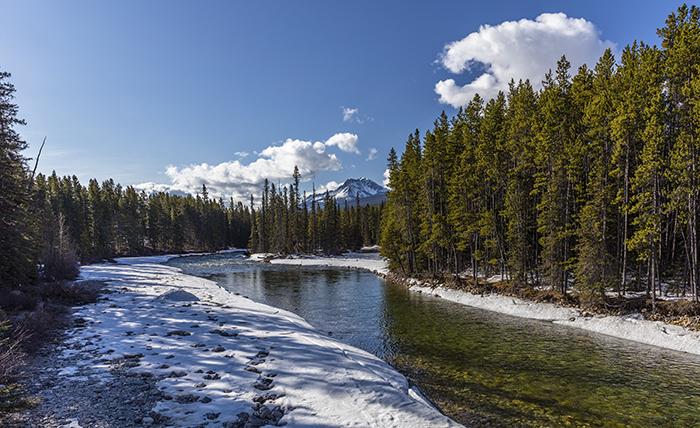
Bow River vista, Banff National Park / Rebecca Latson
In mid-April 2016, I traveled to Canada for a 4-1/2 day stay in Banff National Park with trips up to the southern border of Jasper National Park. Even though spring was perhaps not the best time to find nice, short hiking trails open and free of snow, the photo ops were nevertheless boundless, just from the side of the road. Hence, another Armchair Photography Guide developed from this excursion. This particular guide really only hits the tip of the iceberg. I didn’t see much of Jasper National Park but I hope to remedy that with a 2017 late summer/early fall return to both of these parks. For now, I present to you Part 1.
I have rheumatoid arthritis and am not in as great a shape as I used to be in my 30s. As such, my Armchair Photography Guides are geared for those of us who either cannot or do not wish to hike long trails, race mountain goats up a steep incline, or otherwise carry a lot of stuff (mainly photography gear) on our backs out into the hinterlands for extended periods of time away from civilization.
Getting There
Your main port of entry to the parks will be via the city of Calgary and Alberta Hwy 1 or via British Columbia along Alberta Hwy 1. From Calgary, it’s about 1-1/2 hours to travel to Banff and another 30+ minutes to reach Lake Louise.

Evening view along the Trans-Canada Highway, Banff National Park / Rebecca Latson
I haven’t visited this part of Canada since I was 7. At that time, Dad was driving and I definitely did not have a camera with me (Dad had it, instead).
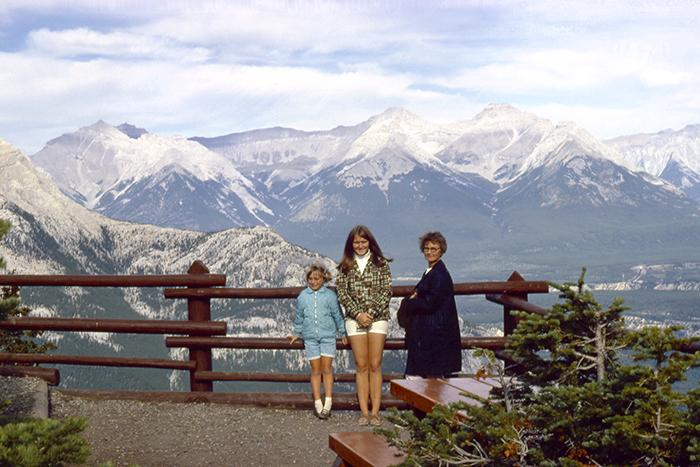
The photographer, her sister and mother overlooking Banff Townsite, 1968, Banff National Park / John Latson
Fast forwarding to 2016 and adulthood, I noticed several differences between Canada’s national park system versus the U.S. National Park System during this trip.
- There are no real visitor centers near the park toll booths (you know, like there is near Arches National Park). I found a visitor center for Banff National Park in the town of Banff, and I have read that there is a visitor center for Jasper National Park in the town of Jasper. I did stop at the visitor center near the small mountain town of Field, through Yoho National Park. The park staffing desk was closed until May and the only person present was the proprietor of the very small gift shop within the building. There were vending machines and - more importantly - the restrooms were open.
- The maps you receive (and you may need to ask for them as the staff member did not automatically hand any over to me) are not as detailed as the maps received at the pay booths of the U.S. national park entrances.
- When you pay for a park pass in Canada, you are paying for the number of days you are staying within that park. You are not paying a fixed fee for an automatic 7-day park pass as with the US National Park system. You will be asked the number of days you plan on visiting and be charged accordingly. A daily park pass is a little less than $10 CAD (approx. $7.75 USD, depending upon the day's conversion rates) and you can actually purchase a park pass online. I paid for a Banff National Park pass based upon the number of days I planned on spending within the park, printed it out and showed it to the booth staff at the park entrance. Thereafter, I simply displayed it on the driver's side of the dashboard.
- Without referring to my park maps, I automatically assumed (and you know what happens when one assumes) that the moment I paid for my pass, I was actually in that park. That’s not always the case. For example, I paid for my Jasper National Park pass when I drove onto the Icefield Parkway and not at the actual park entrance, which was still some 70-ish miles further north at the Athabasca Glacier and Icefield Centre. I thus surmised I was paying as much for entry onto the parkway as I was entrance into Jasper National Park.
- Canada utilizes the metric system, so a rule of thumb is to multiply the kilometer (km) distances by 0.6 and you’ll get a pretty good approximation of the mileage. Note that your rental cars will be on the metric system as well. Ninety (90) kmh is the general speed within the park (that’s about 54 mph) and there are mileage limits posted accordingly along the highways.
- From my observations, the Canada Parks road system is in considerably better shape than the U.S. National Park System’s roads (based upon my experience with the roads I’ve driven within the US national parks I’ve visited - and I'm thinking in particular of the road to the Many Glacier area in Glacier National Park).
Now that the preamble is out of the way, let’s get down to photography within these Canadian national parks. Note: This is based solely upon my own experiences and I did not visit every single sight, stop, turnout, or town within these national parks, either because I just didn't have the time or because the particular trail/sight was closed or snowed-in (or both).

The view along Vermillion Lakes Road, Banff National Park / Rebecca Latson

Mt. Rundle and the view along Vermillion Lakes Road, Banff National Park / Rebecca Latson
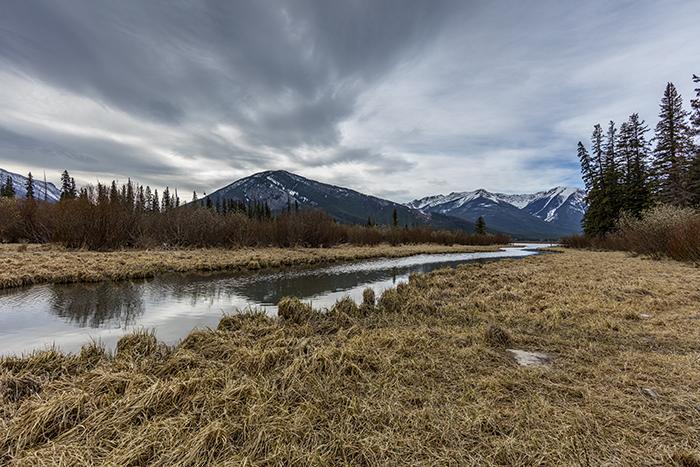
Another view along Vermillion Lakes Road, Banff National Park / Rebecca Latson
Your photographic trip might start in and around the town of Banff, at the southern end of the national park. Before actually entering the town, take a quick detour to Vermillion Lakes. A number of small turnouts along the narrow road will allow you to capture different views of the wetlands as well as of Mount Rundle and its reflection in the water. Ducks were floating amongst the waterlogged grasses during my April visit, so you might want to pack along a zoom telephoto in the event you spy any nearby bird life during your visit.

Wildlife overpass on the Trans-Canada Highway, Banff National Park / Rebecca Latson
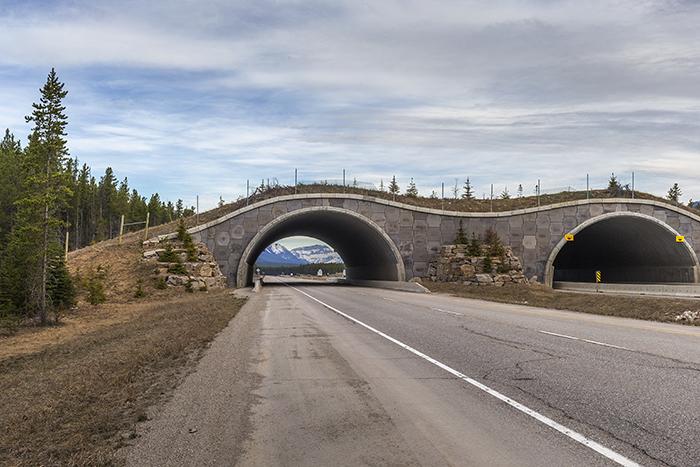
A closer look at a wildlife overpass on the Trans-Canada Highway, Banff National Park / Rebecca Latson
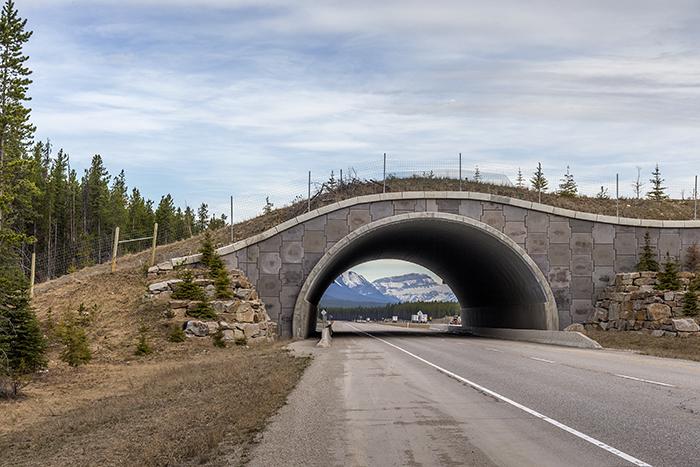
A closeup view of a wildlife overpass on the Trans-Canada Highway, Banff National Park / Rebecca Latson
As you drive the Trans-Canada Highway toward Lake Louise, note what you see along the road, such as those arched overpasses you drive under every few miles. Observe that dirt and trees are planted atop these overpasses and there are no roads leading to anywhere. These are bridges allowing wildlife to cross safely over the busy highway.

Spring In Banff National Park / Rebecca Latson
Mid-April in the higher elevations of Banff and Jasper national parks is pretty much a guarantee of snow and ice. As such, many of the trails and side roads are snowed in and closed. However, that doesn’t mean you won’t be able to achieve spectacular shots of the stunning beauty on display from areas which you can reach – you just might not be able to visit all the sights on your must-see list during that time of year.
If the places to visit are limited due to weather or construction or some other issue, don’t despair. Visit the accessible locations more than once, during different times of the day and during different weather conditions. Not only will you see aspects of that area you might have missed the first time, but you’ll be surprised at how different the same view can look, due simply to the slant of natural light and whether or not the sky is clear or cloudy and snow is present or gone.

Early morning on Lake Louise, Banff National Park / Rebecca Latson

Blue hour ending and sunrise beginning over Mt Victoria, Banff National Park / Rebecca Latson

Sunrise at Lake Louise, Banff National Park / Rebecca Latson

Sunrise reflections at Lake Louise, Banff National Park / Rebecca Latson
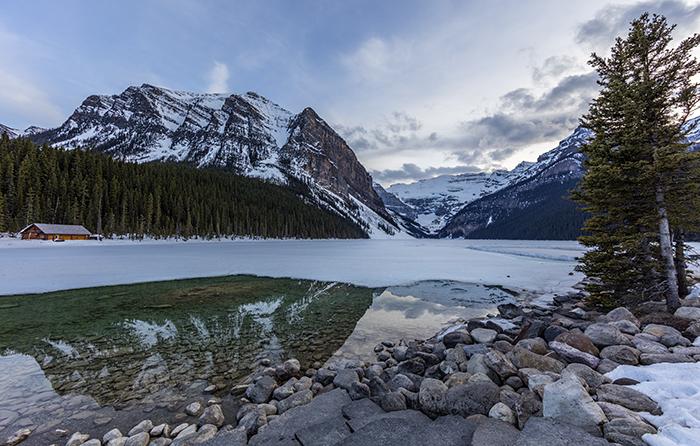
Early evening at Lake Louise, Banff National Park / Rebecca Latson

Mid-afternoon on Lake Louise, Banff National Park / Rebecca Latson

Early morning moon and stars at Lake Louise, Banff National Park / Rebecca Latson

Spring vista along the Icefield Parkway, Banff National Park / Rebecca Latson

Same location, different day - Spring vista along the Icefield Parkway, Banff National Park / Rebecca Latson
I captured numerous photos of Lake Louise during sunrise, mid-afternoon, and even at 2:30 am. I used both zoom and wide-angle lenses for my images. I photographed during crystal clear days (and nights) as well as during cloudy days with snow flurries. I followed this same routine along the Icefield Parkway, photographing one day when the trees were flocked with snow and on another day when the snow was totally gone and the heat of the sun caused me to sweat through my polarfleece.
Lake Louise during early spring will still be frozen, and you may see large rectangles at the foot of the lake created by the resort (Fairmont Chateau Lake Louise) as skating rinks for the guests (yes, the ice gets thick enough to support the weight of numerous people). There will also be quite a bit of snow on the mountains. If you are staying at or near the lake, take your camera and tripod early in the morning to photograph the blue hour just prior to sunrise, then remain to capture the ever-changing play of light across Mount Victoria (straight ahead of you) and Mount Temple (to the left of Mt. Victoria- the boathouse is situated beneath Mount Temple) as the sun climbs above the mountains behind you. The morning alpenglow will land first on the tips of the mountain tops, the light starting out as a pale pink, morphing to a much more intense pink-orange, then yellow, then white. As the sun continues its climb up the sky, the morning light will continue to move down the mountains and onto the frozen lake.
With or without the moon, on a clear night the stars will sparkle at Lake Louise. Walk the paved path along the lake and try your hand at night photography. The lights from the resort act as light painting on the shoreline’s rocks and edges of the skating areas. If you don’t like the light, then move a little further along the path and away from the resort. Turn off the AF (auto focus) and manually set your lens focus to Infinity (which means you set the focus right at the figure-eight infinity mark and not beyond it). Open the lens aperture up as much as you can (lenses with apertures f1.2 to f2.8 are good for night photos) and try out different ISO and shutter speed settings. Don’t forget your flashlight so you can see the settings. You might want to practice this during the daylight so you become comfortable with using manual focus and for noting where your camera focuses best on that infinity setting.
Orient yourself in relation to the resort and the head of Lake Louise, facing Mount Victoria. Now, turn left and walk along the pavement. A prime place for lovely images in mid-April is at the stone steps leading down to the small stream outlet next to the resort. That area close to the shore melts first and you can get some wonderful mountain reflections during any part of the day, mixed with the still-frozen portion of the lake. You might have to step on and over some small shoveled snow drifts so be careful of your footing. Keep this tidbit in mind: early mornings and late evenings are better for still water and reflection shots, because the wind either has not yet picked up (motning) or it has died down (evening).
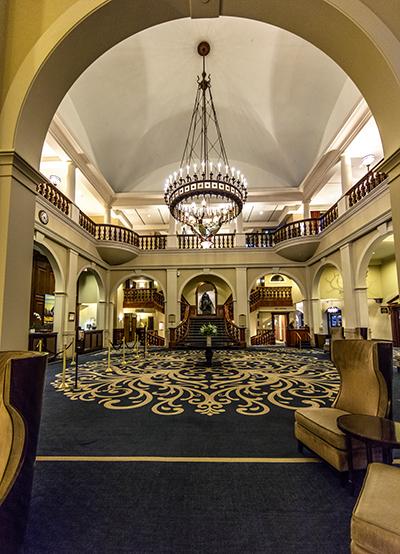
The Fairmont Chateau Lake Louise lobby, Banff National Park / Rebecca Latson

Morning view at the Bow River, Banff National Park / Rebecca Latson
Before departing Lake Louise, take a walk into the Fairmont Chateau Lake Louise situated at the foot of the lake and get a few interior shots of the lovely lobby. Since this will be low-light photography, set your camera to a higher ISO (maybe 1000 or more). Because you might have a little "noise" (graininess) in your photo, you may need to use some noise-reduction during the editing process.
Once you’ve decided to leave the resort area to explore the Icefield Parkway (Hwy 93N), drive back down to Lake Louise Village, past the turnoff to Moraine Lake (that road will likely be closed during this time of year, which is why you don’t see any photos of that famous view in this Part 1 guide). Stop at the bridge spanning the Bow River, just prior to entering the village. You can acquire some nice horizontal and vertical views of the river, trees and mountains before hopping back in your vehicle to continue your journey. Early-to-late morning is a great time for light on the mountains at this spot.

Icefield Parkway scenery, Banff National Park / Rebecca Latson

Mountain vista along the Icefield Parkway, Banff National Park / Rebecca Latson
Just about everywhere you look on the Icefield Parkway is a great photo opportunity. If there is no handy turnout or parking area at a photo op you’ve encountered, the shoulders alongside the highway are wide enough for you to park your vehicle well off the road in order to photograph the stunning mountain vistas. Try to keep away from those shoulders with lots of rocks and boulders, though, as those indicate rockfalls.

A snowy, stormy day at Crowfoot Glacier, Banff National Park / Rebecca Latson

Crowfoot Glacier on a sunny day, Banff National Park / Rebecca Latson
Most, if not all, of the lakes you pass will be covered with a layer of ice and snow. You will see glaciers along your drive, too, such as Crowfoot Glacier (there’s a large gravel turnout for that glacier to your left as you head north). When photographing this type of scene, make certain your camera settings are such that the white of the snow is not a gray-ish tone. Your camera’s meter is trying to find a mid-tone, which in the camera world, means a mid-gray color. You can remedy this issue by working with your camera’s exposure compensation button, allowing you to adjust the exposure measured by your camera regardless of whatever settings you are using. Of course, rather than fiddle with the exposure compensation button, you can also set your aperture and shutter speed to lighten a scene as well. Try experimenting with each of these settings on the same scene to see which you like better and which is easier for you. As you may notice from the images above, the time of day and weather conditions also play a good part in determining the color tone of the snow that day.
If your scene is photographed with the sun and a blue sky, or during early morning, with very little to no sun, then lighting is going to be bluish, giving your snow a blue cast. You can fix that issue by changing the white balance setting on your camera (maybe from AWB to the shade or cloudy settings) or changing the color temperature in your camera to somewhere between 4000k – 5500k (yes, color has temperature and most digital SLRs will allow you to change the temperature, which is measured in degrees kelvin). You can also change the color balance during the photo editing process.
Be aware that photographing a scene filled with patches of snow (bright light) and patches of forest (less light), may be problematic. If you set your camera’s exposure for the darker patches of your composition, then the lighter areas – the snow – may become blown out (highly over-exposed). If you expose for the snow, then your dark areas will be very dark. You’ll need to decide on which scene to concentrate when setting your exposure, then either lighten or darken those other parts of your image during the editing process.

The view looking toward the northeast at Saskatchewan Crossing, Banff National Park / Rebecca Latson
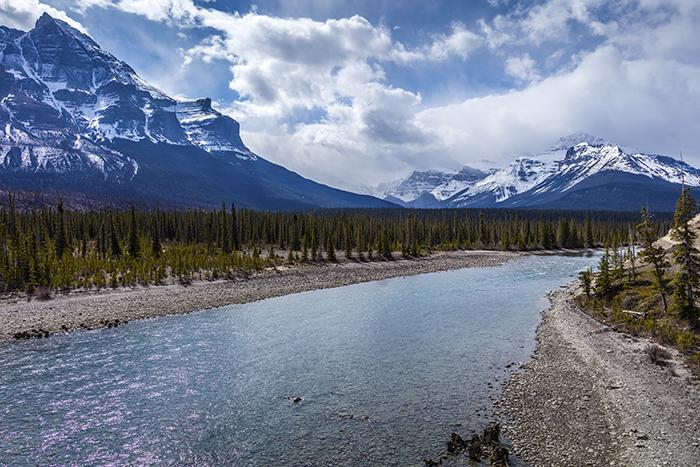
The view looking toward the southwest at Saskatchewan Crossing, Banff National Park / Rebecca Latson
After crossing the bridge over the Saskatchewan River (the maps indicate this is called Saskatchewan Crossing, approximately halfway between Lake Louise and the Icefield Centre), park your vehicle along the shoulder, well out of the way of traffic and walk back to the bridge (look both ways and stay out of the line of traffic). The bridge curb is just wide enough for you to stand on it and set up your tripod to capture both horizontal and vertical images of the river-and-mountain views. The lighting from morning to early afternoon highlights the mountains as well as the aqua hue of the crystal-clear river water. Make sure your polarizing filter is attached to your lens to bestow an extra bit of “oomph” to the colors and reduce glare on the water. You will probably also want to make use of a graduated neutral density (grad ND) filter to even out the bright light of the sky versus the darker areas from the riverbed and surrounding mountains. It might be windy on the bridge so brace yourself and your tripod.
Prior to reaching the Icefield Centre (and Athabasca Glacier and the Glacier Skywalk), you’ll drive up Sunwapta Pass. At the beginning of the ascent, you’ll notice landscape similar to Alaska’s Denali National Park, with wide, flat river beds and a thin thread of river snaking through the sand and gravel. There are a couple of view areas prior to the beginning of the mountain pass climb and you’ll want to stop and photograph the flat expanse versus the sheer, jutting mountains on either side of the narrow valley.

The view down river, Banff National Park / Rebecca Latson
A word of warning: you may be so enthralled with the scenery and attempting to find a great spot for the next photo op, that you neglect to notice whether or not you see large rocks and boulders on either side of the road. You are driving within avalanche country, so please be wary of your surroundings. While I stood with my tripod and camera, aiming at the scene in the photo above, I heard a BOOMING, reverberating rumbling sound directly behind me, surprising and scaring me not a little. I turned, looked across the highway and up the steep mountain wall to see rocks and snow falling from far above. Luckily for me, a swath of forest stood between the rock fall and the highway. Otherwise, I’m sure I might have encountered some rocks bouncing right across the road. Needless to say, I nervously trundled myself and my gear back to the car with some alacrity.
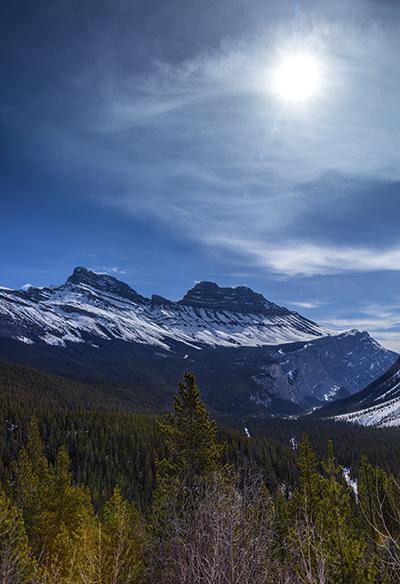
Cirrus Mountain, Banff National Park / Rebecca Latson
As you begin your climb up Sunwapta Pass, stop off at the large turnout on your left and photograph the view back toward Cirrus Mountain. You’ll definitely need to use your grad ND for photos here. If the sun is high in the sky as it was during my visit, try getting a starburst by setting your aperture to f22. You may even have to do as I did and stand yourself and your tripod onto a small drift of plowed snow.

Cirrus Mountain and the Icefield Parkway below, Banff National Park / Rebecca Latson
As the road up the pass steepens around that hairpin curve, there’s a large gravel turnout to your right with a fantastic view of the mountains, valley, and road. From this vantage point, you can see just how far you’ve driven up the pass.

A bridge with a view at the Icefield Centre, Jasper National Park / Rebecca Latson
Upon reaching the Icefield Centre, park in the large lot and walk over to the little bridge connecting the parking lot to the building. Here, you are afforded a nice view of the mountain scenery and the road leading to the glacier. Capture both wide-angle and telephoto shots as the road toward the glacier makes for a nice, curvy leading line. It’s important to utilize a polarizer and ND filter here because it’s quite bright with the snow and the sky.
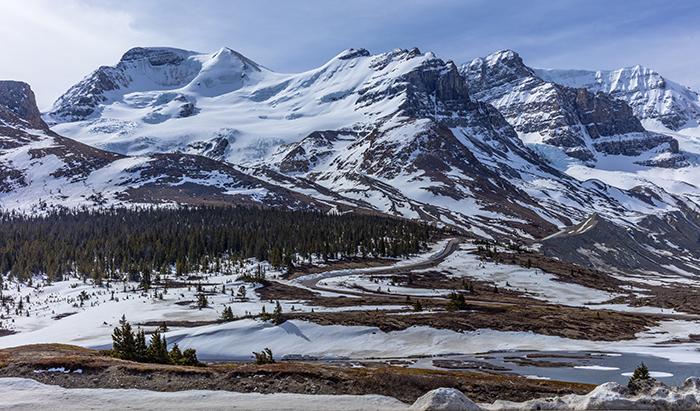
The view from the Icefield Centre, Jasper National Park / Rebecca Latson
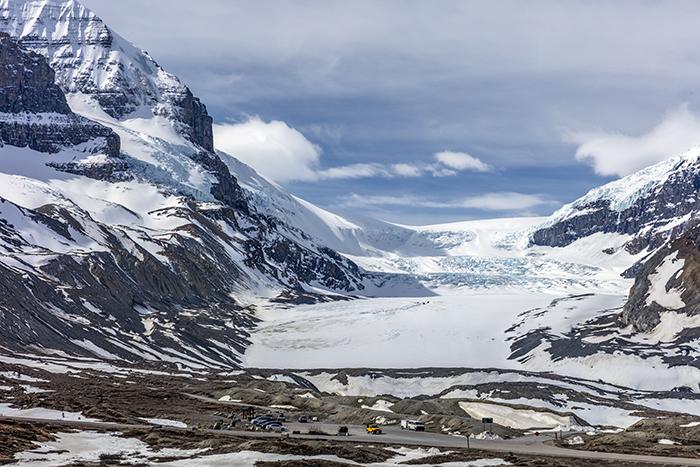
The Athabasca Glacier, Jasper National Park / Rebecca Latson

Tiny people walking upon the Great Athabasca Glacier, Jasper National Park / Rebecca Latson
Continue up the steps to the Icefield Centre’s patio for some expansive views of the scenery. Sit a spell and breathe in the clear, crisp mountain air. If you wish, you can purchase tickets to take a ride out onto the Athabasca Glacier. If you’ve never stood on a glacier before, it’s a pretty cool (literally and figuratively) experience. Since I’d flown to and stood on a glacier during my Denali National Park trip, I opted out of this. When I return, though, I may go ahead and purchase a ticket for this experience.

The Glacier Skywalk, Jasper National Park / Rebecca Latson

On the Glacier Skywalk, Jasper National Park / Rebecca Latson

On the Glacier Skywalk, Jasper National Park / Rebecca Latson

Walking on transparent - The Glacier Skywalk, Jasper National Park / Rebecca Latson
What I did do was buy a ticket to walk out onto the Glacier Skywalk. It’s similar to the Grand Canyon, Arizona, version with a couple of differences. Here, you can wear whatever shoes you wish, without having to wear protective booties. You may also take as many photos as you like, with your own camera, and not be charged for the photos or barred from using your own camera. As cheesy as it may sound, the Skywalk is a fun experience and I swear I felt a little vertigo kick in as I set foot onto the transparent walk. You can achieve some lovely shots of the scenery around you from this vantage point, with or without the Skywalk in your compositions (I included the Skywalk in some of my shots as I liked the scale this man-made construction offered, emphasizing just how small we humans are in relation to the overall grandiosity of the surrounding mountains). You might even see some mountain goats or bighorn sheep as we did while on the bus heading up to the Skywalk. Be aware, though, while photographing the scenery, that you will have issues with the snow-clad mountains and bright sky versus the darker, green tree-dotted valley. I did not take my tripod with me onto the skywalk, so I was unable to use my grad ND filter. I did have my polarizer on the lens, and I worked on the lighting issues when I edited the photos later on my computer.
Upon returning from your Skywalk jaunt, why not make the short drive up the road from the Icefield Centre, turn left and then turn right onto the dirt/gravel parking lot near a path leading to views overlooking the Athabasca Glacier. There’s another short road down to the toe of the glacier, but during my April visit that road was closed, although I saw numerous visitors walking down to the view area and I'm sure I could have hiked down there had I so chosen. The road straight to the glacier itself, is closed to all vehicles except those buses ferrying ticketholders to the glacier for a trek out onto this geological wonder.
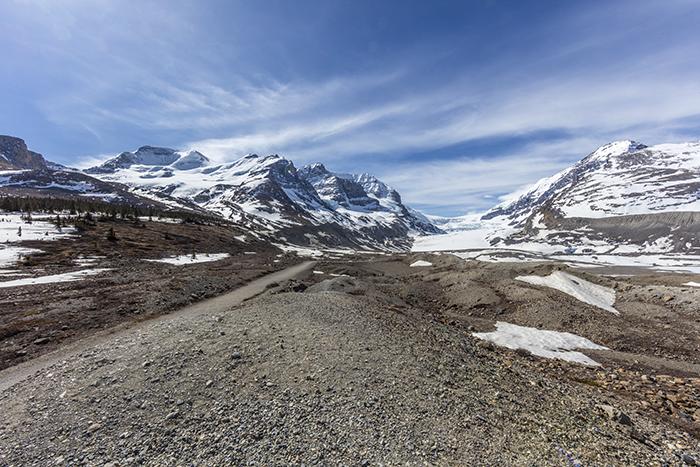
The path to views of the Athabasca Glacier, Jasper National Park / Rebecca Latson
It’s extremely windy (and cold!) as you stand out on the glacial moraine, exposed to the elements while composing your image. Ensure you are dressed warmly and your tripod is heavy enough to not fall over in the wind gusts - especially if you are using a wireless shutter release to get a selfie or group shot. Have your polarizing filter on your lens and use your grad ND filter. If it’s a snowy/stormy day out there, your filters will allow you to add a little drama and texture to the clouds over the area. Remember, sunny clear days are wonderful, but cloudy snowy days are equally as great because clouds add interest to a scene.
This was as far as I got into Jasper National Park. In retrospect, I wish I had driven further into this particular park, and I definitely plan on doing so during my planned 2017 trip. This initial sojourn into the parks was more or less a reconnaissance trip. I also know where I’d like to go within Banff National Park during a warmer season (when trails and other view stops are open). So, (fingers crossed) Parts 2 and 3 of this Armchair Guide will occur later next year.

The photographer at Athabasca Glacier, Jasper National Park / Rebecca Latson

 Support Essential Coverage of Essential Places



Comments
Converting from km to mi you DIVIDE by .6 or multiply by 1.6, or multiply by 8 and divide by 5. Miles are bigger than km. same with km/h.
Hmmm. What I am doing is simply taking the number itself and multiplying by .6. So, when someone enters a 5k run, all I really do is multiply the 5 by .6 and get 3, which is analogous to 3 miles. This is what I learned from a fellow photographer on a photo tour I took several years ago. So, much to your annoyance, I guess I worded that sentence incorrectly. What I should have said was, take the metric number you see on the sign and multiply by .6. In terms of just the number itself, the mile number will be smaller than the kilometer number. It's simply a quick & dirty method of getting an approximation, and it's always worked for me.
Rebecca... we just returned from living in Alaska on the Canadian border and learned to glance at my speedometer for a quick conversion table, as the numbers for metric and American are next to each other. It's mickeymouse as a tool, but works.
Love your photography - I was last in Banff in 1970 during my "young man returned from his combat tour backpack tour around North America", and your pictures help to rekindle my memories of the place. And, given the 40-some years of deteriation in my body since then, I appreciate your viewpoint of finding easy to access beauty.
@J. Ewing: You are correct: Miles are bigger than kilometers. That means it takes FEWER miles to cover the same distance. So you MULTIPLY by .6 to get the approximation. 10 km ? 6 miles. Rebecca was correct in that regard. (Dividing by a decimal < 1 gives you a LARGER number.)
Five comments and only one regarding the traveler's photos and comments; so I will be 2 of 6 and say thank you! I visited Banff, Jasper, and Lake Louise September 2011 and would love to go back in late spring some time to see the wildflowers and more snow on the peaks.
My hero! The next time I write a single paragraph about metrics or math, I'm running it by you first (grin).
Thank you, AnnD for the kind comments. I had to laugh over this all and I'm glad you liked the photos and article.
Your Photos are fabulous! We have been to Banff and Jasper twice in our 66 years of living and plan to visit this year from July 3 - 8, staying in the town of Banff. Your photos and "hints" for capturing the right exposure have been very helpful and made me realize I better brush up on the settings on my camera! Thank you for the stories you have included with the photos and directions to those special spots. I have bookmarked your site and look forward to more Armchair Guides!