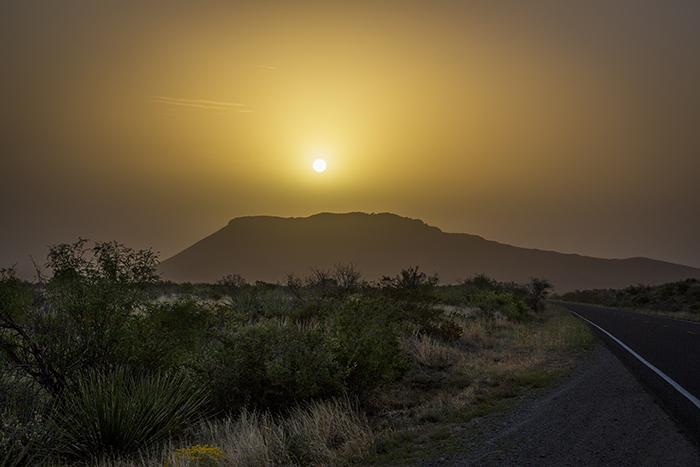
A Big Bend sunrise, Big Bend National Park / Rebecca Latson
In Part 1 of this armchair guide to Big Bend National Park, I left you to get a good night’s rest at either the Chisos Mountains Lodge or the Chisos Basin Campground. Hopefully you are now refreshed and ready for more incredible photography within the park. If you’ve read Part 1, then you have a basic understanding of the park, the importance of staying hydrated, and the importance of watching where you step and where you place your hands when roaming around the desert and rocky areas. You’ll also know that these armchair guides don’t cover every single view area, pullout or trail within the park.
Part 2 is going to take you east, west, and south of the Chisos Basin Road. Let’s head east, first.

A Big Bend sunrise, Big Bend National Park / Rebecca Latson

The road to the sunrise, Big Bend National Park / Rebecca Latson
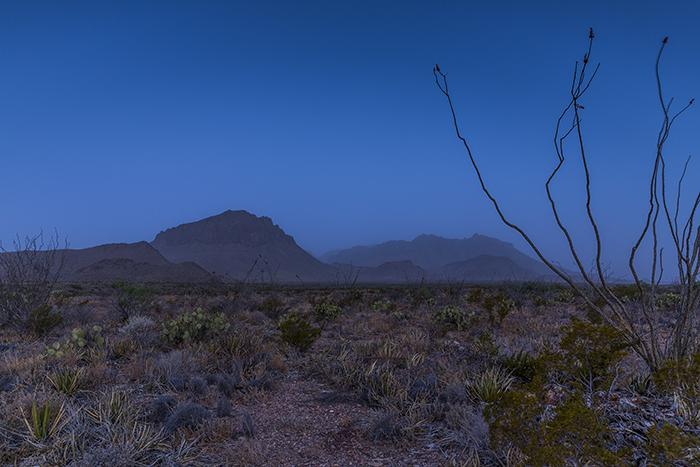
Morning on the Chihuahuan Desert, Big Bend National Park / Rebecca Latson

Mid-morning on the Chihuahuan Desert, Big Bend National Park / Rebecca Latson
Stop 8: The Road Toward Rio Grande Village – Can you say “sunrise”? The sunrises in this national park are amazing. Traffic is slim-to-none, prior to and during sunrise. With your sunrise time table in hand, park on the shoulder of the road and either station your tripod and camera right beside your vehicle, or take your setup out to the middle of the road for a few shots (with your eyes open and your ears alert for any oncoming traffic). You don’t need any filter this early in the morning; as the sun rises, though, you might consider using a graduated neutral density (grad ND) to keep the sky from being blown out as the morning light in the sky progresses but the area below the horizon continues to remain shadowed.
As you continue eastward, you’ll see a number of pullouts and parking beside view areas with descriptions of the Chihuahuan Desert. If you are visiting during the spring, you’ll see all sorts of blooming cactus. Make certain your circular polarizer and grad ND filters are handy for the day’s photographs.
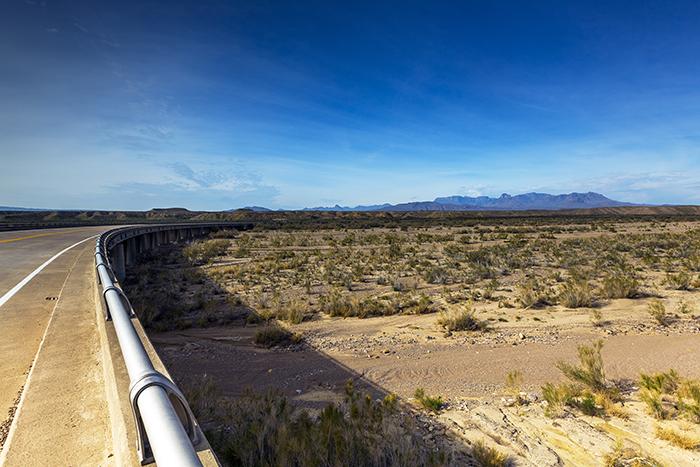
Bridge over the Lower Tornillo Creek, Big Bend National Park / Rebecca Latson

Lower Tornillo Creek bed, Big Bend National Park / Rebecca Latson
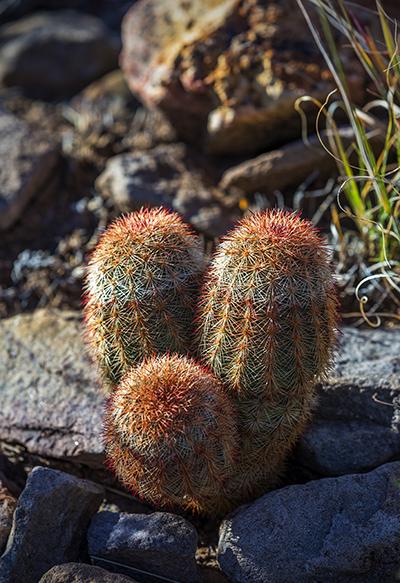
Texas rainbow cactus, Big Bend National Park / Rebecca Latson
Stop 9: The Bridge Over The Lower Tornillo Creek – During the dry time (which would be most of the time in this national park), this just looks like a long bridge over a very wide expanse of desert and you’d wonder why on earth there even is a bridge out in the middle of a dry nowhere. Without the bridge and during a heavy rain, though, this particular part of the park would become problematic for any vehicle. Note: this applies to any off-road area where you might find yourself hiking along a canyon, dry creek bed or what appears to be a dirt road. Flash flooding is a very real threat in the park, particularly during the rainy season of late summer through October.
Park your vehicle on the road shoulder and walk onto the bridge with your camera. This is a great spot to really emphasize the feeling of wide open spaces imparted by this national park. Include the bridge in your image for a sense of scale and reference. Use a wide-angle lens (anywhere from 11mm to 35mm) to encompass as much of the scene as you can as well as to provide a unique perspective to your composition - the wider the angle, the better. Wide-angle lenses tend to make close objects look quite large and far away objects look small; the closer you get to your subject, the more pronounced this exaggeration becomes.

The view beyond the tunnel, Big Bend National Park / Rebecca Latson
Stop 10: The Tunnel Just Prior To The Rio Grande Overlook – Driving onward toward Rio Grande Village, you’ll pass through a short tunnel just before you see the turnoff to the Rio Grande Overlook on your right. Park your car at the overlook and walk back into the tunnel with your camera and tripod (after first checking to make sure no vehicles are heading toward you in either direction). Set your exposure for the scenery you see through the tunnel so as not to blow out (over expose) the view beyond the tunnel interior. You want the tunnel portion to be underexposed since it is acting as the “frame” for your subject (the scenery outside). Notice that both tunnel and road create a very nice leading line, taking the viewer's eye through the tunnel and out beyond to the scenery.

Rio Grande Overlook, Big Bend National Park / Rebecca Latson
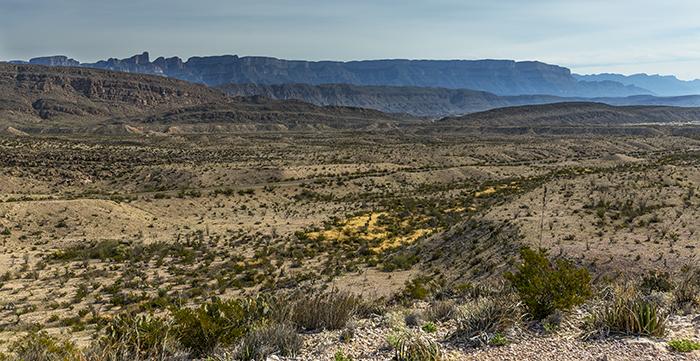
A closer view at the Rio Grande Overlook, Big Bend National Park / Rebecca Latson
Stop 11: The Rio Grande Overlook – After photographing the scenery through the eye of the tunnel, return to the overlook and walk up the path to the top of the short hill to get one of those wide-expanse views that look into Mexico. Use your circular polarizer to cut out glare and add color and definition to your composition. You’ll probably want to use your grad ND filter for this view as well.
From here, it’s either head onward into Rio Grande Village or turn around and head in a westerly direction. So, let’s head west and then south, shall we?
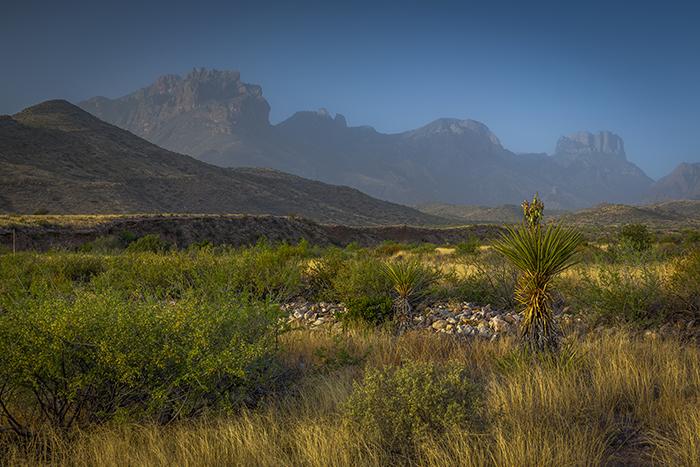
Morning view, Big Bend National Park / Rebecca Latson

The road through the park, Big Bend National Park / Rebecca Latson

Texas brown tarantula, Big Bend National Park / Rebecca Latson
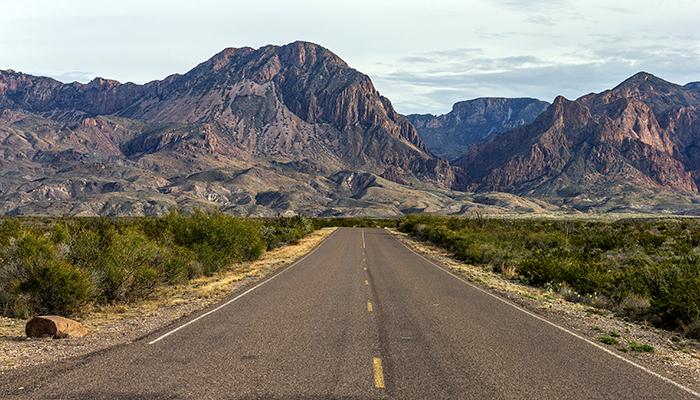
Leading line toward the Window, Big Bend National Park / Rebecca Latson

Chisos Mountains landscape, Big Bend National Park / Rebecca Latson
Stop 12: Ross Maxwell Scenic Drive – Stay on the road back to the Panther Junction Visitor Center and drive west, past the turnoff to Chisos Basin Road. After approximately 10 miles, turn left at the Castelon / Santa Elena junction. You’ll have plenty of opportunities to stop and photograph the amazing geologic vistas prior to this turnoff. Once you take the junction, you and your vehicle will now be traversing the Ross Maxwell Scenic Drive. The views along this highway are expansive. Drive carefully and follow the speed limit; all sorts of critters cross the road, including the Texas brown tarantula.

The Sam Nail Ranch path, Big Bend National Park / Rebecca Latson
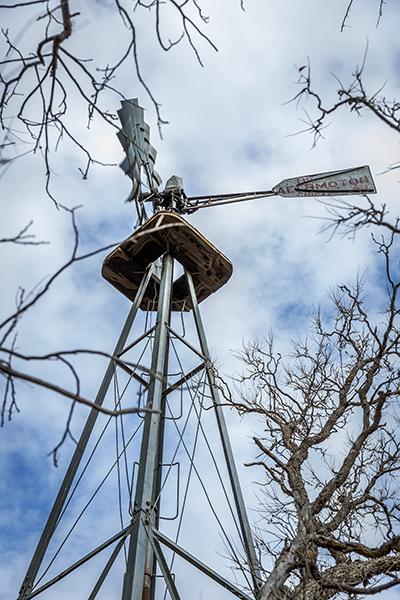
Windmill at the Sam Nail Ranch, Big Bend National Park / Rebecca Latson
Stop 13: Sam Nail Ranch - Three to five miles along the Ross Maxwell Scenic Drive, you'll see a sign pointing the way to the Sam Nail Ranch located off of the right-hand side of the road. Park in the pullout and take the short trail downhill to what remains of the house foundation and the windmill. The tree-lined trail is the perfect place to capture a leading line composition. The remnants of the home and windmill make for interesting mood shots.
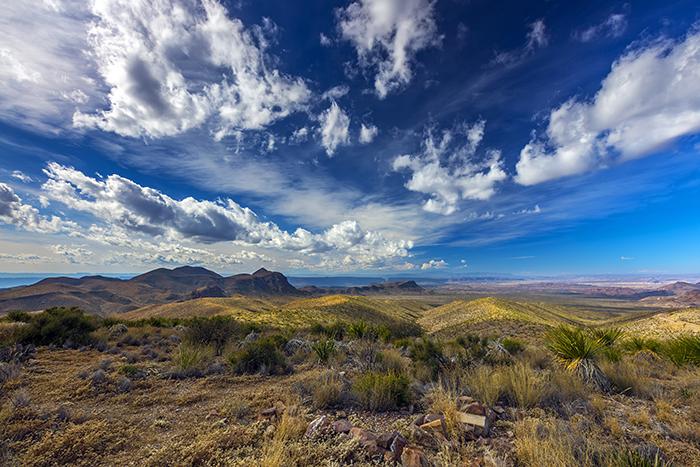
Sotol Vista, Big Bend National Park / Rebecca Latson

The road toward Study Butte as seen from Sotol Vista, Big Bend National Park / Rebecca Latson
Stop 14: Sotol Vista – This is one of my favorite overlooks within the park for really wide-angle views of the land. From the large paved parking area (with a restroom), you can see the Santa Elena Canyon (from this spot, it looks like a small gash in the rock) and into the Mexican state of Chihuahua. On a clear, moonless night, it’s a wonderful spot to try out your night sky photography skills. Use your circular polarizer and grad ND filter to great effect at this view area, named after the sotol plant (commonly known as Desert Spoon). Sotol, for a little trivia, is also distilled into an alcohol by the same name.

Goat Mountain, Big Bend National Park / Rebecca Latson
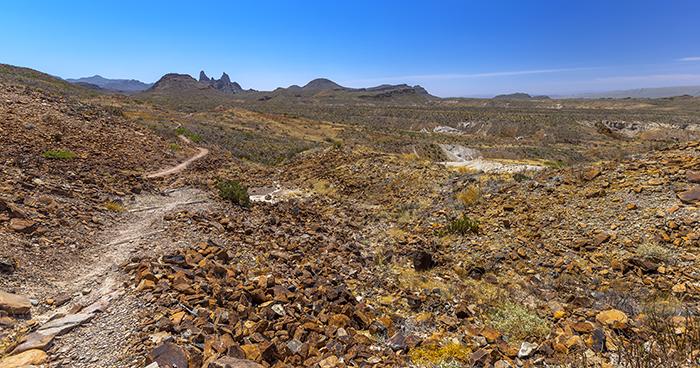
The trail toward Mule Ears Peak, Big Bend National Park / Rebecca Latson

A view along Mule Ears Spring Trail, Big Bend National Park / Rebecca Latson

Eagle claw cactus, Big Bend National Park / Rebecca Latson

Looking down at eagle claw cactus blooms, Big Bend National Park / Rebecca Latson
Stop 15: The Road To Castelon and Santa Elena Canyon – Continue your road trip south from Sotol Vista. Stop off at the Goat Mountain display to read about the volcanic forces which created this colorful geologic wonder. Drive a little further and park your vehicle at the Mule Ears View Point hiktoe a little bit of the Mule Ears Spring Trail. If it’s springtime, keep your eyes peeled for other flowers like the bright fuchsia blooms of the eagle claw cactus or the strawberry pitaya cactus.
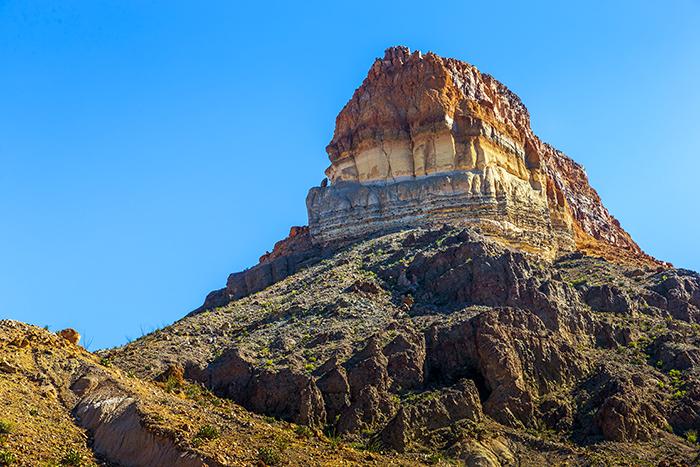
Cerro Castellan, Big Bend National Park / Rebecca Latson

Becky, volcanic ash and lava, Big Bend National Park / Rebecca Latson
Drive a little further and park your car at the Cerro Castellan (Castellan Peak) pullout to view and photograph the orange and buff-colored layers of volcanic ash (tuff) and lava flows comprising this mountain peak. Point your camera across the road at more mountains composed of lava and tuff.

Tuff Canyon, Big Bend National Park / Rebecca Latson
Not too far from Cerro Castellan is the Tuff Canyon view area. This canyon, a little steeper and less wide than others within the park, is composed of – you guessed it – volcanic ash. At the bottom of the canyon lie volcanic rocks. This stuff is not eroded as easily as other rock which is why it’s a canyon and not a broad wash.
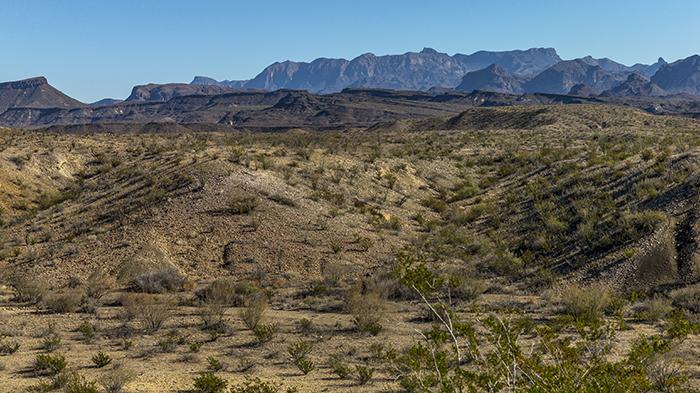
Land of distances, Big Bend National Park / Rebecca Latson
After passing the left turnoff to Castelon (the visitor center is closed in the summer but the little store is open year-round) and the Cottonwood Campground, you’ll see a stop to your right. Take the gravel trail up to the pictorial description to read about the “Land of Distances”. Capture both wide-angle and telephoto shots here, then just stand and breathe in the dry, fresh air while looking as far north as your sight can reach.

Santa Elena Canyon Overlook, Big Bend National Park / Rebecca Latson
When you are finished looking north, turn yourself around and see how close you are getting to that gash in the rock wall – that gash known as the Santa Elena Canyon. Just prior to the Santa Elena Canyon Trail parking lot, there is a parking area with a nice view straight on into the canyon.

The Rio Grande and Santa Elena Canyon, Big Bend National Park / Rebecca Latson

On the Santa Elena Canyon Trail, Big Bend National Park / Rebecca Latson
Stop 16: Santa Elena Canyon Trail – The trailhead is reached from the parking lot and crosses over the mud and sand bank beside the Rio Grande. Depending upon the time of year, the river could be quite shallow, as it was during my December 2013 visit. The trail doesn’t start to climb until you’ve crossed over the river bank. If you don’t feel like making the climb and then the easy but somewhat steep descent of this short trail, you can stay where you are and get shots of the river, the area around the river, a leading line composition of the trail itself, and the canyon walls. If you manage to reach the trail really early in the morning, you’ll be there to see the sun bathe the front and entrance walls of the canyon with orange-gold lighting.

Starry morning on Chisos Basin Road, Big Bend National Park / Rebecca Latson

By the light of the Big Bend Moon, Big Bend National Park / Rebecca Latson
Stop 17: Night Sky Photography – So, you’ve spent a day or two or more taking tons of photographs of the sights within this huge national park. Now, let me tell you about the nights here in Big Bend. According to the National Park Service (NPS), Big Bend National Park has the least pollution of any of the national parks within the Lower 48 and is designated as an International Dark Sky Park (one of the benefits of being in such a remote part of Texas).
If you stay awake past 10pm or set the alarm for after midnight, you and your camera will be treated to an amazing starry canvas above your head where you can see a part of the Milky Way. It is an awe-inspiring sight. I caution you to drive slower than the speed limit during these wee hours of the night/morning, because that is when the animal life picks up. Jackrabbits are extremely common in the park and during the nights I was out, they were all over the road, zipping in zig-zags in and out of my rental car’s path.
Night photography is a little tricky and takes some practice; I’m still learning, myself. Expect to take numerous images in your endeavor just to get a few “keepers”. Following are some tips that I’ve learned along the way.
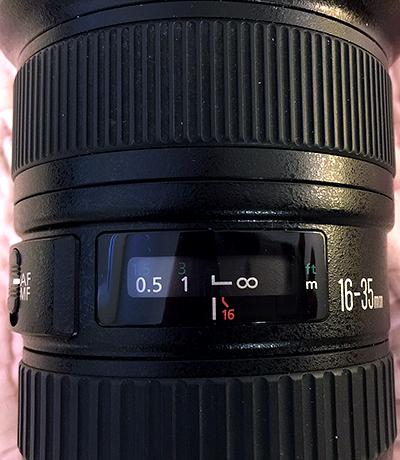
Infinity focus on a Canon lens / Rebecca Latson
I like using the widest-angle lens I have, which is my Canon 16-35mm lens. Because it’s dark, the lens will search and search for a point on which to focus, generally not accomplishing the goal. Best to switch your lens from AF (auto focus) to MF (manual focus) and set the focus to Infinity (that little sideways figure-8 symbol). On my Canon lens, this means essentially moving the lens focus all the way to the right – actually, just a little bit left of right (makes sense, yes?). Practice setting the focus to infinity during the day, so you can see how far you need to move the focus ring in order for your subject to look sharp. I have discovered if I set my focus all the way to the right, directly on the infinity symbol, my focus of the sky is not totally sharp. The photo above shows where I must set my focus ring for the stars in the night sky to be clear.
Your camera absolutely needs to be on a tripod for your night shots. Play around with your ISO (anywhere from 3200 to 6400), aperture (f2.8 to f4), and shutter speed, which can be anywhere from 20 seconds to 30 seconds; setting your shutter for anything longer than 30 seconds causes the star trail swirly effect (which gives me vertigo, believe it or not).
It’s also quite likely you will need to play around with your color balance during your photo editing. Sometimes the night sky images come out a little on the yellow side instead of the deep indigo blue your own eyes see. You can change the color temperature settings in-camera or simply correct this issue with your photo editing software.
It’s a safe bet your images will initially look grainy (“noisy”). By "grain", I'm referring to the pink and green and yellow specks in your composition. Noise reduction software is a requirement for a great night sky image – at least, it is for me. If you are really serious about night sky photography, there are online and in-person tutorials and workshops out there to help you hone your skill.
This ends another of my armchair guides. Big Bend National Park is a vast land of volcanism and Chihuahan desert. During the spring, it’s a feast for the eyes when the cactus and ocotillo are in bloom. During the summer, even at the park’s hottest and driest, you might still experience a short, dramatic thunderstorm which can turn a wide, dry wash into a raging river. During the winter, you may spot interesting things such as tarantulas crossing the road, and you might even experience a freak storm that will coat a prickly pear cactus with a layer of ice. These stops are just samplings of the areas you can reach with your camera. A huge national park like Big Bend presents huge photographic opportunities. Have fun using these stops and ideas to create your own armchair guide and add to what I’ve listed in this article.

The road to the stars, Big Bend National Park / Rebecca Latson


 Support Essential Coverage of Essential Places



Comments
I want to go there!