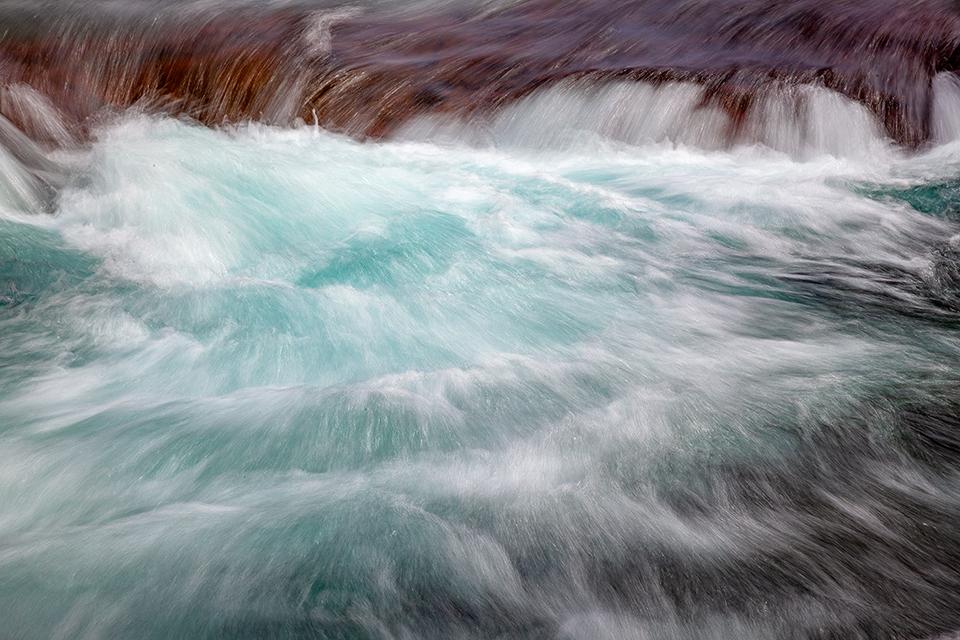
The energy of agua, Glacier National Park / Rebecca Latson
…But not a drop to drink (paraphrased from the “Rime of the Ancient Mariner”).
Let’s think about water for a minute. Consider all the forms of water we may have included in our park photos. There’s water in its liquid form (ponds, hot springs, lakes, streams, rivers, oceans), water in its solid state (ice, glaciers, snow), and water in its gaseous state (mist, steam, clouds).
Water is usually photographed in conjunction with something, like mountain reflections, a boat, a forest stream,

A Swiftcurrent Lake sunrise, Glacier National Park / Rebecca Latson
a waterfall cascading off a mountainside,

A hazy sunrise over Myrtle Falls, Mount Rainier National Park / Rebecca Latson
a colorful hot spring,

Ripples in the water, Biscuit Basin, Yellowstone National Park / Rebecca Latson
a glacier on a mountain,
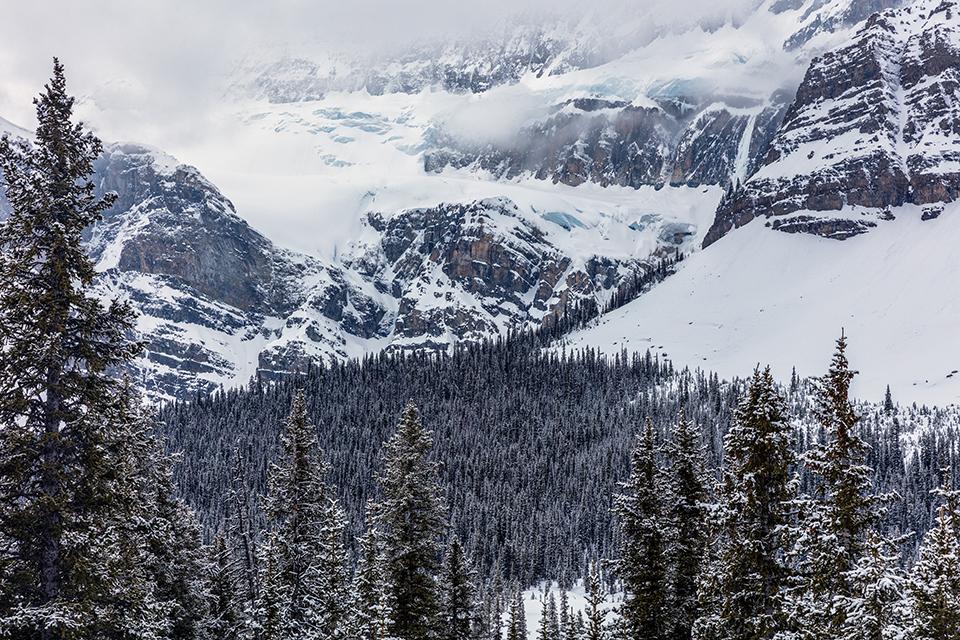
Crowfoot Glacier landscape, Banff National Park / Rebecca Latson
snow on the landscape,

A winter landscape in the Paradise area, Mount Rainier National Park / Rebecca Latson
mist swirling around trees,
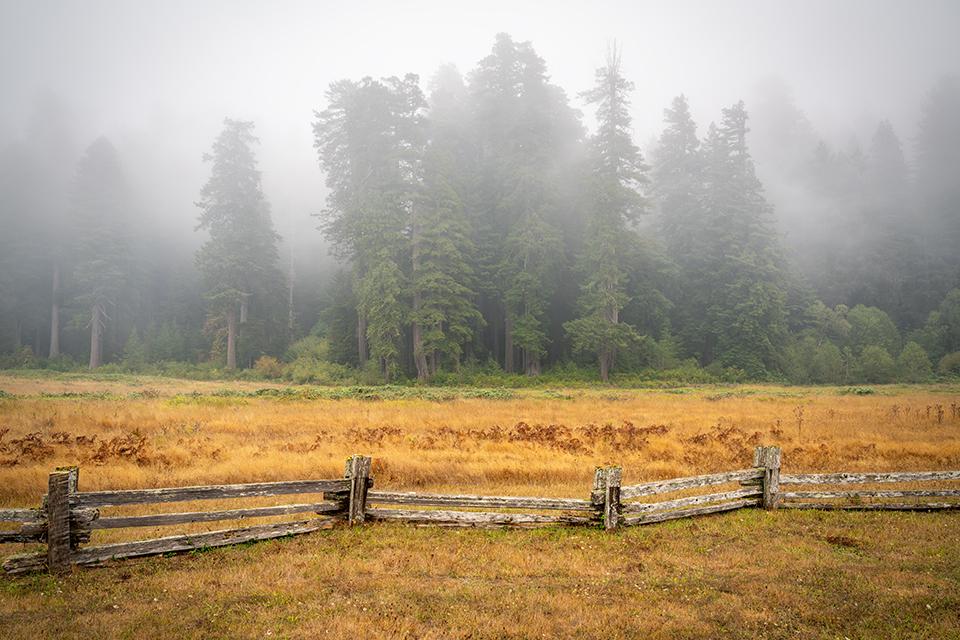
A misty morning at Prairie Creek Redwoods State Park, Redwood National and State Parks / Rebecca Latson
geysers exploding a few feet to hundreds of feet into the air,

dramatic clouds over a mountain.

Clouds over "The Mountain," Mount Rainier National Park / Rebecca Latson
Numerous national parks and protected areas are brimming over with water scenes. Because there is so much national park photography associated with water, I thought an article about water photography – or rather, photography with water in it – would be appropriate. And no, this is not another “silky water” article, although there are silky water shots included in this column.
For those of you who are unfamiliar with the term silky water, it’s a technique to create a satiny, silky effect on moving water by keeping the camera on a tripod while using a slow shutter speed. The trick to a successful silky water shot is through the use of a circular polarizing (CPL) filter or a neutral density (ND) filter. These filters allow you to apply a slow shutter speed while preventing the bright portions (“highlights”) of the image from being overexposed (“blown out”).
Photographing Water Movement and Energy
Let’s think about how we might photograph the energy of water movement in a burbling stream, flowing river, cascading waterfall, erupting geyser, or ocean wave, like the abstract at the top of this article capturing the frothy flow Glacier National Park’s Avalanche Creek, or the images below of the arcing green Pacific Ocean waves at Rialto Beach in Olympic National Park and Grand Geyser erupting at Upper Geyser Basin in Yellowstone National Park.

Pacific waves at Rialto Beach, Olympic National Park / Rebecca Latson

A Grand Geyser eruption, Upper Geyser Basin, Yellowstone National Park / Rebecca Latson
All three compositions capture water’s energy, but there’s a difference between the photo of Avalanche Creek and the ones of the ocean and geyser. For Avalanche Creek, I used the silky water technique of slowing the shutter to capture the energy. For both ocean and geyser images, I applied a fast shutter speed to freeze the movement. Both of these techniques are great for conveying water’s energy to your viewers.
Below are three images of Stehekin River in North Cascades National Park. Each shot was captured with a progressively slower shutter speed. Which image most conveys to you the movement and energy of that cold, clear river? No wrong answer here, since photography is a subjective art. These photos simply demonstrate ways to capture water movement. The next time you and your camera are in front of a waterfall, stream, or river, play around with your camera’s shutter speed dial and a CPL or ND filter.
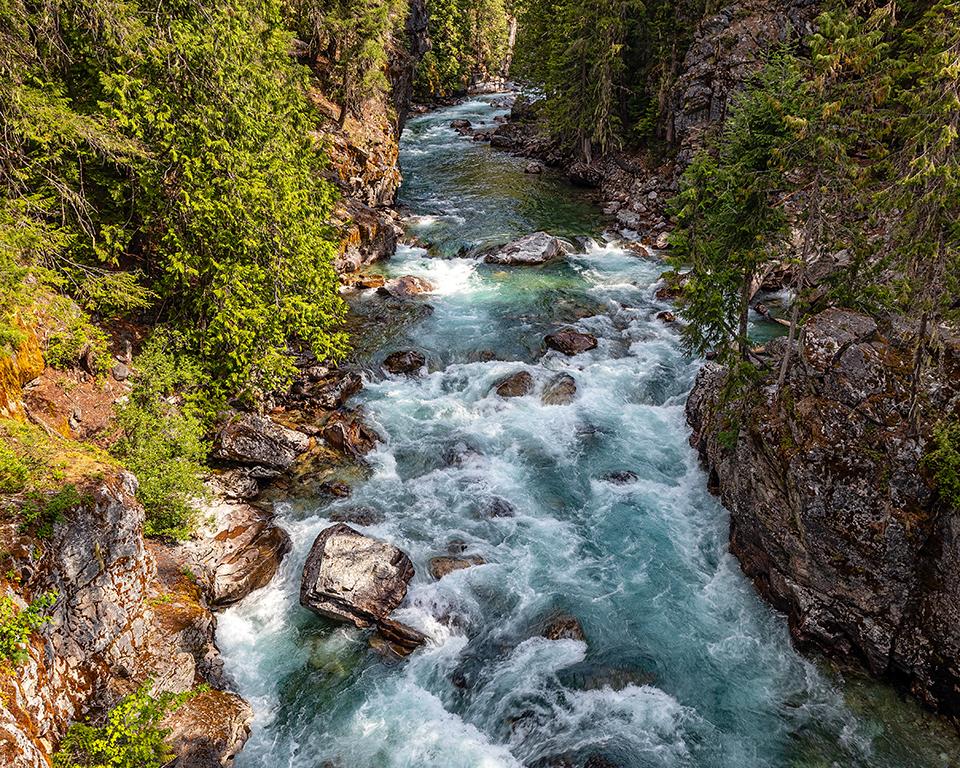
A High Bridge view of Stehekin River, North Cascades National Park / Rebecca Latson

Stehekin River energy, North Cascades National Park / Rebecca Latson

Stehekin River silky waters, North Cascades National Park / Rebecca Latson
Before I leave the subject of portraying water movement with your camera, I want to show you one more example of how to convey the power of water: photograph a glacier. There’s no discernable movement in a “river of ice,” but through the sinuous curves of an aerial view like the shot I snapped while flying over Denali National Park and Preserve, and the close-up of crinkled crevasses like the telephoto view of Nisqually Glacier in Mount Rainier National Park, glaciers convey to the viewer the immense power of the gradual, inexorable, crushing “flow” of tons of frozen water over a landscape.
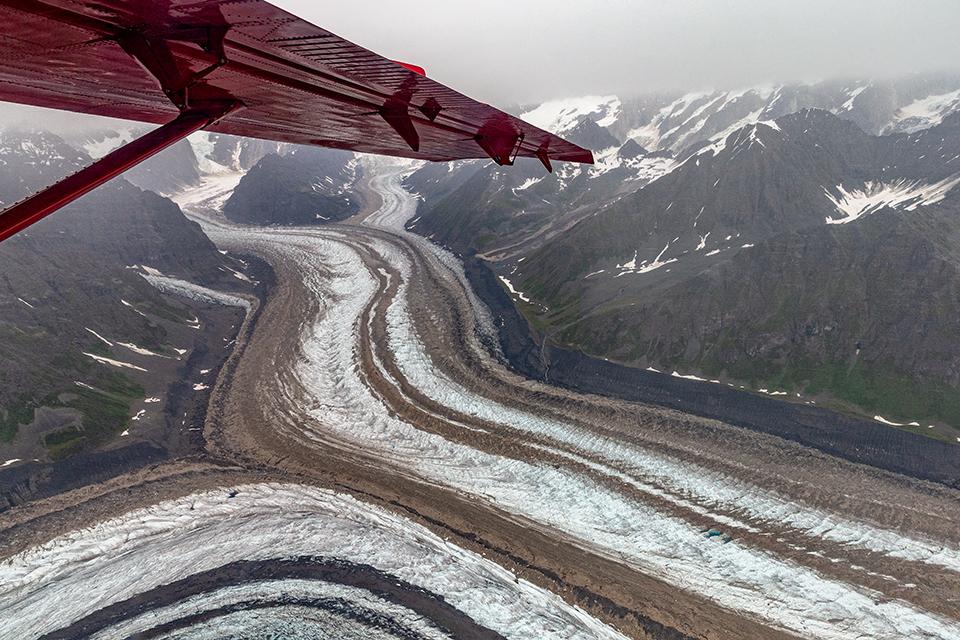
Rivers of ice, Denali National Park and Preserve / Rebecca Latson

A telephoto look at Nisqually Glacier, Mount Rainier National Park / Rebecca Latson
Photographing Reflections on Water as Well as What Lies Beneath
Earlier, I mentioned the use of a CPL to achieve a silky water shot. The versatile CPL is also great at removing surface reflections on water, thus allowing you to see beneath that liquid surface.
Lake Josephine's clear water and colorful pebbles, Glacier National Park / Rebecca Latson
A CPL works like your sunglasses to remove surface glare. The trick is that the sun needs to be at an angle to your photo’s subject for the CPL’s effect to be obvious. That’s why morning hours prior to noon, and afternoon/evening hours after about 2:00 p.m. are the most successful times to apply the glare-reducing effects of your polarizing filter. Just rotate that outer filter ring to see what I mean.
Below are a couple of photos of Liberty Pool at Upper Geyser Basin in Yellowstone. One image was taken without a CPL, and the other was taken after rotating that CPL filter ring.
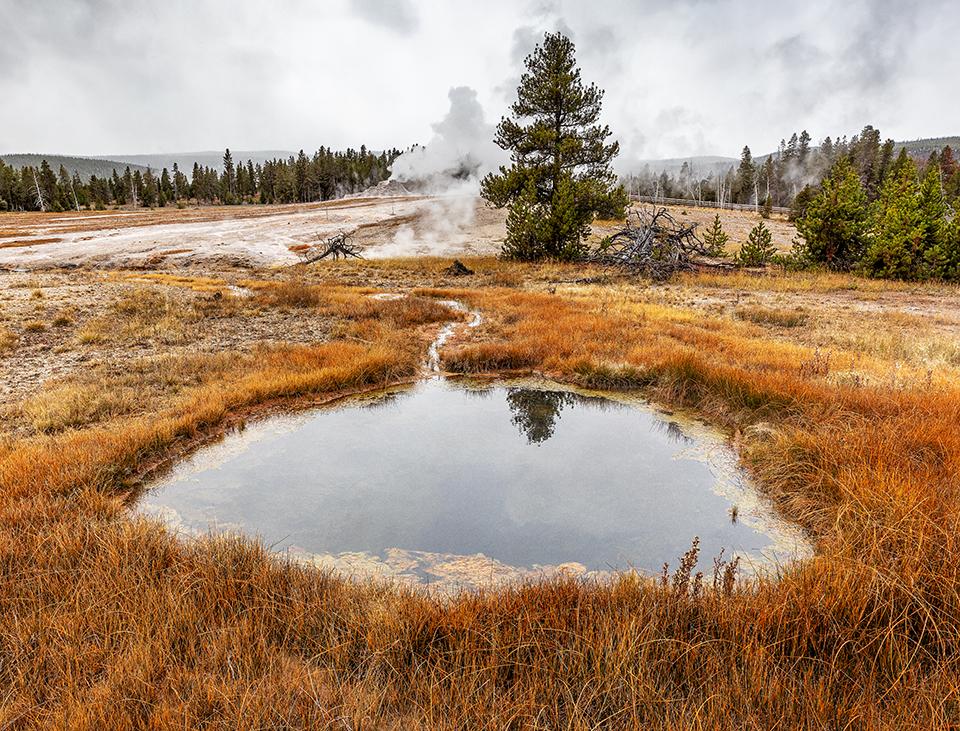
Liberty Pool without the use of a CPL filter, Upper Geyser Basin, Yellowstone National Park / Rebecca Latson
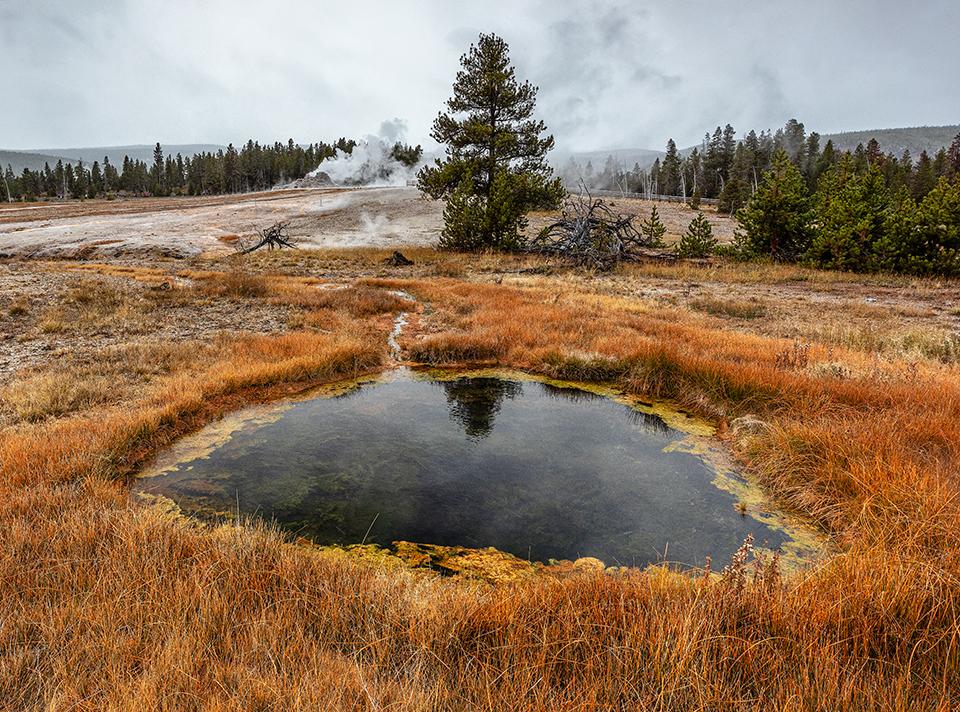
Liberty Pool using a CPL filter, Upper Geyser Basin, Yellowstone National Park / Rebecca Latson
You now know you can use a CPL to see beneath the water, but what if you actually like a reflective scene in your composition? Mountains reflecting in mirror-smooth ponds and lakes make awesome images. You don’t have to take that CPL off your camera to keep that reflection in your shot. Just rotate the outer ring a bit to deepen the water’s colors and really highlight that reflection. Rotate that filter ring a little more, and you’ll still have your reflection and you’ll be able to see beneath the water.
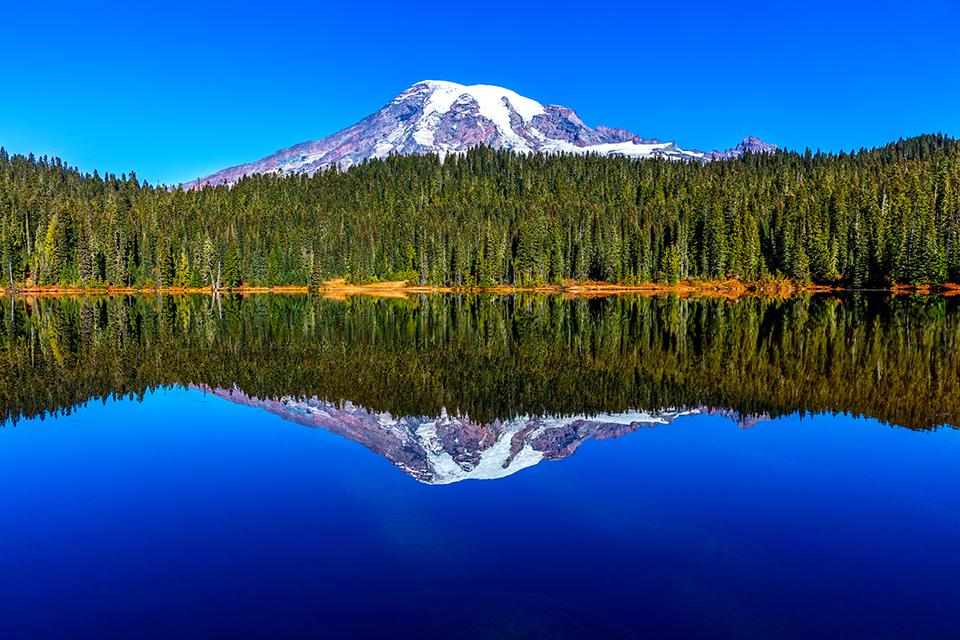
Reflection Lake reflections, Mount Rainier National Park / Rebecca Latson

Fishercap Lake reflections, Glacier National Park / Rebecca Latson
Water as A Leading Line
I’m a huge fan of the leading line. They are a favorite photographic theme. I use trails, roads, fences, and water bodies to create that line leading my viewers’ eyes from one portion of my photo to another. As your eyes follow that progressing line of flowing water, perhaps you’ll wonder what vistas that water rolls past and where it will eventually empty.

Winter flow along a nameless creek, Mount Rainier National Park / Rebecca Latson
Photographing Ephemeral Mists, Dramatic Clouds, and Geyser Steam
Many photographers don’t much care for bluebird skies because they are so “ho hum.” While I am not of that category, I readily agree that clouds add texture and often drama, to make a great image into a fantastic image. To heighten that cloudy drama, I often use either my CPL, or a graduated neutral density (grad ND) filter. The CPL and grad ND both bring forth a cloudscape’s texture, and the grad ND – a piece of resin or glass that is half shaded-half clear – works at preventing the brighter sky scene from blowing out the highlights while allowing you to focus on the darker vista below the horizon.
A misty day in the park allows you to photograph some fairytale scenes like this shot of coastal redwood trees in Redwood National and State Parks.

Redwoods in the mist, Prairie Creek Redwoods State Park, Redwood National and State Parks / Rebecca Latson
Because mist is so ephemeral, you need to be quick about getting the shot before the scene changes, which is what occurred with the image below of a geothermal mist in the northern portion of Yellowstone as I headed toward Tower Junction. I’d originally stopped because I saw nicely-defined sun rays piercing through the mist. By the time I set up my tripod and camera, I saw this image, instead. It’s still lovely (imo) but it’s not what I’d wanted to originally capture.

A geothermally foggy morning, Yellowstone National Park / Rebecca Latson
If you read my article about photographing forests, you will have read the paragraph about low light and graininess (“noise”). Low-light imagery is not the only producer of grainy photos. Mist, fog, and steam will often look grainy as well. The pixels might not be the pink/green/yellow grains you see in low-light shots, but if you enlarge your photo while editing, you’ll see a grainy texture. Use of noise reduction software mitigates the grainy look. If you’ve never heard of this kind of software, just type “noise reduction software” into your search engine to pull up all sorts of brands, blogs and reviews.
Photographing Snow
If you read any of my previous articles about photographing snow, then you’ll know bagging a good snow scene takes some practice. You don’t want to blow out those bright white highlights, you don’t want your snow tinted gray, and you don’t want your snow to look too dark. You do want your snow image to look interesting and even dramatic. So here’s a tip: try to include one or more darker subjects within your snowy composition. Something dark, like a tree or rocks or mountains or even wildlife give your viewer a frame of reference.

A snow-carpeted bridge over a snow-blanketed Edith Creek, Mount Rainier National Park / Rebecca Latson
You might want to capture snow falling (more movement of water in its frozen form). To do this, you need to strike a nice balance with your shutter speed. If the shutter speed is too fast, then your image won’t really delineate the snowfall, but if it’s too slow, you’ll get white streaks rather than little white dots of snow.
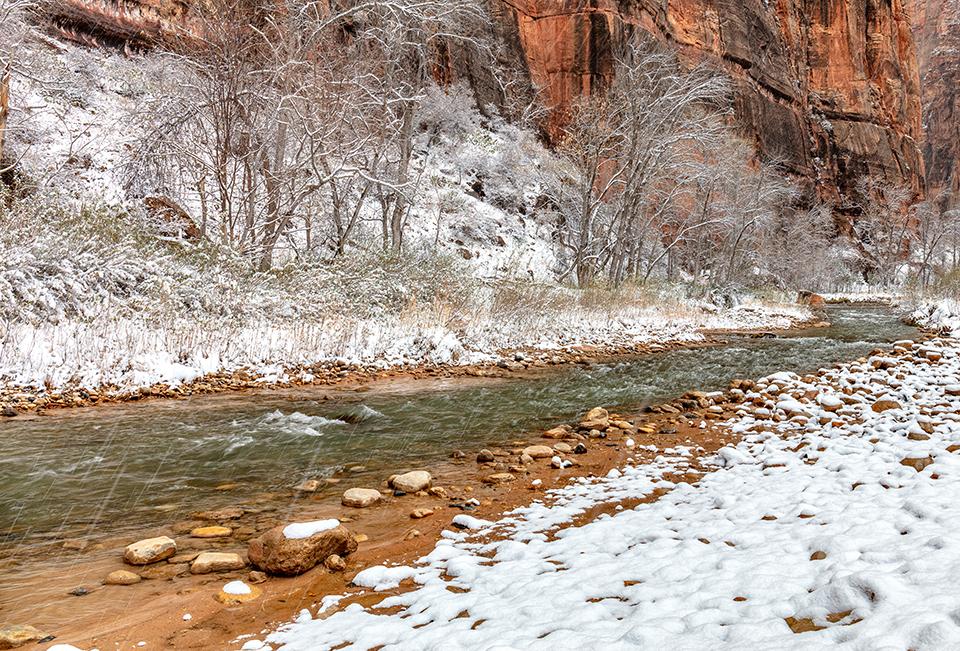
Snow streaking over the Virgin River, Zion National Park / Rebecca Latson
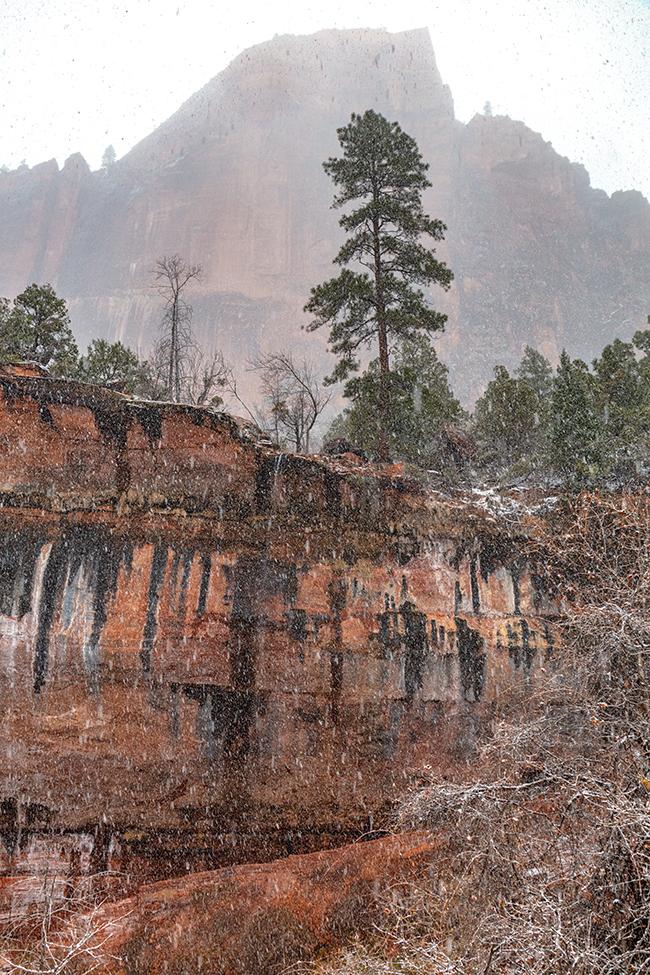
A winter snowfall in Zion National Park / Rebecca Latson
If you are aiming for something a little edgier with your snow image, here’s a hint to make your photo even more dramatic – something that goes against what I’ve written earlier: make your image “high key.” High key is where you actually do blow out those highlights to bring even more focus on your darker subject(s). You need a white background for this technique, so a bright day with no blue sky works well, like the day I visited the Paradise area of Mount Rainier to capture these shots that I turned high key during the editing process. Oh, I kept the original jpgs, too. I always make copies of images on which I wish to experiment. Note that I converted this image into a black-and-white version, as well, for a comparison of color versus monotone. To achieve a high-key shot, you can do this directly with your camera (bumping up the ISO, slowing your shutter speed, opening up the aperture) or via the editing stage (like I did) once you’ve uploaded the image to your computer.

A high-key line of trees in the snow, Mount Rainier National Park / Rebecca Latson
Just as some groups of people have many different words for snow, you can see now there are many different ways of photographing water in a national park. Get your feet wet (pun intended) the next time you and your camera visit a national park by taking as many different water photos as there are possibilities for the shot.
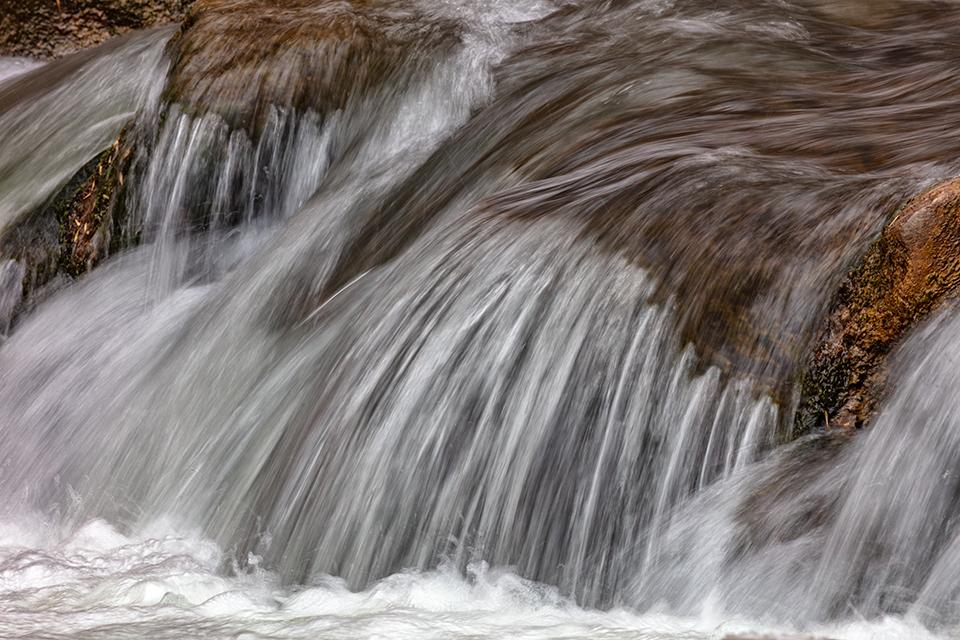
Liquid movement, Virgin River, Zion National Park / Rebecca Latson


Comments
Beatiful photos, especially the "liquid movement"!
I particularly enjoyed the - to me - local pix from Stehekin in NOCA. That aside, you have once more convinced me that every photo in a photo story of yours is worth enjoying. Well done.
Very nice article with good, useful tips!
Another great article Rebecca - thanks!