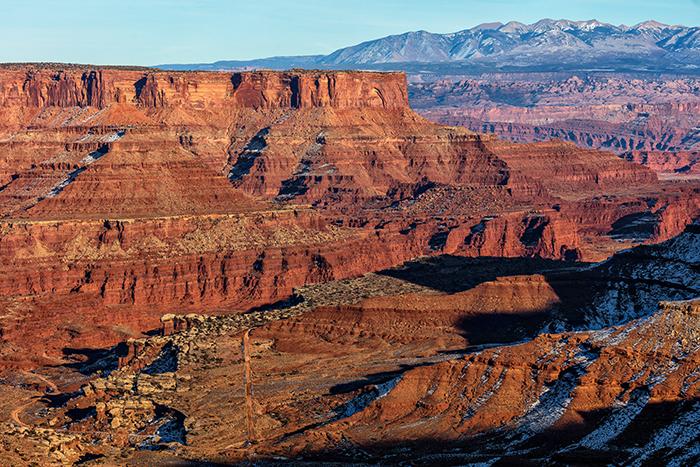
A late-afternoon view into Shafer Canyon, Canyonlands National Park / Rebecca Latson
It’s been awhile since my last Armchair Photography Guide. You see, I have rheumatoid arthritis and am not a backcountry hiker. While I do hike some longer trails, I am of the opinion that you don’t have to venture too far from car, campground or cabin to achieve stellar images of beautiful locations within a national park. All you need to do is put a little thought into your composition and apply a few techniques. So, I began writing these Armchair Photography Guides a few years ago with the intention of providing tips and techniques for getting great photos using any camera (smartphone, point-and-shoot, SLR) at easily-accessible locations or along shore, or popular hikes within a national park.
This month's column is devoted to an Armchair Photography Guide for Canyonlands National Park. Canyonlands is divided into fiur districts, two of which I have visited and one of which I will detail here: Island in the Sky. While I have not stopped at every single view area nor hiked every single trail, I hope the stops and trails I do describe in this guide will whet your photographic appetite to set out on your own Island in the Sky adventures.
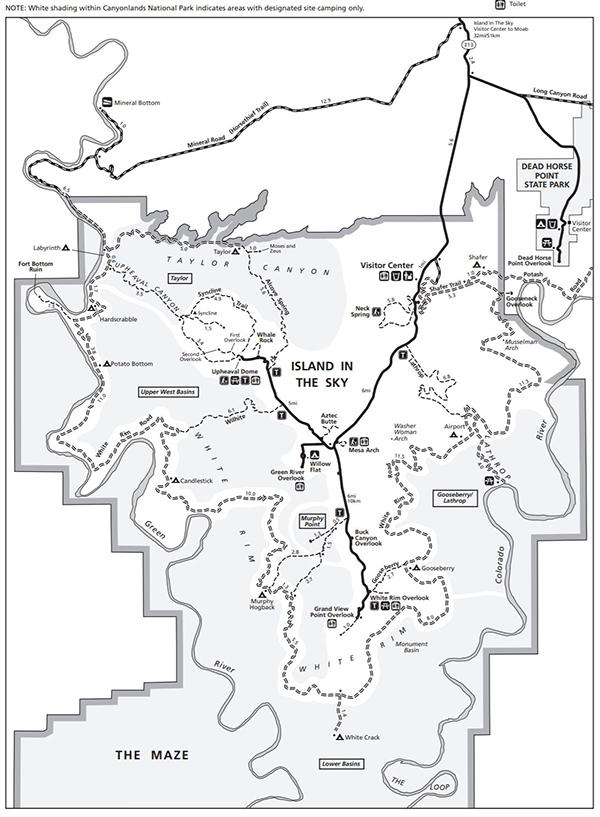
A map of Island in the Sky District, Canyonlands National Park / NPS
Note: There are many scenes along the road prior to entering this district in Canyonlands that merit stops for photos. There's also the opportunity for a side trip to Dead Horse Point State Park. For this guide, however, I’m going to stick with just the things you can see and photograph within Island in the Sky District.
Getting There
From Moab, Utah, it’s 32 miles to the Island in the Sky entrance. Aside from the visitor center, where drinking water is available spring through fall, there will be no food, gas, or water services elsewhere within the district. Make sure you have plenty of each before starting your day’s adventure.
Gear
Whatever camera you use, I suggest you bring the following:
- At least one spare charged battery and battery charger (or an outlet charger to use in your lodging and a car charger for your smartphone)
- Plenty of memory cards for point-and-shoot or SLR cameras, ranging from 8GB to 128GB
- Memory card reader
- Laptop or some other means of downloading and storing your images in addition to keeping them on your memory cards
- Portable hard drive(s) of 1-2 TB, which you can purchase at Wal-Mart or Amazon or elsewhere, ranging in price from $54 - $119
For SLR cameras, you’ll want to pack:
- A wide-angle lens and a telephoto lens for your SLR. Zoom lenses are the most versatile, but if you have room for a couple of primes, bring those, too. The lenses I travel with are 14mm, 16-35mm and 24-70mm zooms. The telephoto I bring with me is the 100-400mm, but the 70-200mm or even a 24-105mm will work just as well.
- Circular polarizer filter (CPL)
- Graduated neutral density filter (grad ND)
CPL filters work on the same principal as your sunglasses. When your lens is pointed at or near 90 degrees to the sun, rotating the outer ring of a CPL reduces glare, eliminates reflections, saturates color, and adds texture to clouds and craggy canyon rock.
Grad ND filters are round, square, or rectangular half-clear, half-shaded pieces of glass or high-quality resin. The gray-shaded portion comes in different darknesses (densities) and is used to mitigate the difference between the bright highlights of the sky versus a darker ground.
I highly advise you bring a tripod with you. It really does help stabilize your camera to create a clear, sharp image, and can serve double-duty as a hiking staff. Yes, even a smartphone can be placed on a tripod, with the correct tripod mount (available at Amazon.com from $4 - $9). Ok, so, why would you want to use a tripod for your smartphone? To get a time-lapse video! My May article details this fun technique and shows an example of a smartphone tripod mount I used during my Bryce Canyon National Park trip.
You've got the gear, you've got the supplies, and now it's time to get going. While you can capture wonderful photos just about any time of day in this national park, you should start your photographic day early. There are so many view areas and trails to explore with your camera, you’ll be spending the entire day out in the field. You should leave early, too, because sunrise provides gorgeous gold-red light and interesting shadows highlighting the patterns, colors and textures of the mesa, butte, and canyon geology you see.
Shafer Canyon
Park your vehicle at the Island in the Sky visitor center and cross the road to venture out toward views of Shafer Canyon.
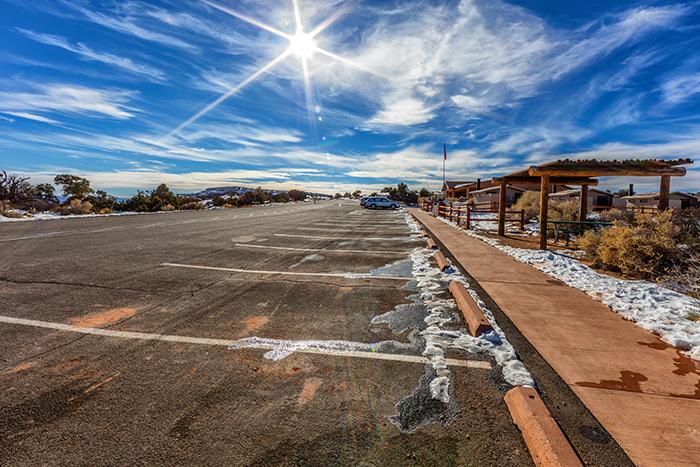
Island in the Sky visitor center, Canyonlands National Park / Rebecca Latson
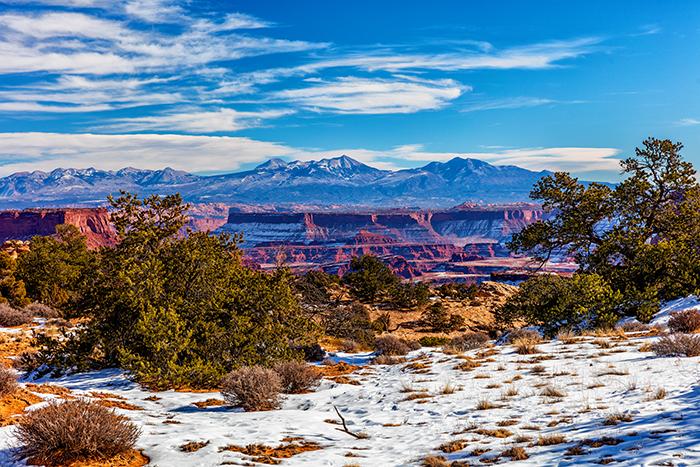
The view across the road from the visitor center, Canyonlands National Park / Rebecca Latson
During the sunrise, it may be a little shaded, but the higher the sun climbs into the sky, the more side light you’ll get into the canyon, with full exposure by midday. Don't feel too discouraged if your resulting photos appear a little dark in places from too much shadowing. Any good photo editing software will have a tool, preset, or slider you can use to moderate those shadows. Later in the afternoon, after 2 p.m., you’ll start to get great side lighting in the opposite direction of the sunrise lighting. The wind might be a little gusty at times, so a sturdy tripod is helpful in keeping your camera steady on the slickrock (watch your step! Also, some tripods have hooks at the base of the camera mount where you can attach a weight, such as a small sack with rocks in it, to help prevent winds from blowing it over). During the hour prior to sunrise, as well as the beginning of sunrise, you won’t need a CPL on your lens. However, as the sun continues to rise but is still at an angle, you might want to use that polarizer and a grad ND to keep the sky and sun from overexposing (blowing out) while you set your camera exposure for the canyon walls and floor.
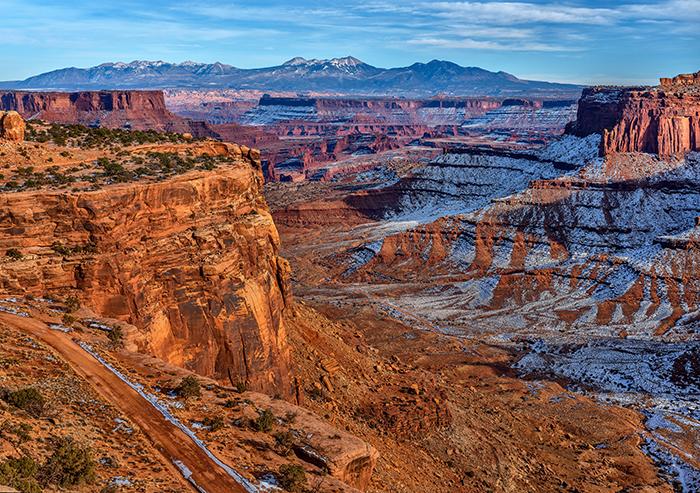
Looking into and beyond Shafer Canyon, Canyonlands National Park / Rebecca Latson
Just a little further down the road is another Shafer Canyon stop to your left. Wander down the trail to the area that juts out into the canyon for a different perspective of the scene. Don't forget to photograph into the canyon in addition to beyond the canyon.
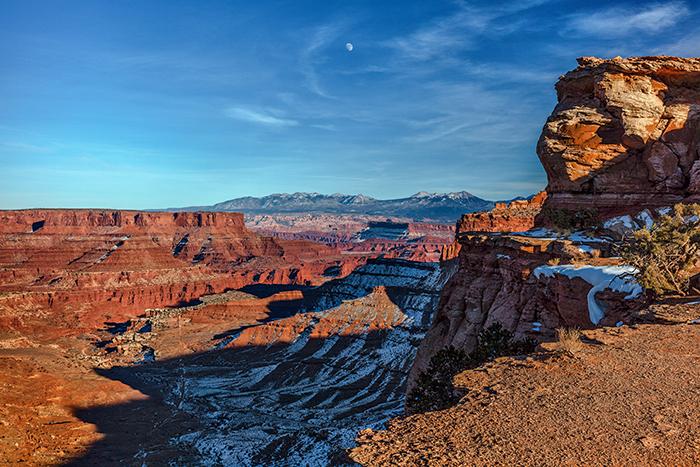
Moonrise over Shafer Canyon, Canyonlands National Park / Rebecca Latson
For the telephoto image looking into the canyon below, you'll notice I placed the road to the right of center. That's called the Rule-of-Thirds and is a nice little technique to emphasize your subject and grab the viewer's attention.
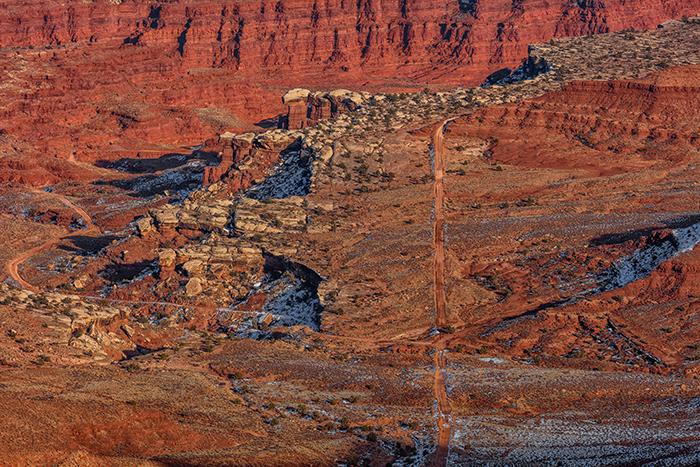
A telephoto view into Shafer Canyon, Canyonlands National Park / Rebecca Latson
Mesa Arch
This is the iconic location for sunrise shots you see aplenty in print publications and online websites. While these sunrise images are definitely gorgeous, I’m here to tell you, any time of the day is a great time to photograph the awesomeness of this location. If you intend to capture sunrise at this spot, make sure you leave Moab well before sunrise in order to stake out your territory amongst the other photographers there. If you arrive just prior to sunrise, you might be cheek-by-jowl not only with photographers but with small tour groups, thus making the search for a space to plant yourself and your tripod a bit problematic.
The relatively small Mesa Arch parking lot will be to your left as you head southwest along the main park road. The lot fills quickly and tends to stay full throughout the day. The 0.6-mile trail is easy but heavily-trafficked, most of which is over slickrock, so be extremely mindful of where you step and especially so if you visit during the winter and spring, when there might be snow and/or ice. Yaktrax- or Kahtoola-brand ice traction devices for your hiking boots are extremly handy for slippery slickrock.
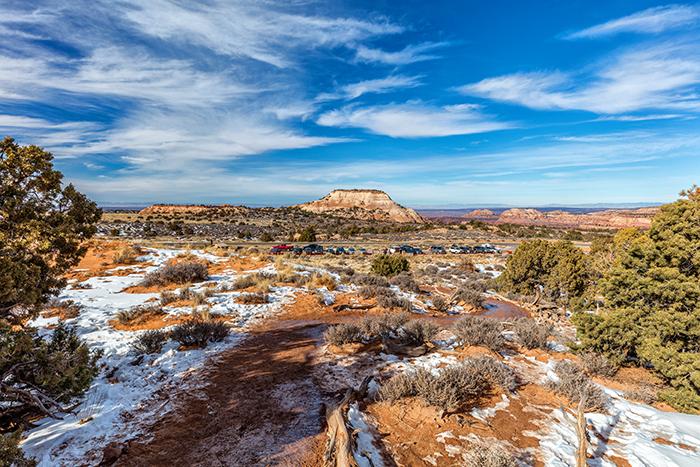
A view of the parking lot from the Mesa Arch trail, Canyonlands National Park / Rebecca Latson
For the image below, I set myself relatively low to the ground and pointed the wide-angle lens slightly upward for an interesting perspective provided by the lens and my position. Wide-angle lenses produce different perspectives, depending upon whether you are level with, looking down, or looking up at your subject.
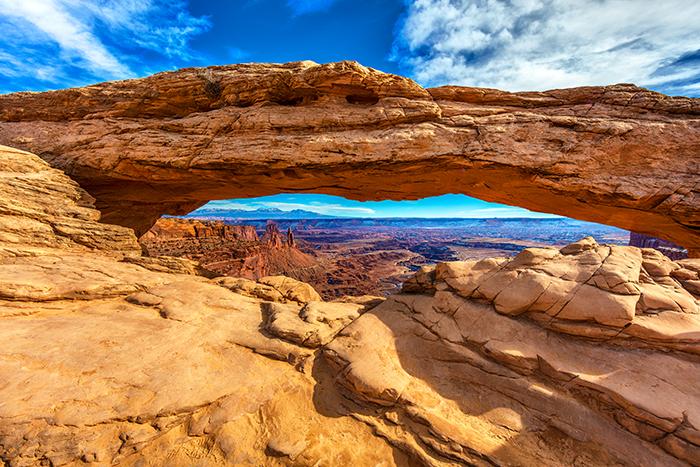
A midday view of Mesa Arch and the vista beyond, Canyonlands National Park / Rebecca Latson
As you hike the trail to the arch, why not capture other scenes as well. Stand on some slickrock overlooking the area to get a composition showing the relatively small size of Mesa Arch. Photograph the trail itself or some of the cairns pointing the way. Photograph the arch from a different angle. Make the most of your photography at this spot, and concentrate on more than just the wide-angle view.
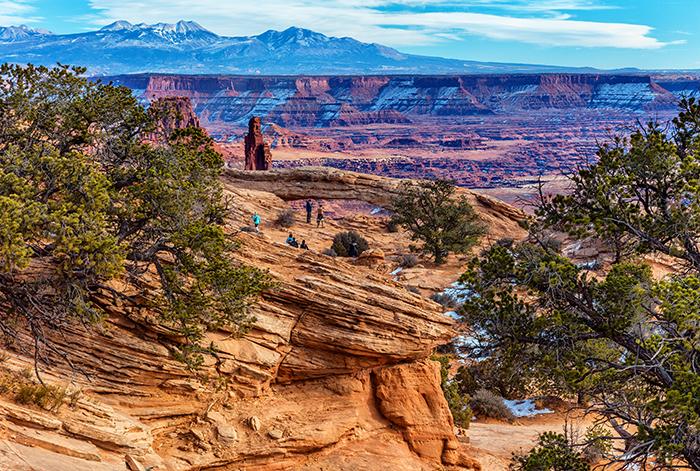
Overlooking a busy Mesa Arch, Canyonlands National Park / Rebecca Latson
For the image below, I used both the Rule-of-Thirds and leading line techniques to make the viewer look down at the cairn in the lower right corner, then over diagonally toward the tree and the small opening in the rock wall.
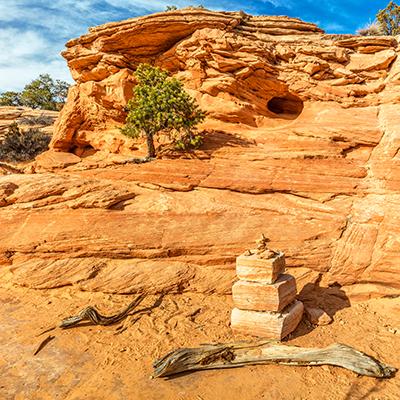
A cairn along the Mesa Arch trail, Canyonlands National Park / Rebecca Latson
FYI, Mesa Arch looks out onto national park scenery and U.S. Bureau of Land Management land, as well. After you’ve gotten your a wide-angle image using anywhere from 14mm to 16-35mm or 24-70mm, utilize your telephoto lens for closer views of the distant formations. Depending on the weather and air clarity, even midday shots like the one below will afford you clear, sharp compositions.
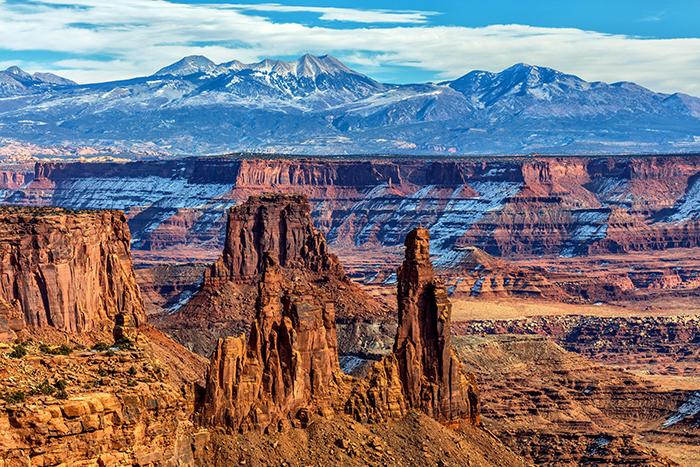
The scenery beyond Mesa Arch, Canyonlands National Park / Rebecca Latson
Green River Overlook
Drive a bit further down the road from the Mesa Arch parking lot and turn right to head toward the Green River Overlook and the Upheaval Dome Trail. Visit the Green River Overlook first. Morning and late afternoon provide great lighting (the “golden hours”) with interesting shadows. Late morning to 1 p.m. allows you a view into every canyon corner, nook and cranny, with little to no shadows. You might find the scenery a little hazy, though, during the midday hours. Try a UV filter on your lens or utilize your photo editing software during post-process to mitigate this effect; Adobe Lightroom now has a great "de-haze" slider.
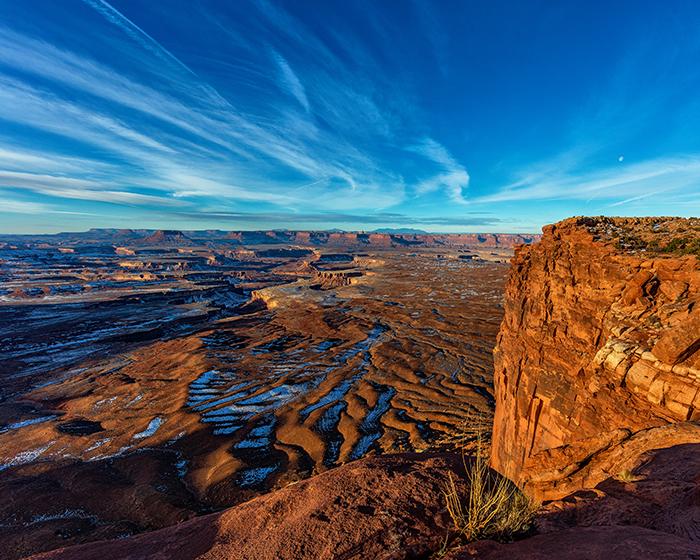
Sunrise and moonset over the Green River Overlook, Canyonlands National Park / Rebecca Latson
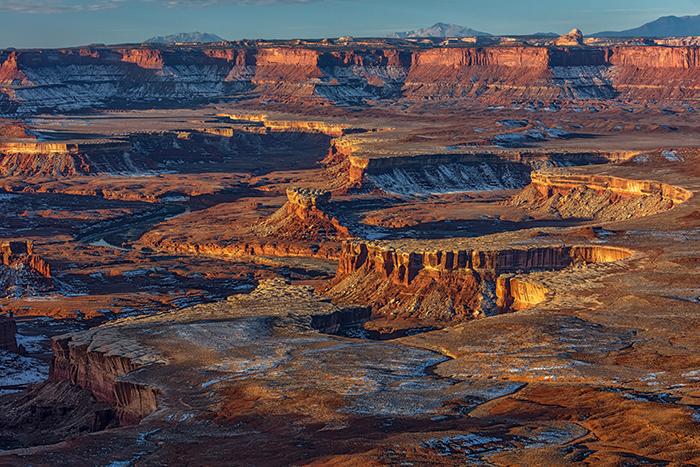
Canyon scenery at the Green River Overlook, Canyonlands National Park / Rebecca Latson
A wide-angle shot reveals the vastness of this overlook, but the canyon area might look “busy” to the eye with so many patterns, textures, and colors. A telephoto lens can isolate and focus upon a smaller portion of the canyon scene, or a particular formation.
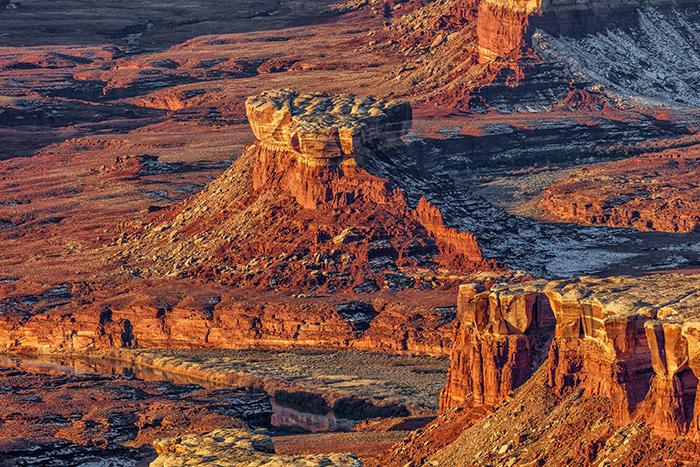
A close-up view of Green River scenery and Canyonlands geology, Canyonlands National Park / Rebecca Latson
While standing at the overlook, you might see a raven or two perched along the railing. Capture a shot of those ravens as well as anything else you see of interest. Remember, it's accessory things like the ravens that help flesh out your national park photographic story.
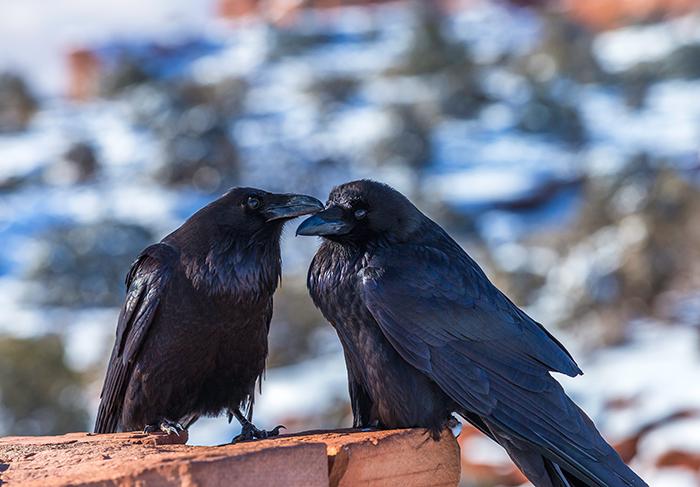
An affectionate little peck on the beak, Canyonlands National Park / Rebecca Latson
Upheaval Dome
Head back toward the entrance to Green River Overlook and turn left to continue your drive to the end of the road where the Upheaval Dome trailhead, picnic area and restrooms are located. Along the way, you’ll pass the trailheads to Aztec Butte, Alcove Spring, and Whale Rock. While these hikes are not covered here, they would make great photographic side trips if you have extra days to spend in this district.
Upheaval Dome is an interesting geologic phenonmenon. This 3 mile-wide area is either a salt dome that squeezed up to deform the overlying sediments, or the result of a meteorite impact. Whichever theory applies, you won’t be able to deny the amazing view rewarding you after the 1.7-mile hike up to the top, where you will have the choice of two overlooks for taking in the scene. It’s a little steep in spots, and might be icy during the winter or spring, so be careful, watch your step, and take it slow and easy to reach your destination. Pull on those traction devices I described earlier. Your tripod can also serve double duty as a hiking staff.
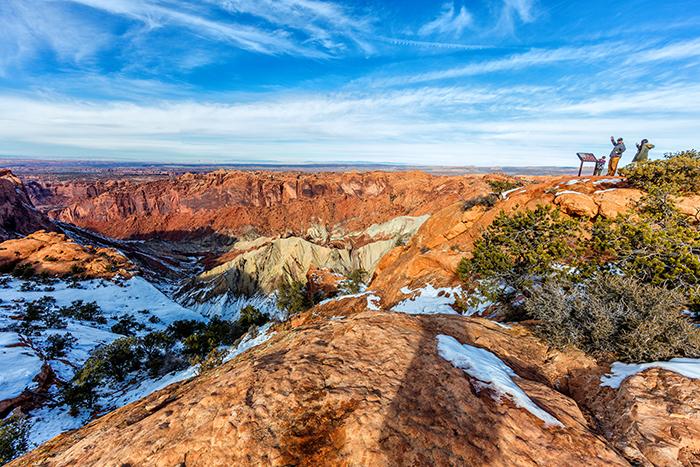
Looking out over Upheaval Dome, Canyonlands National Park / Rebecca Latson
Because the scenery is wide and jumbled with a bunch of different colors, your best bet is to capture more of a crop or telephoto shot of some specific portion of the dome, itself. The photos you see here were captured during the late afternoon, providing nice light to the geology below, but also creating issues with my shadow getting in the way of the composition. To avoid this, start your hike a little earlier – maybe late morning or even midday. If you choose to get a wide-angle shot of the entire view, including the horizon and the bright sky above, then your CPL filter will saturate the rock colors and a grad ND filter will alleviate overexposure of the sky while setting your camera exposure for the ground.
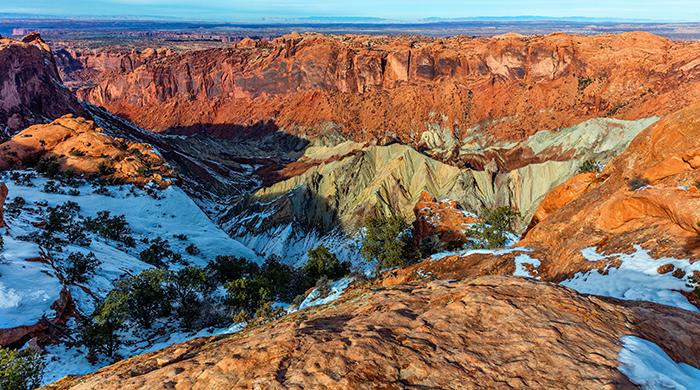
Upheaval Dome, Canyonlands National Park / Rebecca Latson
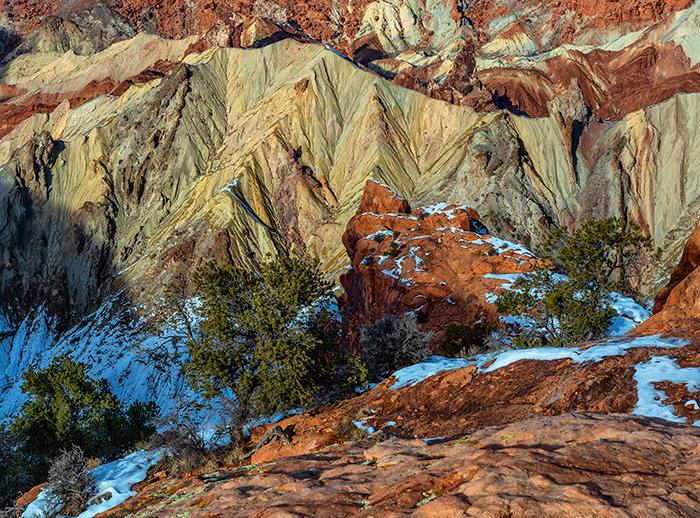
A telephoto view of Upheaval Dome, Canyonlands National Park / Rebecca Latson
After returning to your vehicle, drive back to the main park road and turn right to continue your journey south. Stop at the pullouts along the road. In the photo below, I added some depth to the shot by capturing the foreground mesa, the middle ground formation and the background wall of mesas and buttes.
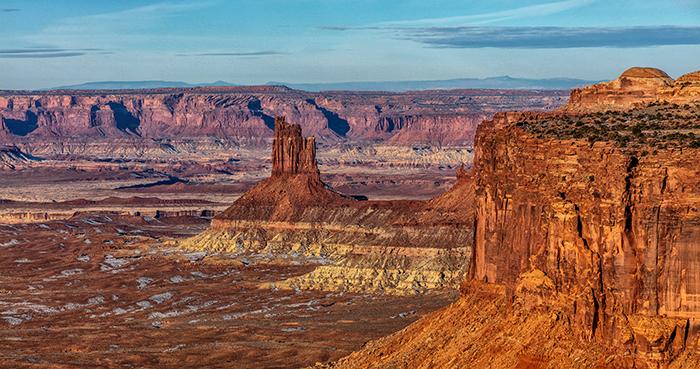
John Ford scenery, Canyonlands National Park / Rebecca Latson
Buck Canyon Overlook
The small parking lot to this overlook is on the left side of the road. Buck Canyon is another amazing reminder of the expansive vistas provided by Canyonlands National Park. The view is to the east, so you can capture a nice sunrise over the mountains beyond, or get some dramatic side lighting later in the evening. Late morning is not too bad for photography either, as you can see from the image below. If you arrive during midday, you’ll be able to see inside the canyon with no shadowing, but the sky might be hazy with a blue cast and the noon sun will create blown-out highlights to any clouds.
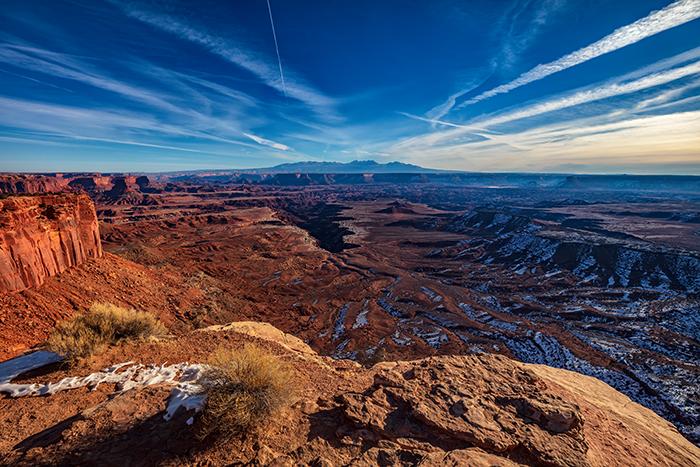
Buck Canyon Overlook, Canyonlands National Park / Rebecca Latson
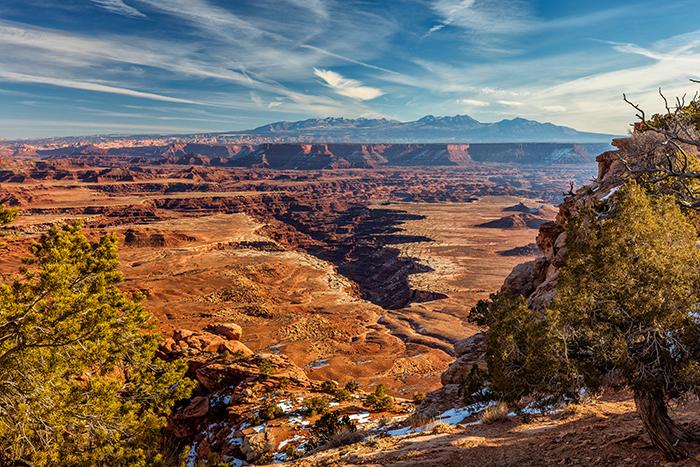
Another wide-angle view of Buck Canyon, Canyonlands National Park / Rebecca Latson
Grand View Point Overlook
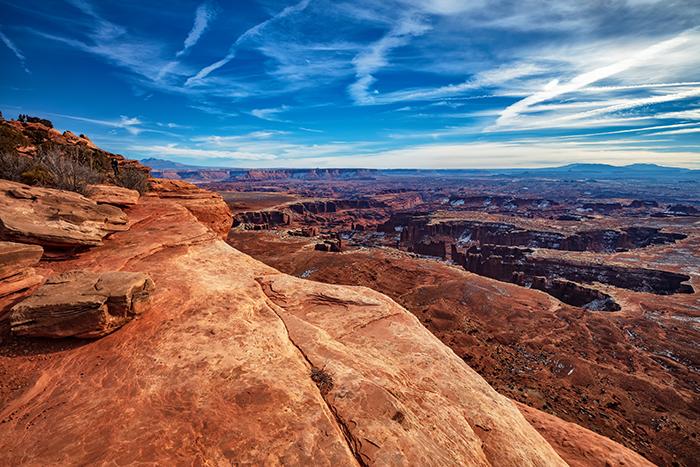
A grand view at Grand View Point, Canyonlands National Park / Rebecca Latson
This is the crème de la crème of Island in the Sky overlooks. Why? Because it is so darned expansive! Yes, all of the view areas in this district are stunning, but they didn't name this location Grand View Point for nothin'. On a really clear day, you can view scenery east, west, and south as far as the eye can see.
Because this is such a huge vista, photographing a wide-angle view might be tricky. You really want to capture as much of the overlook as possible, yet you’d need quite the wide-angle lens to do so, which, in turn, would make everything look smaller and further away, reducing landscape details. A super-wide angle lens would even create a fisheye effect. Some people think that's cool, while others think it's a wierd distraction.
Keep in mind, you should have some sort of frame of reference for your images here. If you photograph a wide-angle view while standing at the edge of the overlook, there is no frame of reference to give viewers a sense of depth and to be able to discern the distance between where you are perched and how far below the canyon floor is. So, you might want to start with wide-angle shots of sections within this overlook, rather than the entire vista, edge-to-edge. You also might want to add a foreground to your composition, like in the image above, to add a little depth to the scene. People know you stood right there on that slickrock overlook and can see it's a bit of a drop to the landscape below. Make sure you also capture a few telephoto landscapes of the mesas, buttes and crazy geological formations you see. It’s not all just about the wide-angle here. You need telephoto close-ups to grasp the details of these canyon formations.
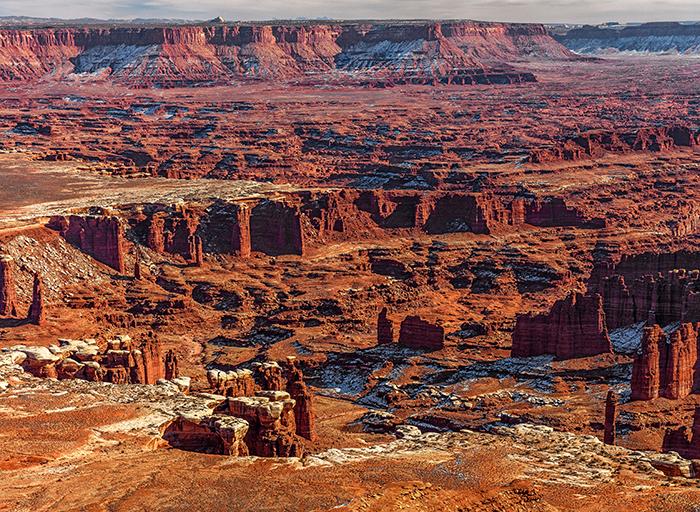
A "small" section of Grand View Point, Canyonlands National Park / Rebecca Latson
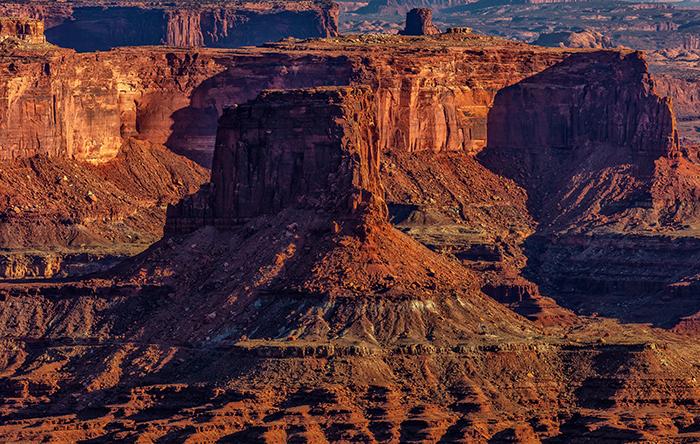
Mesas, buttes and canyon land, Canyonlands National Park / Rebecca Latson
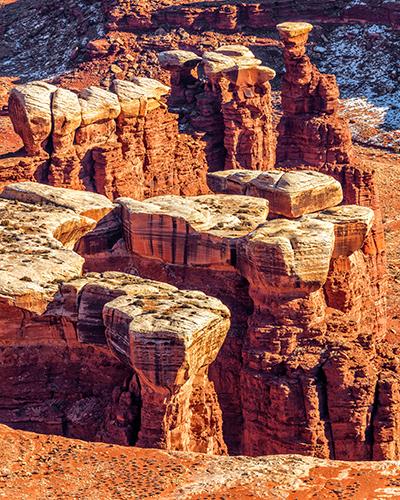
Geology close up at Grand View Point, Canyonlands National Park / Rebecca Latson
Morning or anytime after 2 p.m. are good times for great images here. Noon or a little before or after produces hazy flat light. That doesn’t mean you won’t come away with spectacular images, since it’s hard to get a bad shot here. You might have to work a little editing magic to alleviate atmospheric haze and blue cast. Your best photo ops will occur during those times of day when there is forgiving side light with greater depth-creating shadows.
Try to spend more than a single day in this huge district of Canyonlands National Park. Visit a new spot every day, and re-visit places you’ve already photographed. The season, time of day and weather can change the same scene into something totally different.
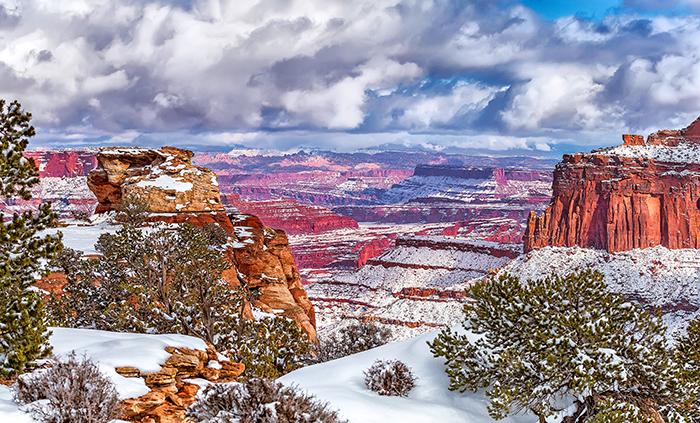
Fresh snow over Shafer Canyon, Canyonlands National Park / Rebecca Latson
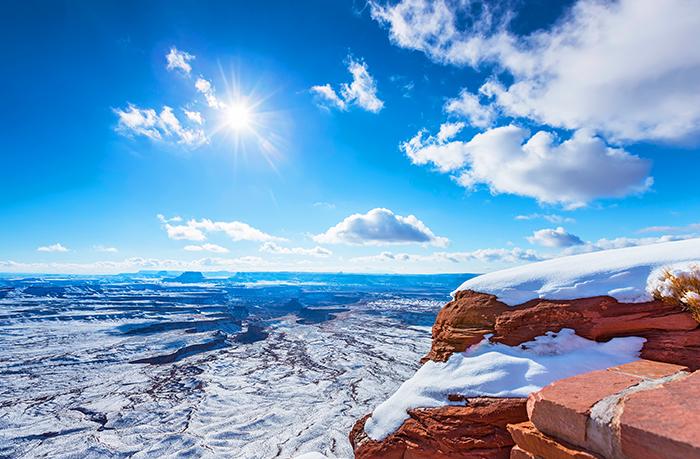
Snow day at the Green River Overlook, Canyonlands National Park / Rebecca Latson
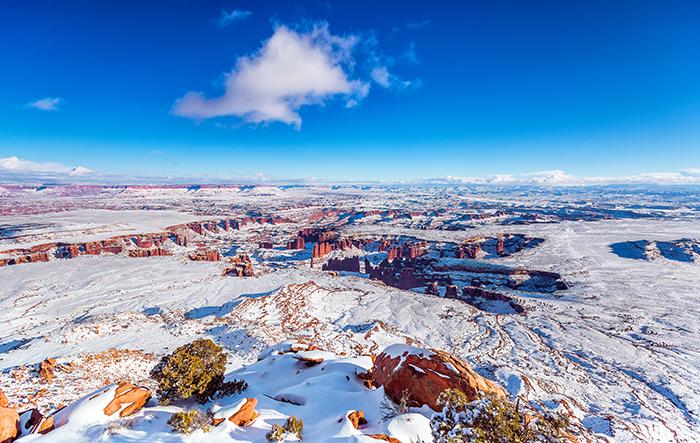
Winter's snowy blanket over Grand View Point, Canyonlands National Park / Rebecca Latson
This Armchair Photography Guide to Canyonlands National Park is a primer. Take what you read here as a start and add your own techniques. Enjoy your visit to Island in the Sky and get some amazing shots!


Comments
Beautiful photos of a beautiful place. Thanks again, Rebecca.
Breathtaking pictures. Thanks very much for sharing.
Absolutley gorgeous photos! Thank you so much for sharing! I've done the 1.7 mile hike to Upheaval Dome and it is quite the hike! I don't think anyone could take a bad photograph here. I look forward to your next article.
Thanks Rebecca, this is very helpful
Another good article with good photos from easily accessible places in the area. It has been years, since my last visit to Arches and Canyonlands. This article reminds me that I need to get back there and spend more time in and around the parks. There is so much to see here and the scenery is overwhelmingly great everywhere. Now that I know a bit more about how to make photos thanks to articles such as yours, I feel that I need to go back to reshoot everything.
So wonderfully illustrated!
Great help for those who can no longer hike distances. Appreciate it. Lovely photos encourage us not to "give it up".
Fantastic!