
The view from the trail, Mount Rainier National Park / Rebecca Latson
After completing a couple of articles using photos from my early July trip to Mount Rainier National Park, I realized I'd amassed enough material for another Armchair Photography Guide, with the caveat that I haven't made it to all the stops nor through all the trails in this 369-square-mile national park. I do, however, have enough information to get you started on capturing your own great images during a visit to Mount Rainier.
If you are unfamiliar with my Armchair Photography Guides, these are photo guides fashioned primarily for those of us who are unable to, or don’t wish to, hike long distances backcountry or even on just lengthy/really steep trails, lugging heavy backpacks full of camera gear with the goal of capturing great images of a national park. At my age and in my physical condition, it’s my opinion you don’t have to go to such lengths for your photos. These guides I publish in the Traveler provide you with advice and tips on gear, times, seasons, and locations for achieving wonderful shots along short hikes or at view areas. My previous Armchair Photography Guides include Glacier National Park, Arches National Park, Mesa Verde National Park, Banff and Jasper National Parks, and Big Bend National Park.
Mount Rainier has four entrances (White River, Stevens Canyon/Ohanapecosh, Nisqually, and Carbon River) and is open year-round. I've accessed this park via all four entrances and have visited during the spring, summer, and fall. I can tell you unequivocally that the seasons and entrances dictate what you will see of this incredible place.
During the winter, the Nisqually entrance is the only road open to vehicles. The road up to Sunrise is closed, since it’s season is July to October. If you travel to this national park in the winter, bring chains for your tires and snowshoes or skis for yourself.
The road from Longmire to Paradise should be open in the spring. Snowpack will probably still be quite high in places – high enough that only the upper floors and roof of the Paradise Inn peek out from beneath a deep, white blanket. Remember to pack or rent snowshoes or skis for trekking to those upper-elevation photo ops.
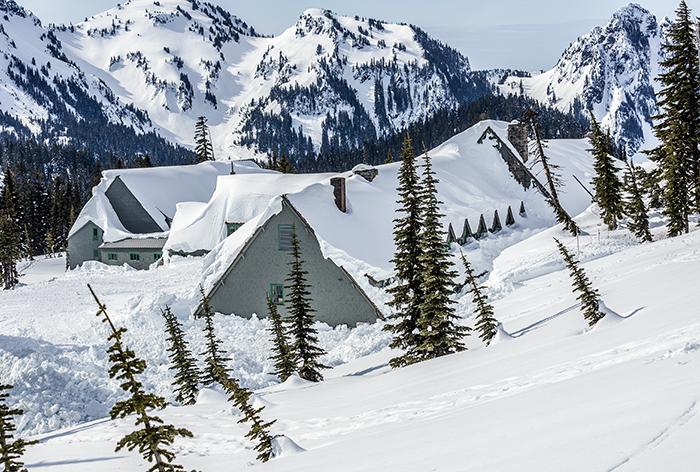
Paradise Inn during early spring, Mount Rainier National Park / Rebecca Latson
The weather in summer is fantastic, and you’ll see "The Mountain" 99.9 percent of the time. Early in the season, however, you might still encounter snowpack in the higher elevations, blocking access to all or parts of the trails. When I visited July 7-12, most of the trails in the Paradise area were still covered with snow. Sunny afternoons made it relatively easy to navigate a short way through the slushy, mushy, melting mess, but by morning, that mess had frozen into slick ice. Mid-late August is really the perfect time to visit and be assured of clear hiking trails. Of course, good weather during any time of the summer means crowds at all of the popular areas. Arrive very early in the morning (before 9 a.m.) or much later in the evening (after 5 p.m.) to grab a good spot for a nice shot of a popular scene.
I admit that fall is my favorite time of year for photography in any national park. Be aware, though, that this time of year brings low clouds and rainy weather, which can obscure the view of Mount Rainier for several consecutive days. The reward, though, for “weathering” through an inclement autumn period is the day when the sky is clear blue, the huckleberry bushes are saturated shades of bright orange and red, and The Mountain looms over it all.
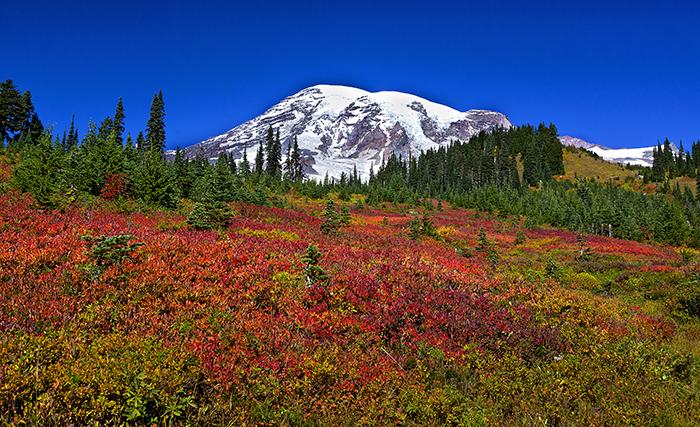
Paradise in the fall, Mount Rainier National Park/Rebecca Latson
Mount Rainier's official website urges people to visit during weekdays for a less-crowded experience. During my July stay, weekdays tended to be only slightly better than weekends in Longmire and Paradise. The Sunrise area, however, fared well in terms of parking availability and fewer crowds.
OK, I need to start somewhere with this Armchair Photography Guide, so I'll concentrate Part 1 on the Sunrise area.
Part 1 – Sunrise
You can access the White River/Sunrise entrance by driving north or south along State Route 410. If you are traveling north from Yakima and over Chinook Pass, you’ll drive beneath a road-spanning stone-and-log entry arch dividing the boundaries between Mount Rainier National Park and Wenatchee National Forest. Drive a little further, look to your right and you’ll see glorious Mount Rainier towering over the alpine Tipsoo Lake.
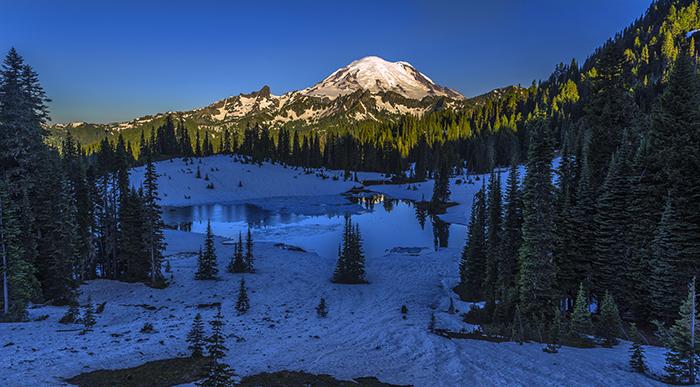
The Mountain reigns supreme over Tipsoo Lake, Mount Rainier National Park / Rebecca Latson
Stop at the long pullout on your right to capture an overview of this scene. If you arrive early in the morning, like I did for the shot above, you'll be seeing Mount Rainier lit by the sun, but the rest of the overview will be shaded. Use your graduated neutral density (grad ND) filter that you should be carrying in your gearbag so you can expose for the shaded portion of the scene while keeping the mountain and sky from being overexposed (blown out). After getting some overview shots, drive down the road to the parking lot and hike (or snowshoe) around the lake for picture-perfect compositions of the mountain’s reflection in this serene little water body.
Take note: Depending upon the time of year you visit, you might catch The Mountain in all its glory or you might see only a tip of the mountain at best, due to fog and low-clinging clouds. Don’t bypass Tipsoo Lake, though, just because you can’t see The Mountain. Go ahead and take a little time to frame some lovely, quiet images of this place before driving on to Sunrise.

Summer reflection at Tipsoo Lake, Mount Rainier National Park / Rebecca Latson
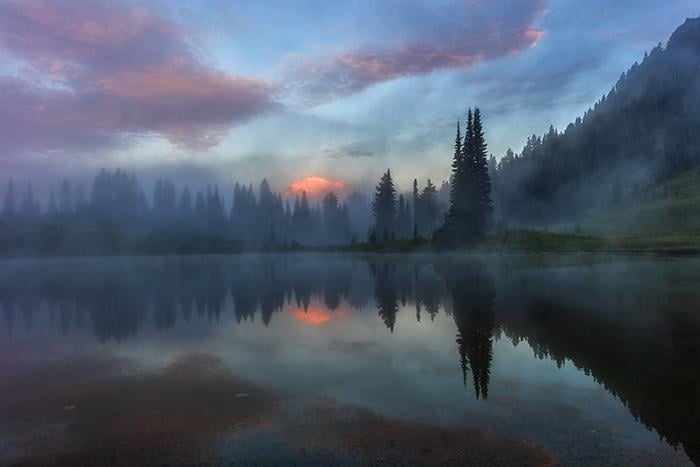
A misty autumn morning on Tipsoo Lake, Mount Rainier National Park / Rebecca Latson

A September morning at Tipsoo Lake, Mount Rainier National Park / Rebecca Latson
Speaking of a literal sunrise, while that specific time of day affords sweet light to both lake and mountain, don’t fret if you can’t make it to Tipsoo Lake during pre-dawn hours for a sunrise setup. The lighting is nice until about 10 a.m., so morning hours after sunrise are also lovely for photography at this location. Use your tripod and grad ND filter because this will help you with exposure balance and add a little dramatic texture if there are clouds over, or around, the mountain.
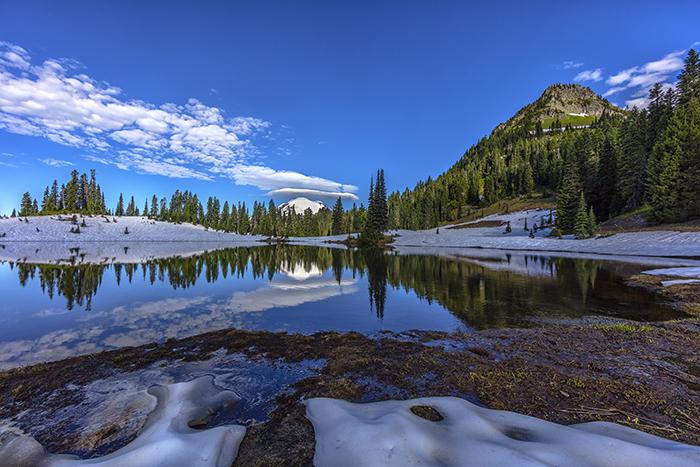
9:30 a.m. at Tipsoo Lake, Mount Rainier National Park/Rebecca Latson
Gear Note: Two of the most important accessories I carry in my gearbag are a circular polarizer and a grad ND filter. The grad ND filter, composed of either glass or high-grade resin, is half clear and half gray. The gray part comes in varying darknesses (called “densities”). The round filters screw onto the front of your lens, and the square or rectangular filters may be either hand-held or attached via a filter holder. The filter is used both to balance light above and below a horizon as well as achieve a certain amount of dramatic texture for mountain shots and cloudy skies (photographers love clouds). With a grad ND filter, you can expose for the lower portion of the horizon without blowing out the area above the horizon (which is usually the sky and lighter-colored objects such as snow-clad mountains).
After spending time at Tipsoo Lake, continue driving SR 410 north, past the Highway 123 turnoff and straight onward to the White River/Sunrise entrance. If you are driving to the park entrance south along 410 from Enumclaw, you will miss the Tipsoo Lake scene, but there will be pullouts along the highway permitting access to imposing views of this 14,410-foot-tall composite volcano that the National Park Service calls “episodically active” (the last eruption was in 1894).
Naturally, you will want to park at one of these pullouts and set up your tripod and camera. Mount Rainier’s impressive immensity makes it too irresistible to not get a shot, no matter what time of day. You should utilize a grad ND filter here because you’ll notice the sky and the mountain with its glaciers are considerably lighter than the forested hills below. Without a grad ND, your camera will expose for either the light part of the image (underexposing your ground) or for the dark part of the image (blowing out the mountain and sky). If you don’t have a grad ND filter but do have photo editing experience, you can take two photos of the same view, exposing one image for the sky and the other for the ground and then blend them together into a single image. For this to work, though, your camera should be on a tripod.
Continue to the White River entrance and drive 12 miles up the winding road to Sunrise Point for stunning panoramic vistas of Mount Rainier as well as other mountain ranges. You might even see a distant Mount Adams on a very clear day. The best time for great lighting conditions and few crowds is, of course, early in the morning (7-8 a.m.), when the atmosphere is free of haze (unless there is a forest fire somewhere), the landscape colors are more saturated, and the sunlight is less harsh because it's shining on the scenery from an angle.
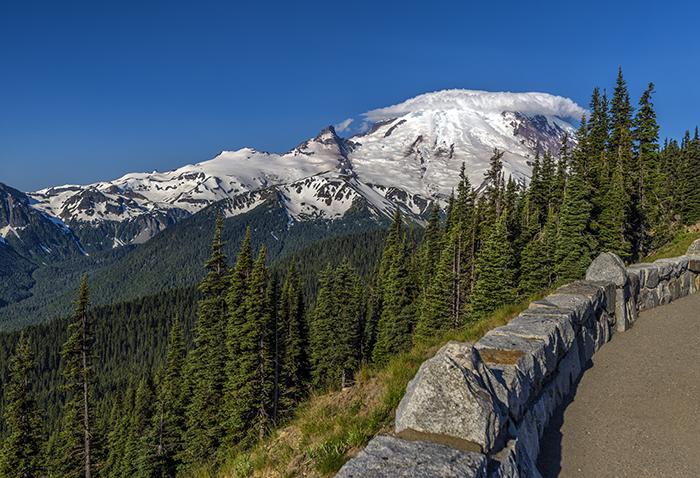
A view of "The Mountain" at Sunrise Point, Mount Rainier National Park / Rebecca Latson
Cross the road from the Sunrise Point parking lot and set up your tripod against the rock wall. Include a part of that wall in your composition to add a bit of leading line to the image. Attach your circular polarizer and have your grad ND filter at hand. While you’re at it, set your camera’s timer for 10 seconds, or use a wireless remote shutter release, then sit on the rock wall with the mountain in the background for a nice selfie or group photo. Wander along the sidewalk for other views before hopping back in your vehicle to drive the remaining 2 miles up to the Sunrise visitor center and day lodge. From there, you have a multitude of choices for trails and photo ops.
On a clear bright day, affix your polarizing filter to your lens. Polarizing filters work on the same principle as sunglasses by cutting down or completely eliminating bright glare, saturating colors and adding some texture to any existing clouds. Turn the filter ring and see for yourself what a polarizing filter can do. It works best when your lens is aimed 90 degrees (or thereabouts) away from the sun.
Sourdough Ridge and connecting trails
For frame-filling scenes of Mount Rainier, the paths leading up to and intersecting with the Sourdough Ridge trail are awesome. These connecting trails form a loop when joined to Sourdough Ridge. You can take one path up to the Sourdough Ridge trail, then walk along that trail until you reach the other connecting path to make a loop back down to the visitor center. Or, hike further along Sourdough Ridge west to Frozen Lake or east to Dege Peak. Remember to make noise as you hike the trails here, as this is bear country. Before visiting, check with the park for the latest rules on bear spray. Also obey the park signs to stay on the trail and off the meadows, and pack out what you pack in, leaving no trash behind. Oh yeah, and please don’t feed the wildlife.
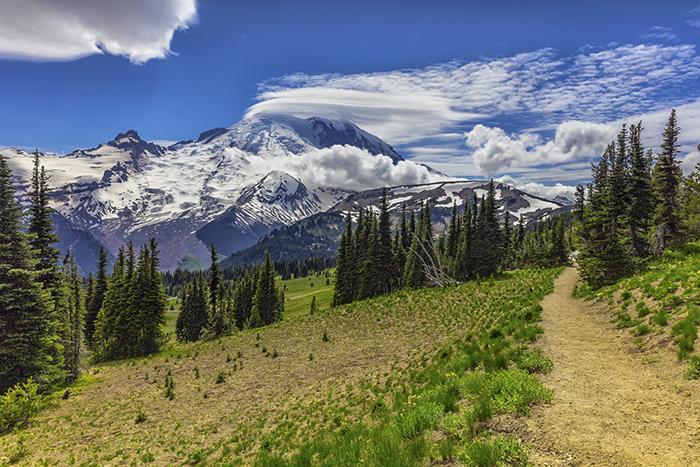
The view from Sourdough Ridge Trail, Mount Rainier National Park/Rebecca Latson
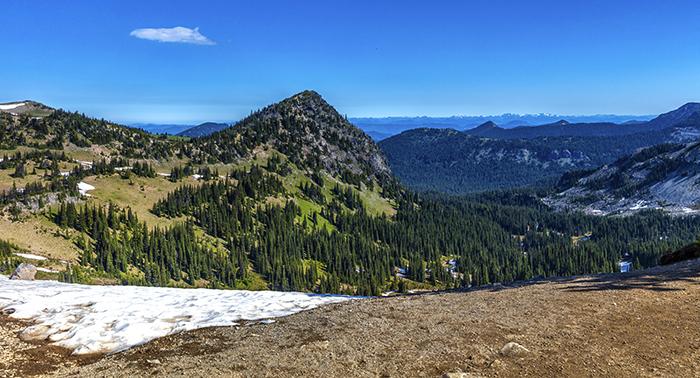
A Sourdough Ridge Trail panorama, Mount Rainier National Park/Rebecca Latson
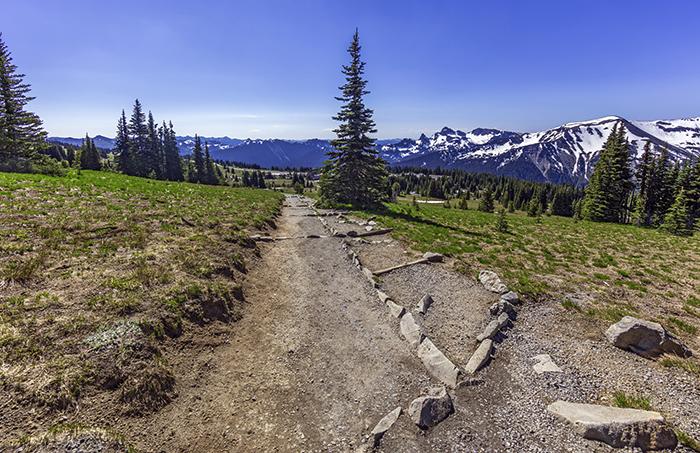
Heading back down the trail to the Sunrise Visitor Center, Mount Rainier National Park/Rebecca Latson
While you are on the trail, listen for the incessant, somewhat nagging, raspy caw of the Clark’s Nutcracker. This light gray-and-black feathered character is quite brazen and provides nice little photo ops if you happen to be carrying a telephoto lens.
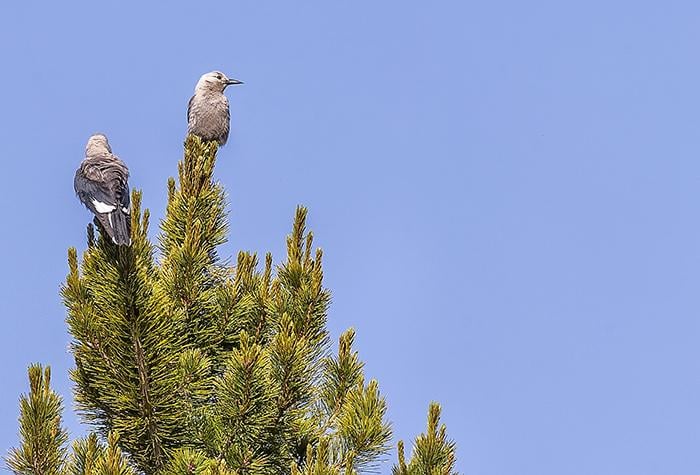
Clark's Nutcrackers, Mount Rainier National Park / Rebecca Latson
Wildflowers
There will almost always be flowers blooming in this national park, but for a plethora of blooms from many varieties, visit the park in the summer. In the Sunrise area, you'll be treated to a flower feast of yellow glacier lilies, pasqueflowers (in both flower and shaggy “bed head” stage), and magenta paintbrush. In lieu of a macro lens, use your telephoto lens. I left my macro lens at home and utilized my 100-400mm lens for practically all my wildflower images. I also used my camera’s focus mode for tracking movement. Canon calls it AI-Servo, Nikon calls this setting AF-C, Pentax calls it AF.C, and Sony calls it AF-C. This focus mode provides better opportunities for clearer images of flowers swaying in a gentle breeze.
If you use a point-and-shoot camera, then not only will you have a telephoto built in, but you should also have a macro setting as a choice. The symbol on your camera for this setting might even be that of a little flower. Even with a smartphone, you can capture some nice flower photos, although you might find it difficult to focus on a flower moving in the breeze. Make sure to look up the wildflower names afterward, so you can impress friends and family with your flower identification knowledge. I find that knowing a flower’s name adds to my appreciation of a beautiful bloom.
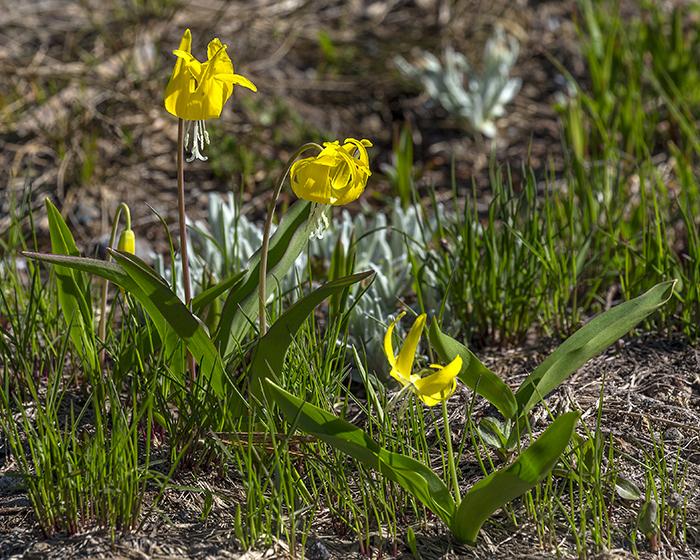
Cheery yellow glacier lilies, Mount Rainier National Park/Rebecca Latson
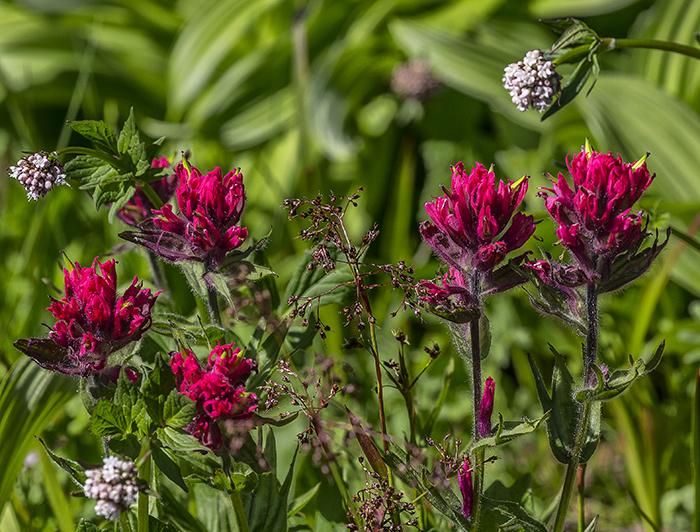
Magenta paintbrush, Mount Rainier National Park/Rebecca Latson
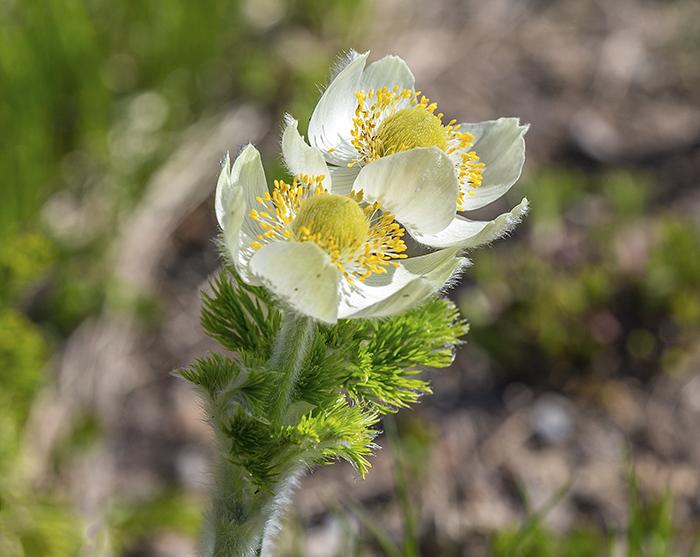
Pasqueflowers in bloom, Mount Rainier National Park/Rebecca Latson
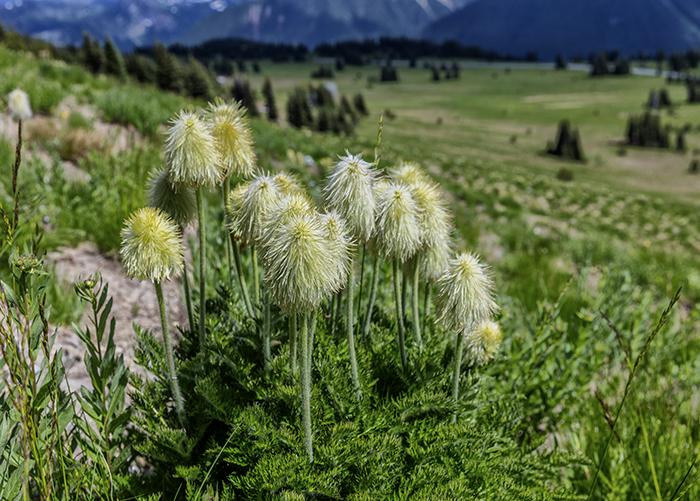
Pasqueflowers in their shaggy stage, Mount Rainier National Park/Rebecca Latson
Since I've mentioned this enough times, by now you probably realize you should carry a tripod. You may think a tripod is an extra added weight to your pack, but here’s a tip: Make your tripod serve double-duty and utilize it as a walking stick. I’m not that sure-footed and I also suffer from rheumatoid arthritis. To facilitate easier movement along the trail, I employ my Induro-brand carbon fiber tripod as my hiking staff. I love this tripod brand because it is light, yet sturdy enough to keep a camera steady on a really windy day, and it has a center column which I raise just enough to grasp hold in order to use the tripod like a walking staff. In case you ask, I much prefer a tripod to a monopod, although you can use a monopod as a hiking staff as well. It’s one of those personal preference things. When not using my tripod as a staff, I like its 3-legged steadiness for my images.
While I am on the subject of image steadiness, here are two very important photo tips for using your camera on a tripod:
- If your camera has a self timer, set it on the shortest time (usually 2 seconds), before pushing that shutter button. If your camera does not have a self-timer, you might want to think about purchasing a cable shutter release or a wireless shutter remote. Why? Well, one of the reasons you use a tripod instead of hand-holding your camera for landscape images is for the stabilization a tripod lends to the camera to aid in removing motion blur and producing a sharp image. Your finger on the shutter button adds a bit of vibration to the camera, no matter how carefully you push down on that button. A 2-second delay, or a cable or wireless shutter release, prevents that extra vibration.
- If your camera or lens has image stabilization (Canon calls it IS and Nikon calls it VR), turn that stabilization off while the camera is on a tripod. Image stabilization looks for vibrations to reduce. If the image stabilization is turned on while your camera is on a tripod, it will create vibration. I know, sounds odd, doesn't it? I admit to having forgotten to turn off the IS on occasion. Just remember, the object of having your camera on a tripod is to get the clearest, sharpest image possible, and that includes turning off the IS/VR.
Emmons Vista
Once you’ve finished with your higher-elevation photo hike, why not wander the short trail from the parking lot down to Emmons Vista. At only 1/10th of a mile long, the Emmons Vista trail will lead you to a lovely little rock-walled area offering a first-class view of the mountain and Emmons Glacier, all bordered by tall trees that make excellent natural frames for your photos. The view area is not very large, so you may need to practice a little patience and wait your turn for a prime position. Don’t hog the view, either; remember to share with others who want to see the view.
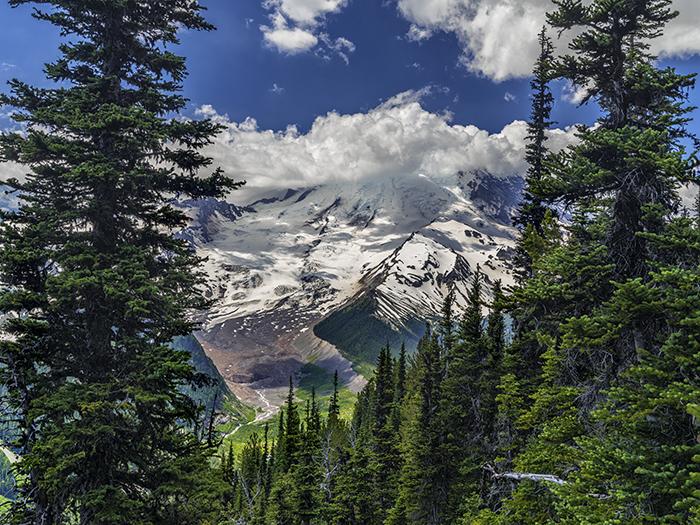
Emmons Vista, Mount Rainier National Park/Rebecca Latson
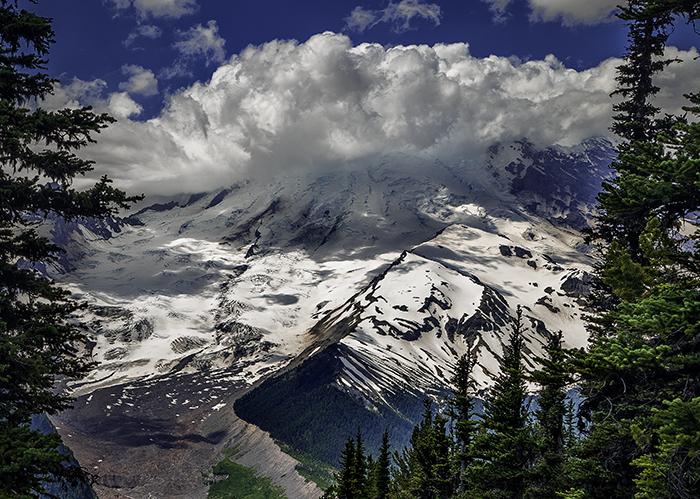
A closer view of "The Mountain" at Emmons Vista, Mount Rainier National Park/Rebecca Latson
In addition to Emmons Vista, a number of other relatively-short trails exist in the area for you to wander with your camera. Had I spent more time at Sunrise, I would have absolutely explored more of the trail system. I’m saving those trails for future visits and add-ons to this photography guide.
For further information about hiking in Mount Rainier, I recommend the books Best Easy Day Hikes Mount Rainier National Park by Heidi Schneider and Mary Skjelset, and Day Hike! Mount Rainier by Ron C. Judd. If you purchase these books from Amazon.com, make sure you click on the link to that site that the Traveler provides on the ride side of the screen (smile.amazon.com), so a portion of the proceeds of your purchase go to upkeep for this nonprofit site. For a map of the trail system in the Sunrise area, click on this link. The trails I wandered at Sunrise bore less snowpack than the trails in the Paradise area during my early July stay. That said, there was still snow cover along some paths. Before traveling anywhere within this park, go onto Mount Rainier’s website and check the trail conditions page.
I’ll stop here with Part 1. By now, you should have a general idea of places for great shots during your drive up to, and day(s) spent at, the Sunrise area of Mount Rainier National Park. Next month’s Armchair Photography Guide will focus on spots in another part of this spectacular place.

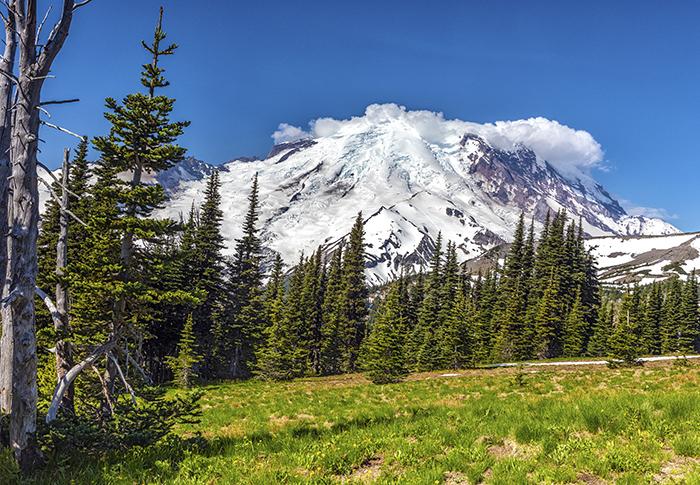
Mount Rainier on a blue-sky day, Mount Rainier National Park/Rebecca Latson


Comments
Ah, you've done it again, Rebecca.
Give us wannabe photographers something to try for.
Thanks, Lee. You are too kind.
Just incredibly beautiful images of our Pacific Northwest wonder. Your skill at capturing them truly humbles a guy like me with a cell phone camera and absolute beginner's skills.
I just found out this wonderful series. Thanks so much for sharing your experience as your goals match mine. I have gout, so I have to find beautiful places that don't require much walking. Hope you'll do series in the Utah and Arizonia area.